Thursday, March 2, 2017

Crafter in The Spotlight 39 - Itsy Bitsy

Hello arty-crafty folks,

How soon Thursdays come back! It’s once again time for me to introduce a talented crafter and her impressive crafting skills. This week’s chosen one is Miti Bhavsar, from Ahmadabad. Miti graduated from Gujarat University and is pursuing interior designing. Among her other hobbies, Miti finds crafting most interesting and loves making something new every time.

Since childhood, Miti has been a craft lover and had passion for collecting wedding invitation cards which she later reused for her creative ventures. Her mother is a great inspiration for her because she too loved making handmade things. A hobby turned to a business, that’s how Miti took her creative skills to a new level.

 There’s no favourite style of craft which Miti restricts herself to. She loves experimenting with new things. However, she is fond of shabby chic projects. Miti finds Itsy Bitsy handmade flowers quite irresistible and the same feeling goes for rest of the products too.


How did Miti get into crafting, what inspires her, what are her tips for fellow crafters, her favourite quote, how would she contribute to the crafting world if she had magical powers? Read answers to all these questions, discover more about her interesting journey and catch a glimpse of a step by step project by Miti in this interview. Don't forget to leave your comments for her.


Rashmi Closepet, MD, Itsy Bitsy: Tell us a bit about yourself & your background?

MB: Thanks Itsy Bitsy team for giving me this beautiful opportunity. I am Miti from Ahmadabad, Gujarat. I am a BBA graduate from Gujarat University and am currently pursuing the last semester of interior designing. My hobbies are dancing, singing, taking selfies (lol), listing to music but my most favourite hobby is making something new every time when I am crafting.

RC: How did you get into crafting?
MB: Well, since childhood I love collecting wedding invitation cards & reusing them for making cards for friends & relatives. I always loved gifting handmade cards; since the time when I was six and till now, on every friendship day, I still make friendship bands & cards myself. The most important role is my mom’s because she used to make handmade things in her times. Sometime her stitching creations gave me new idea as well. In May, 2015 I created a page on Facebook to take my hobby to a business level as well.

RC: What is your favourite type of craft?
MB:  Hmmm!!! I don't have any favourite type in craft as I love experimenting & creating new things which I have never done before. I believe possibilities in craft are endless. However, now I love making shabby chic projects. I have tried my hand on mixed media, cards, stamping, flower making, decoupage and the list is endless (lol)…
RC: What are your favourite products at Itsy Bitsy?

MB:  It is indeed a very tough question to answer!!! I love each & every product at ItsyBitsy. Won’t be able to tell my favourite thing but whenever I am placing orders, I can't resist myself from buying handmade flowers as they are aammaazziinngg…..
The best part is you get everything at a very affordable price and shopping here; you will never go out of your budget.

RC: If you had magical powers, how would you contribute to the Crafting world?

MB: If I have magical powers, I would love to build a school or institute where anybody can learn making handmade things with very low fees and can also earn money out of the skills they learn, so that everyone can live their life happily.

RC: Your prized possession in your craft stash from Itsy Bitsy?

MB: About the prized possession in my craft stash from Itsy Bitsy …..For all times they are handmade flowers… as they come in a huge variety, colours, shapes, sizes & designs. Any of my orders are not complete without flowers….

RC: How would you describe your style of crafting?

MB: My style of crafting is unique as I don’t like to make the same thing repeatedly. I love to experiment and whenever I experiment anything new, it always comes out as a unique piece of craft….

RC: How do you organize your time for crafting?

MB: Wish I have more time for crafting. I have classes from 9 to 3 so, evening & late night are generally my crafting times. However sometimes I continue for the whole night too!!

RC: Tips for people who want to craft

MB: As a tip, I would like to say “Experiment till you are not satisfied with your work.”

RC: Your all -time favourite quote?
MB: Nothing is impossible until you try


 RC: Thank you Miti for sharing your story with us. We look forward to many more gorgeous creations from you and wish you all the best in your creative journey!


MB: Thank you Rashmi!

Here is a gorgeous project by  Miti  & step by step description:


I took a pink polka dot paper from the L'amour Des Fleurs pack and cut it in piece of 6x6 inches 
Then I took white cardstock which measures 6"1/8 x 12" 1/4 and folded it in half


 I took a script stencil & modeling paste and stenciled in two corners of the paper.


         Added hot pink color splash on the paper


    Distressed a doily & glued it in the middle of the paper 


I made flowers using color splash black current & used pollen from the store as well.

Set a layout & glued all the adornments with silicon glue. The leaves were from flower packs.
At the end, added a sentiment that says "Thanks a lot" from the same paper pack.


              And Ta-da....the card was ready!!!


  I hope you all like my shabby chic card


 Here are a couple of  Miti's other awesome creations:


Many congrats Miti for being the CRAFTER IN THE SPOTLIGHT – ITSY BITSY


You will receive Rs.500/- Itsy Bitsy gift voucher ðŸ˜Š ðŸ˜Š & a Crafter in the Spotlight badge, which can be proudly displayed on the side bar of your blog and other platforms. Looking forward to many more creations, Happy Crafting!

ITSY BITSY BLOG CHALLENGE #3-2017

Hello Crafters!
Welcome again!
This is Suman Pandit here to announce the third challenge of 2017.


Creations using the Little Birdie Matt CHALK Acrylic paints ITSY BITSY CHALLENGE#3-2017 Theme -Anything Goes using  Little Birdie  Matt Chalk  Acrylic paints

Here are some guidelines to participate. Simple & easy to follow –
  1. Submission can be a Scrapbook layout, card making, journal cover, DIY, Mixed Media and general crafting projects.
  2. The product should feature Little Birdie  Matt Chalk  Acrylic paints. Using Itsy Bitsy product is a must to qualify.
  3. Turn off word verification to enable us to leave comments.
  4. Entries can be submitted until 30th of March 2017.
  5. In order to submit your entry, click on the inlinkz button provided at the end of this post, add your image and link to your blog post containing the submission.
  6. Each participant can submit a maximum of 3 entries. Please add numbers 1,2,3 while submitting multiple entries.
  7. Please link to your post and not just your blog.
  8. In your blog post, create a link back to this page. 
  9. Only projects posted during the Challenge period are eligible (no backlinking).
  10. Entries are welcome from all over the world however if you are the winner, we can only ship your prize to an Indian address.
  11. If you don't have a blog and want to add your creation on Facebook, please upload it on our FB group page Itsy Bitsy Crafter's Cafe with the hashtag - #itsybitsychallenge317 & add the link here.
TWO winners will be picked through random.org who will each receive a voucher of Rs.500 , redeemable online at www.itsybitsy.in. Top 3 will be selected by the DT.

        Here is my inspiration for you ....but before that I would like to share some information about the Little Birdie Matt CHALK Acrylic paints...........the first ever Chalk Paints introduced by an Indian company …..here are the Little Birdie Matt CHALK Acrylic paints ……….


        Available in 14 pretty shades, the easy to use chalk acrylic paints have a perfect consistency for spreading with rollers, sponge and brush. Great for mixed media projects and home decor applications, you can also use sandpaper or a dampened sanding block for a layered, chipped or distressed look…..best part is these are a lot easier to use than you might think!!
          
        • Easy to use as there's no priming required.

        • The Chalk paints by Little Birdie have excellent adhesion and they work well on wood, MDF, metal, terracotta, ceramics, laminate, paper and even glass.

        • You can brush it on, roll it on or even use the sponge.

        • The paints are water-based so the cleanup is really easy.

        • They have no odor.

        • Most colors will give you complete coverage with just one coat.

        • The colors are intermixable, allowing you to get that perfect match.

        • These paints can be sanded when dry but could also be distressed to give you the perfect vintage look.

        • They dry very fast and give a slight texture and a matte finish.

        • When you finish your project just make sure to clean the tops of the bottles and the lids so that when you want to start a new project, the caps open up easily for you.

        So, now I hope you're ready to try Little Birdie Chalk finish paints, start new projects and create beautiful pieces of your own !!

        So now let us have a look at my inspiration projects .....


        Project 1: Decoupage with Chalk paints on Bamboo tray


        For this project I have used PINK BALLET, FRENCH ROSE, SNOW AND RAINY DAY shades of Chalk Paints. I love the soft shades of these pinks and chose a Decoupage Napkin with very soft colors.

        1. I gave a base coat on the Bamboo tray with Gesso and then with SNOW Chalk paint.
        2. Adhered the Decoupage napkin with Gel Medium using a damp sponge to press the tissue on the textured surface.
        3. Let dry and then lightly sprayed with Varnish so that the tissue is prepared for some paints.
        4. Using a sponge and the chalk paints in similar shades as the tissue, painted the background and the edges of the tray.
        5. Added some texture stamping with a Script stamp and Archival Ink.
        6. Sealed it all with Spray Varnish.  


        Project 2: A Gift Box and a Paint Brush Holder


        This is an Up-cycled project ........ started with cutting a Liquor box in half.....


        to create a paint Brush holder and a Gift box.......


        I have used TATTERED LACE and DRIFTWOOD Shades of chalk paints for this. 

        1. Two coats of Tattered lace on the top and bottom one-third portion of the box, no need to paint the middle portion as that will get covered with the burlap ribbon. 

        2. Used Burlap ribbon + corrugated packaging sheet + Crochet lace + Flowers, pearls, sentiment, burlap birds from the store to embellish.

        3. Created splatters using Driftwood chalk Paints. 

        Please remember, using Itsy Bitsy products is a MUST for your entries to qualify. We expect to see plenty of gorgeous creations from you. Just a gentle reminder, entries have to come in by 30th March, 2017. Please follow the rules mentioned above to qualify.

        All the best to craft enthusiasts in your March endeavor. Get..Set…Go!!!

        Do visit us again as we bring you loads of inspiration using new products every month.

        Looking forward to your creations

        Suman Pandit

        Supply List


        home-decor-chalk-paint-tattered-lace


        LINK YOUR ENTRIES HERE


        Winners - Itsy Bitsy Challenge#2 -2017

        Dear Crafters! 

        Thank you all for the wonderful creations you linked to our  ITSY BITSY CHALLENGE#2 -2017 February Challenge.

        It is always hard to pick winners from so many beautiful entries but finally we have the results of this month's challenge.

                 The TOP 3 selected by the DT & in no particular order are 

                                                    Sindhu Manokaran


                                                      Anila D.K


                                                            Sujana


             The two lucky WINNERS , winning vouchers worth Rs.500 are -

                                                       Asha Jain


                                                       Swarna Raman


        Congratulations to all of you! Please collect your Topper & winner  badges. We would love to see you flaunting them on your blogs.

        Toppers please email info@itsybitsy.in with the subject Itsy Bitsy February blog Challenge topper.

        Winners please email info@itsybitsy.in with the subject Itsy Bitsy February  Challenge winner to claim your prize. 


        Our March blog Challenge will be revealed soon  and we hope you will play along.
         

        Wednesday, March 1, 2017

        Set of CAS cards with Fairy Flower Thin Cut Dies

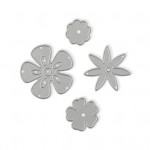
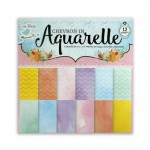
        Hello everyone, it's Juhi. Today I'm sharing a set of 4 note cards that I made using the Thin Cut Fairy Flowers Dies and patterned paper from the Chevron in Aquarelle 12x12" Paper Pack.

        These cards measure 3 1/2" x 4 7/8" and are perfect for gifting as a set. I just love the Fairy flower Thin cut dies, it has 4 pretty flower dies which can be used individually or layered on top of each other.  I wanted to keep my cards Clean and Simple (CAS) hence I've used one type of flower and left a lot of white space on the cards.

        To make the cards, I first started by cutting and scoring the white cardstock to 3 1/2" x 4 7/8". I then proceeded to created the background for the cards by cutting 4 different patterned papers from the Chevron in Aquarelle 12x12" Paper Pack to 3 1/4"x 4 5/8".

        For the first card I stuck the blue chevron patterned paper at and titled at an angle from the edge, as shown in the image below. I then flipped open the card and trimmed of the excess. 

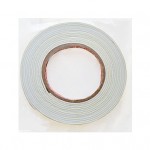
        For the second card, I first stuck the orange chevron patterned paper in the middle of the card front. I then placed a piece of white cardstock slightly bigger than half the length of the orange patterned paper as shown in the image below. I drew a diagonal line on it with a pencil and cut it with a paper trimmer. I then stuck it on top of the orange patterned paper with double sided foam tape.


        For the third and fourth card fronts I first stuck the patterned paper in the center of the card front and stuck smaller white cardstock panels on top.

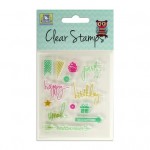
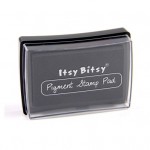
        Once the card backgrounds were done I stamped the sentiments onto strips of white cardstock using Itsy Bitsy Black pigment ink. I marked a dot in the middle of the strip and cut out till the dot from both ends to create a fish tail banner.
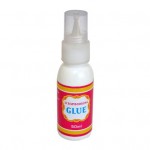
        I then die-cut the flowers using the Fairy Flowers dies from handmade paper using shades similar to the patterned paper backgrounds and played around with their placements on the cards. Once I was happy with the placement I stuck them in place with liquid glue.
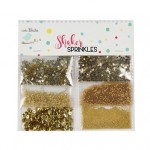
        I also added some details like stems, leaves and a vase with a pen. For the flower centers I put dots of liquid glue, poured some gold shaker sprinkles onto them and simply shook off the excess.


        I finally stuck or stamped on the sentiments on the cards to finish them. Here's a closer look at each of the cards.


        Supplies Used: