Hello
arty-crafty folks,

Here is a gorgeous project by Riddhi & step by step description:


Step-5
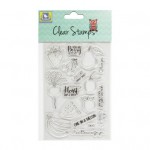
Give a little bit of shading on the first layer of the colour. I am using this pretty sentiment sticker from the store.


Many congrats Riddhi for being the CRAFTER IN THE SPOTLIGHT – ITSY BITSY!!

You will receive Rs.500/- Itsy Bitsy gift voucher 😊😊 & a Crafter in the Spotlight badge, which can be proudly displayed on the side bar of your blog and other platforms. Looking forward to many more creations, Happy Crafting!
Thursday is
here again! Today I will introduce you to another passionate crafter for our
weekly ‘Crafter in the Spotlight’. This week the lime light is on Riddhi
Jani, a talented crafter who is originally from Ahmedabad, residing in Pune but
is soon moving to the ‘City of Dreams’… Mumbai!!
Riddhi has
completed her B. Sc with Biotechnology and feels that art runs in her blood.
She loved painting since childhood but never imagined she would take up
crafting as a career.
Some of
Riddhi’s favourite are scrapbooking, paper crafting and mix media. She
feels, Itsy Bitsy offers the best price and is the perfect place for craft
shopping.
How did Riddhi
get into crafting, what inspires her, what are her tips for
fellow crafters, her favourite quote, how would she contribute to the
crafting world if she had magical powers? Read answers to all these questions,
discover more about her interesting journey and catch a glimpse of a step by
step project by Riddhi in this interview. Don’t forget to leave your comments
for her.

Here are excerpts of my interview with Riddhi Jani:
Rashmi
Closepet, MD, Itsy Bitsy: Tell us a bit about yourself & your
background?
Before I tell you something about myself, I would
like to thank Itsy Bitsy for choosing me. It’s like a dream come true ❤. I'm Riddhi Jani from Ahmedabad but right now I
am in Pune. Most probably I will be shifting to Mumbai this week end. Though I
have completed B. Sc with Biotechnology, art is in my blood. I can't stay
without craft. I like o paint, sing and a dance a bit as well. Hey, forget to
tell you that I'm a big big panipuri fan....lol 😜. I love to listen
to music when I'm alone. Mostly, I like listening to slow songs with deep
meaning.
RC: How did you get into crafting?
RJ: From
my very childhood I loved to paint...But frankly telling you guys, I never
imagined it as a career. It’s only possible because of my loving husband and
mummy (mom-in-law). Without them, it would not have been possible.
Really, words cannot explain the importance of craft in my life. I just
can't stay without craft. I think every craft-y person feels like I do. Right
guys?
RC: What is your favourite type of craft?
RJ: Hmm...Mainly, I like to do scrapbooking and paper
crafting. But I like to work with mix media projects also.
RC: What are your favourite products at Itsy Bitsy?
RJ: Itsy
Bitsy is like a perfect place for crafty shopping and with best price 😊.
Though I love each and every product from the store, my favourites are Flowers,
DCWV papers, Jute sheets and Butterflies.
RC: If you had magical powers, how would you contribute to the
Crafting world?
RJ: If
I had magical powers, I would like to change some thoughts about art in common
people who do not value art and artists. Artists obviously work for money but
more than that, artists want true appreciation. Am I right guys??
RC: Your prized possession in your craft stash from Itsy Bitsy?
RJ: All
the flowers, pattern papers and stickers❤
RC: How would you describe your style of crafting?
RJ: I
will call it unique ❤
as I believe all craft-y folks have their own style...and they are unique in
their own way 😊
RC: How do you organize your time for crafting?
RJ: I
really wish I can craft all day...I have a little boy who is 18 months old. So,
I only craft while he is sleeping. Therefore I can hardly craft for 2-3 hours. At
this stage my family supports me a lot, if my baby wakes up, mummy or my
husband handles him so I can complete my projects 😊 It
really means so much to me. ❤
RC: Tips for people who want to craft
RJ: Craft
from the heart guys…It’s not about crafting…I think it's about crafting with
feelings ❤
RC: Your all-time favourite quote?
RJ: "Difficult roads often lead to beautiful destinations ❤"
Here is a gorgeous project by Riddhi & step by step description:
For the project you need all this stuff
which is in the image.

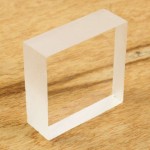
Step-1
Take 4 ice cream
sticks and fix them with the help of any strong glue.

Step-2
Fix 2 more sticks on top of the 1st layer. Then take 4 more sticks and arrange 3 of them in same line and cut 1 ice cream stick in to 3 parts. Then fix it just as shown in the image.
Fix 2 more sticks on top of the 1st layer. Then take 4 more sticks and arrange 3 of them in same line and cut 1 ice cream stick in to 3 parts. Then fix it just as shown in the image.

Step-3
Arrange it as
shown in image. So it will make a little stand for our frame.

Step-4
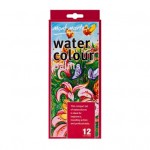
Pick a colour of
your choice. As I'm using one of my favourite colours from the store only. Let
it dry, then, stick pattern paper to give the background a nice look.

Step-5
Give a little bit of shading on the first layer of the colour. I am using this pretty sentiment sticker from the store.


Step-6
Pick choice of flowers. I feel incomplete without flowers for my projects. Thanks Itsy Bitsy for the wide range of flowers within budget. I love them 😄
Pick choice of flowers. I feel incomplete without flowers for my projects. Thanks Itsy Bitsy for the wide range of flowers within budget. I love them 😄


Here are a couple of Riddhi's
other awesome creations:


Many congrats Riddhi for being the CRAFTER IN THE SPOTLIGHT – ITSY BITSY!!

You will receive Rs.500/- Itsy Bitsy gift voucher 😊😊 & a Crafter in the Spotlight badge, which can be proudly displayed on the side bar of your blog and other platforms. Looking forward to many more creations, Happy Crafting!