
Fellow Crafters,
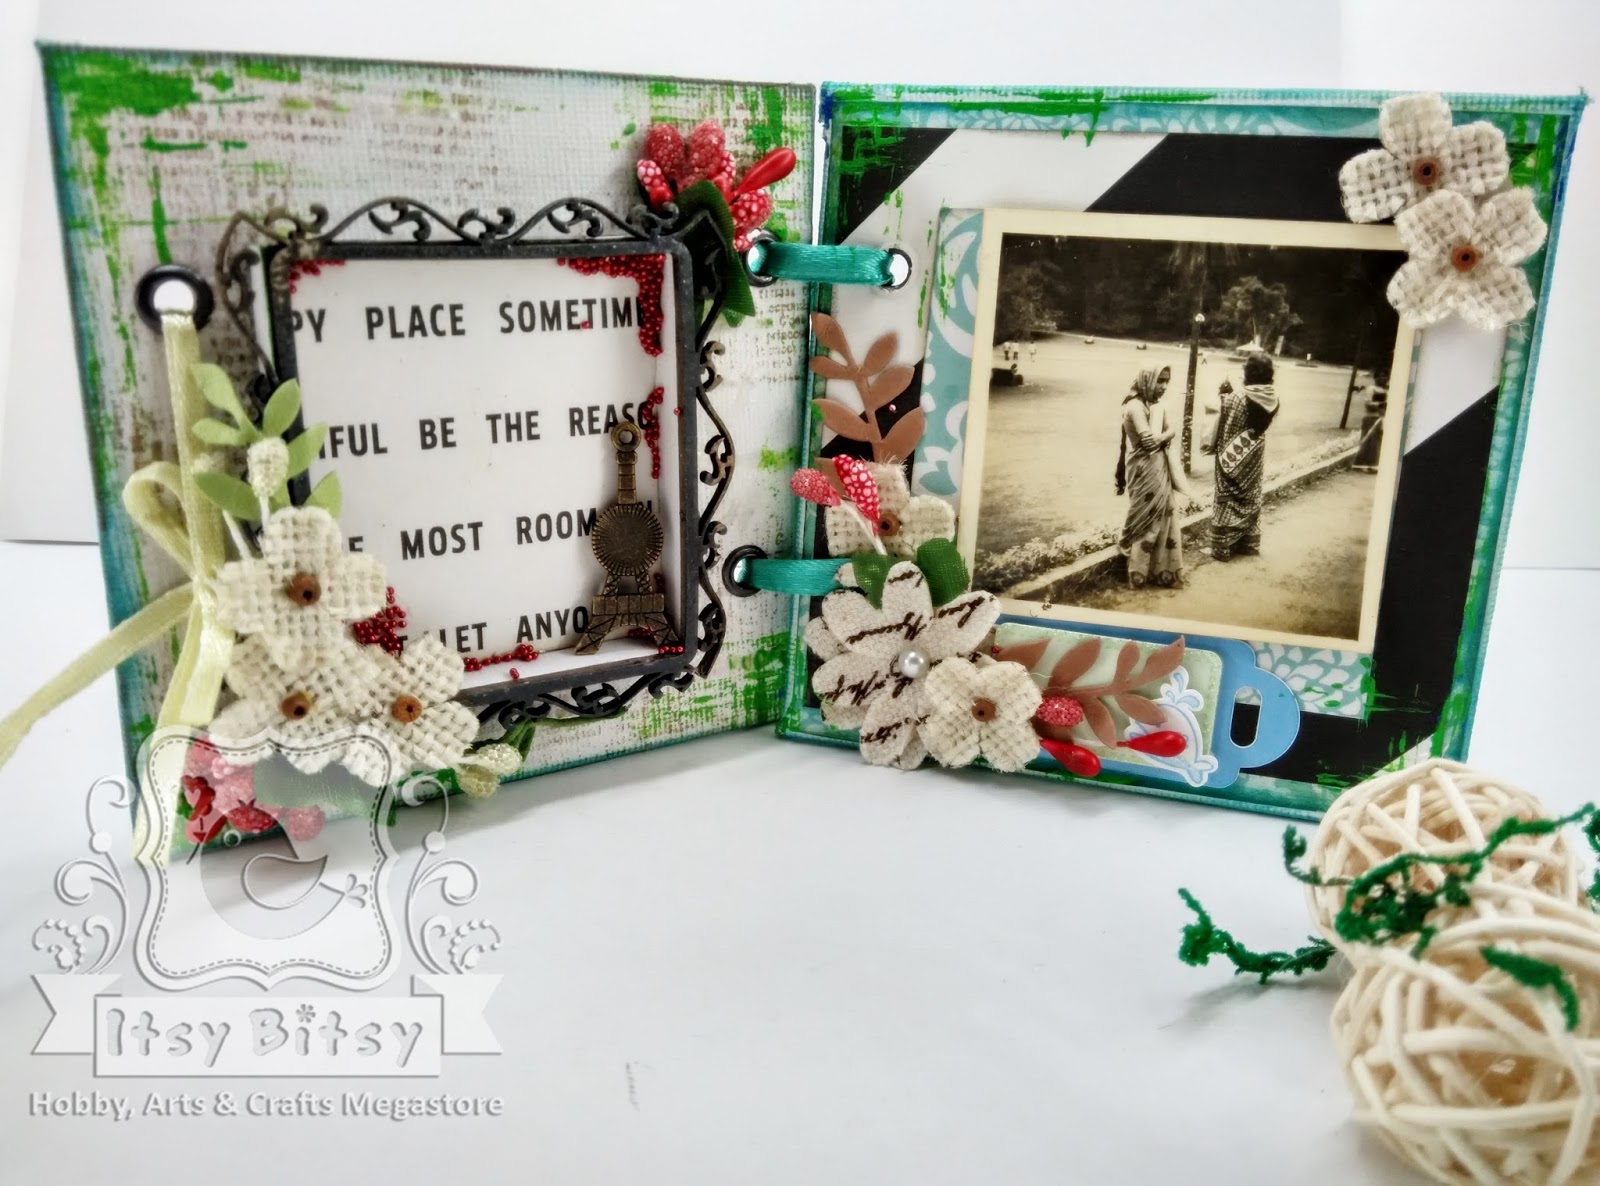
Over ages, Canvas boards has become synonymous with paintings. Right? Lets think out of the box, step aside for a while, away from "general practice" and use it for something different. Today, I have made it into a dual-fold Photo frame
Step 1
Take two Mont Marte Canvas Boards measuring 4 x 4 inch.

Measure 1.5 cm from the side and 2.5 cm from the top and bottom. Punch 2 holes at the intersecting point using We R Memory Keepers Crop-A-Dile. I have started to enjoy using this We R Memory Keepers Crop-A-Dile on any substrate I put my hands on - really am in love with it. Punching through Canvas can be a bit scary, be rest assured it punches even canvas boards :)

Step 2
Stamped Script text Stamp on the Canvas using Versa Colour pigment Ink Pad - Brown . Pigment inks will stay wet for a long time, hence need to be patient with it till it dries up. You can also use heating tool if you are a bit impatient like me. Once the Pigment Ink dries, gave a texture with Mont Marte Dimension Paint -Green using chipboard piece and using its edge to dab the paint around.
NB: Itsy Bitsy has launched real pretty Stamps. Worth collecting all of them !


Till this dries up, let's prep up the chipboard embellishments. I love to give a dimension to the embellishment. Gave a coat of Mont Marte Dimension paint on Square Deco Frame chipboard. I wanted a black shade, but not true Black. So first a coat of Green and Blue mixed together over it. The dimension paint from Mont Marte gives a dimension to the chipboard surface which I love.

Step 3
Place this frame on the canvas on an elevation. Yes! You heard it right - we are going 3D. This elevation is made so that some keepsake can be kept in it. I cut 4 pieces of chipboard (measuring the length and breadth of frame), placed it around the edges of the frame and stuck it to the canvas. Before sticking , I cut a small piece of pattern paper which became my base. This paper stack has lovely paper collection. Do have a look into it .

For the second canvas, Chose a pattern paper with blue shades. Made a frame by cutting out a square from the center. Glued it on 3 sides so that you can slide photos from the top.

Step 5
Now we decorate it with canvas flowers. These Flowers are so pretty that it was really hard for me to use it up. But now my frames were looking even more lovely.

To make this to stand and fold up , tie ribbons through the eyelets punched. To add more interest to the elevated frame, I put micro beads(red) randomly on to the sides.

Hope you all enjoyed this tutorial.
Materials used :
Mont Marte Canvas Board
Square Deco Frame chipboard
Script text Stamp
Pattern Paper
Versa Colour pigment Ink Pad - Brown
Heating tool
Mont Marte Dimensional paint : Green and Blue
Canvas flowers
Micro beads(red)
and .... We R Memory Keepers Crop-A-Dile
Love
Remya
To check my previous blog posts with Itsy Bitsy - click here
Awesome idea Remya! Loved the dimensional left side & insert for pictures on the other side.
ReplyDeleteThank you Tanvi :)
DeleteLove this cute fold photo frame with all beautiful decorated elements and dimension! Absolutely gorgeous Remya!
ReplyDeleteThanks Vinitha :)
Deleteaahha..what a brilliant idea..i guess perfect setup for to pin up a memory ..
ReplyDeleteThanks dearie
DeleteLovely ! Innovative creation
ReplyDeleteThanks dear
DeleteSuch a beautiful idea to make a photo frame ,loved it !
ReplyDelete