Showing posts with label Remya. Show all posts

Wednesday, December 7, 2016

Let's TAG along !

Hello Friends ,

Its time for a new challenge at Itsy Bitsy using Colour Splash Sprays. They have some rich vibrant Colour sprays and  I've used them in my projects here. 


Lets have a quick look on how we can play with them. On a white cardstock stick threads randomly as you can see in the picture. Once dry , spray the color splash randomly . Just play along and you can see how it gels with each other. The darker shades are when the colors merged


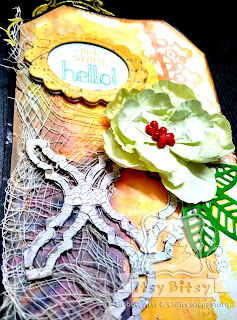
Now I cut the sheet into size of tags. Stuck it on a black cardstock and embellished it with chipboard from Itsy Bitsy. They have a wide variety of chipboard. 


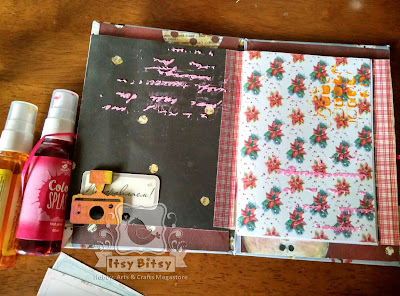
I got so carried away with these sprays ( You will get carried away !) That I created a note book from Handmade paper from  Itsy Bitsy and play around the cover page.
You can also mix it with texture paste and stencil on required areas - like you see below.


Looking forward to see some of your lovely creations using Colour sprays.

Monday, November 21, 2016

Ladies Armoire

Hello friends ,

Back again with a lovely jewelry armories to store all your elegant pieces ! Who doesn't like functional, attractive storage to your bedroom. Well I made it for my craft room ! I store my floral, washi tapes and few knick knacks. Lets get to know how you can make this.


Have you ever tried Craft brown paper cylinders from Itsy Bitsy , its very good for constructing artifacts.

First lets get the Bangle holder done.
Take Craft brown Paper Cylinder 4`` Height dia 35mm and  12`` Height dia 35mm. Cut out a 4 " hole at the center of 12" paper cylinder through which the 4" cylinder will fit in perfectly.


Next we need make a cardboard chest using the packaging cardboard which we all have in our possession !

To make the chest , cut out the below measurements from the cardboard sheet.
Measurements:
Side pieces :          15 x 7 cm     ( 2 nos )
Top and Bottom :  15 x 20.5 cm ( 2 nos)
Back Rest:             8 x 20.5 cm  ( 1 no)  
I stuck them using my favorite silicon glue from Itsy Bitsy


Now for the Drawer , cut out the below measurements from the cardboard sheet.
Measurements:
Side pieces :         15 x 4.5 cm     ( 2 nos )
Front and Back :  14.5 x 18.5 cm ( 2 nos)
Bottom /Base:      16 x 19 cm       ( 1 no)

The Final piece looks like this.

Now for some embellishments.


 Materials :

Hope you guys enjoyed this blog post. See you soon!

Hugs

Tuesday, October 25, 2016

Festive Gift hamper

Hello friends ,

Its October and its festival time Diwali , Halloween all make way to our homes. It brings with it the joy of giving gift , favors to your near and dear ones. What better than to give away hand made ones and make them feel special . I have today a few favor boxes which can be used for the same.

Pillow boxes is one which always catch my fancy. 

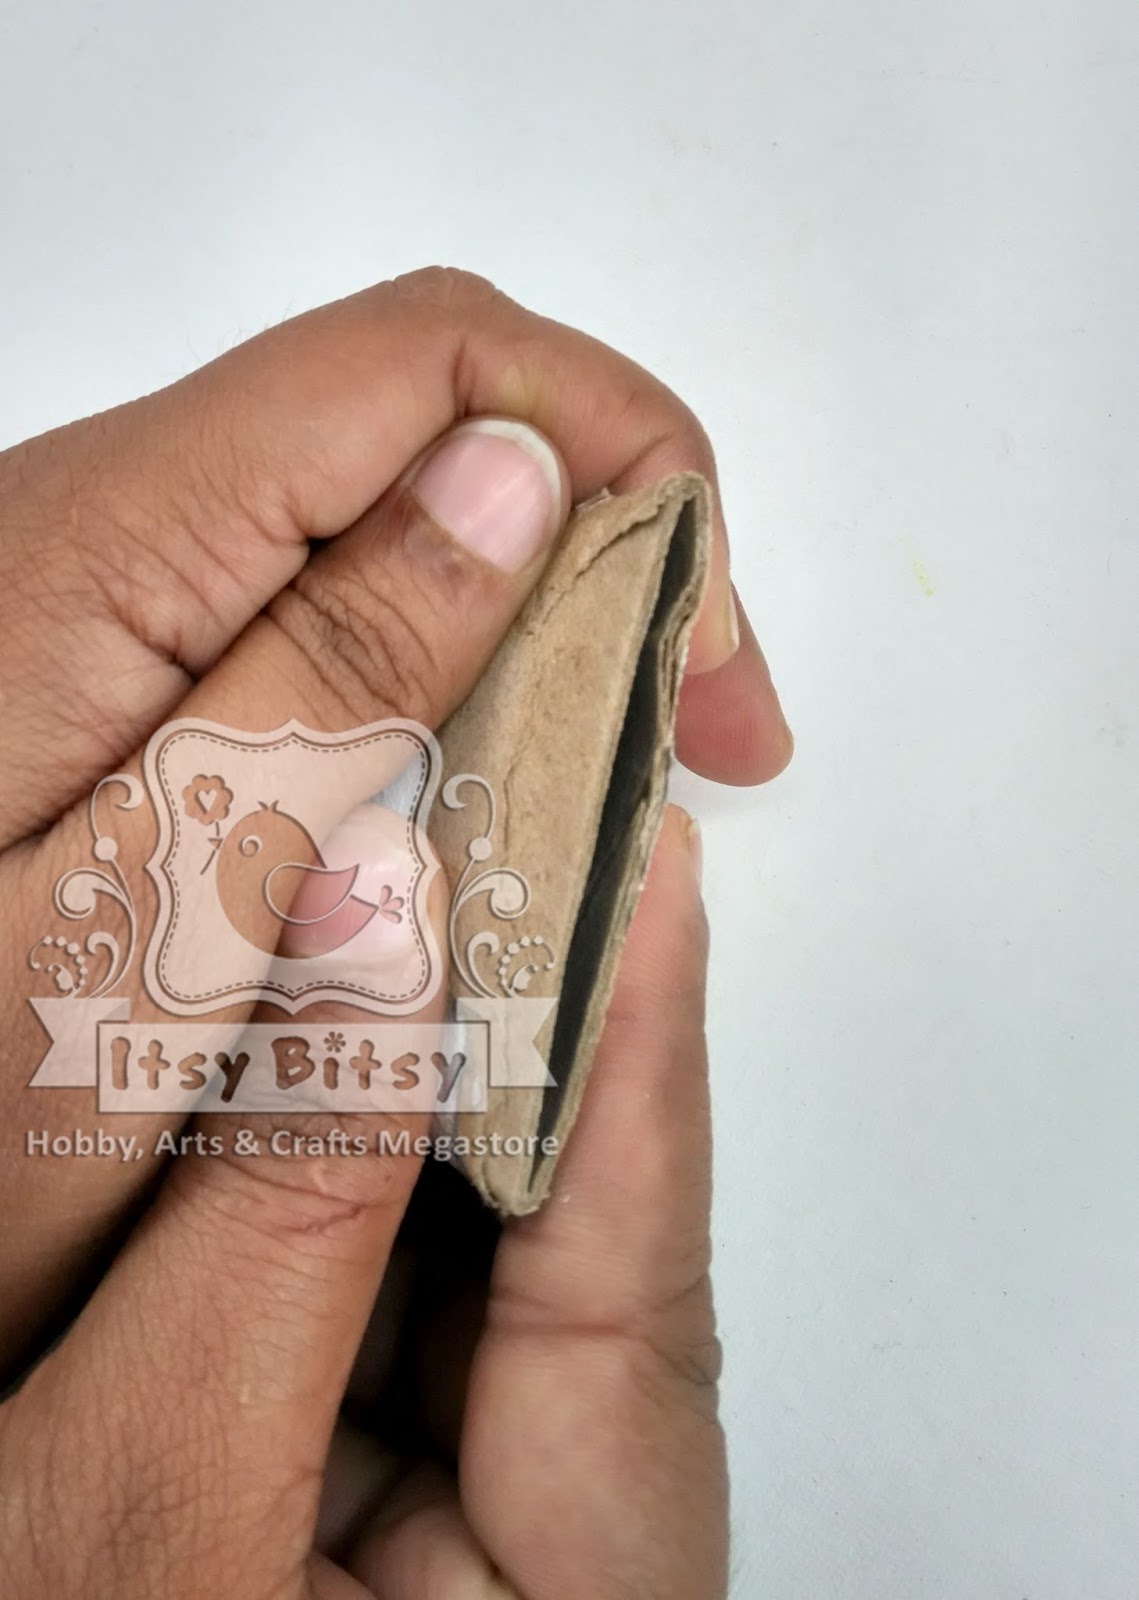
I have made this using Craft brown Paper Cylinder Itsy Bitsy. Its so sturdy that the gifts packed in it will remain unaffected during transit . Itsy bitsy has a huge variety in terms of size too. Once I decided on to the length and size of the cylinder, covered it with lovely pattern paper. Yes you will not fall short of choices at Itsy Bitsy for the same. Pinch the sides of the cylinder towards the interior as shown. 


Do the same for both sides. The substrate being sturdy you may find it difficult but  not impossible. Wrap your gift and place it inside. Tie a dainty ribbon along and place your wishes or flowers to make it special .


Halloween reminds me of trick or treat. So , I wanted to make a candy favor bag. But can a Craft brown Paper Cylinder be converted into it. Well Yes! Join the edges of the cylinder at one end as shown using Silicon glue. 


Punch holes on the two sides on the other end. Tie ribbons and we have a cute little candy favor bag to play trick or treat who come along your doors.

Hope you enjoyed this little party favors. Waiting to see your creations.
Remya


To check my previous post click here

Monday, September 26, 2016

Treasure Trove Tissue Box

Dear Friends ,


Remya here with a tissue box which reminds us of a treasure trove. During all my drives have been frustrated with the blanche look of the tissue box in the car. Today I decided to overhaul it and give it a look of a treasure trove. 


Ready for the overhauling session with me ? Lets begin !


Itsy Bitsy has a huge variety of white washed items which are game for any mixed media encounters. I chose to work on tissue box since I had a need for it.

When working with Chipboards, We would have left over Chipboard pieces which normally finds its way to the trash can, my habit of retaining them (although am blamed many a times) helped here and I have used them here. You would be able to see few broken chipboards here ( Piling up all the hoarded chipboard can cause few of them to break !). I stuck them randomly on the sides of the box.

After the chip board pieces get stuck on to the substrate, its time for giving a common layer, covering the entire surface with kitchen tissue paper and let it dry completely.

Once the tissue dries up its time for GESSO. Here I have covered the box with black gesso. Its mandatory for this to dry completely before you apply any color to it. Else you would land up with colors which you may not desire with colors smudged.
Treasure is always (almost always) golden and hence the trove had to get a rustic golden color. To give it the rustic appearance was a bit tricky with use of multiple colors where black base with pearl yellow and green had to roles to play. I stared by buffing the box with Pearl Yellow dimension paint from Monte Marte. You might get your hands dirty while doing this but trust me the result would be better than using a brush.
Once that was done, rubbed off the color from certain areas for the background black to be visible - to get the aged look.
Once I was happy with the outcome of this, I applied Monastral green dimensional paint on the broken chipboards to highlight them. It looks white in the sunlight though. 
Few flowers near the chipboard, it transformed into a treasure chest:) The wording are cut out from an old magazine - did I say that I dont have a trash can at home ;)


Hope you all enjoyed this journey !

Materials Used :

Tissue box
Chipboard - Square frame
Chipboard - Garden bird
Any tissue paper 
Black gesso
Dimensional paint  - Yellow
Dimensional paint  - Monastral Green
Flowers

Hugs,
Remya


To check my previous blog posts with Itsy Bitsy - click here

Friday, September 9, 2016

"Home is where I am with you" - A Mixed Media Layout

Hello Friends,

Remya here with a mixed media layout.

What is mixed media? For me; it is a place where we can use available mediums and embellishments to create something beautiful, which you would cherish.


Here a cake base has been recycled. It can be painted using Paint brush and acrylic paints. But this time I tried out Spray paints from Itsy Bitsy. Itsy Bitsy has got a wide variety of spray paints and I chose brown to get a rustic feel. You can see it has given a rustic look to the background all together. 


Caution : A point to be noted while spray painting is to ensure that you paint only the substrate and not the grills and surroundings as I did. :) Keeping couple of sheets of newspaper behind would really help the cause.

Next came the background papers. I chose a vintage brown colour - Burnt Sienna to go well with the rustic texture given to the background. Tore the edges randomly and dabbed with brown acrylic paint. This gives a burnt look to the edges. Wound twine around the length of the paper for a texture.


In search of a focal picture , I ended up with a cute little picture of Mom and Daughter. I decoupaged it to a canvas board. The  edges were again dry brushed using Mont Marte Dimension paint  ( Pearl Yellow). This is one paint I would recommend all of you to try. The rich , creamy , velvety paint will steal your heart away. It gave such a golden shimmer that I ended up smudging the edges of my background Pattern Paper too.


Once the base was finalized I stuck them up together using silicon glue. Now this glue has become my "all time" favorite. I lost track of the things I have fixed using it. 


Now lets move to the embellishment part. Everyone those who have visited Itsy Bitsy would agree with me that we are spoiled by choices on the varieties of embellishments it has in store. Wanting the substrate and the embellishments to be in perfect sync with each other, gave a coat of dimension paint to the chip boards (flowers and damask) too. 


Flowers are something to die for. Itsy Bitsy has a huge collection of flowers, again spoilt by choices available. I arranged them till I was happy with it. Stuck them up with the Silicon Glue. Even gave a sprinkle of micro beads for the rustic effect.


A few close up pictures given below for you all to see the details.


Hope you all enjoyed this detailed picture heavy post till the end. See you soon with something new a wonderful .

Materials Used :


Hugs

To check my previous blog posts with Itsy Bitsy - click here