Hello
Crafty Folks, this Thursday is special!! It’s our 53rd Crafter in
the Spotlight; that means we have completed a journey of One Year. That’s
exciting isn’t it?? We have celebrated a talented crafter every week for an
entire year and will continue to do so to motivate and bring out hidden
talents!
Today, I
am here to feature yet another extremely talented crafter from Delhi. She is Preeti Datta, a crafter who chose to go with freelancing jobs
to make time for crafting. She started with kid’s craft and moved on to
discover various techniques of mainstream crafting like mixed media, card
making, journaling and more.
Preeti rightly calls her crafting style eclectic and ever evolving
because she likes to try out different styles, starting from simple cards to
mixed media. Little Birdie color sprays, flowers and embellishments are among
Preeti’s favourite craft supplies and she loves using them quite often.
What are Preeti’s tips for
fellow crafters, her favourite quote, how would she contribute to crafting
world if she had magical powers?? To know all these & to know more about
her interesting journey & to see a step by step project of
hers, please read the interview & leave your comments for her.

Rashmi Closepet, MD, Itsy Bitsy: Tell us a bit about
yourself & your background?
Preeti Datta: My
name is Preeti Datta, my friends on facebook know me as Dutt Preety. I’m a
resident of Delhi. I have studied Clinical Psychology and worked as a
Psychologist and a Talent Acquisition Specialist. Currently, I work as a
freelancer so that I have time to craft and work on other assignments. Cooking, watching movies, listening to music
and crafting are my favorite leisure time activities. My family consists of my
parents. My dad was a Naval Aviator and my mother was a School Principal. I have
2 elder sisters, 3 nephews and 1 niece and I really enjoy spending time with
the little ones.
RC: How did you get into
crafting?
PD: I have always enjoyed
crafting. Even as a child I spent hours dressing up my Barbie dolls and making
new clothes and jewellery for them. Over the past few years, I have helped out my
nephews, niece and friends’ children in their school art and craft work and
holiday homework projects and that’s how I started children’s crafting. I got
into proper crafting last year in September, 2016. Ever since then I have been
hooked. I really enjoy creating, working with colors and learning new
techniques.
RC: What is your favourite type of craft?
PD: I enjoy paper crafting and
I think card making is my favorite followed closely by art journaling.
RC: What are your favourite products at Itsy
Bitsy?
PD: I really love the Little
Birdie color sprays; I use them on almost all my Mixed Media work. Also, the Little
Birdie theme based embellishments and flowers are quite beautiful and I enjoy
splurging on those every so often.
RC: If you had magical powers, how would you
contribute to the Crafting world?
PD: If I had magical powers, I’d contribute to
the crafting world by making all kinds of art and craft tools, supplies and
tutorials available and affordable to anybody who wishes to craft. So that everybody
has the opportunity to learn and enjoy it.
RC: Your prized possession in your craft stash
from Itsy Bitsy?
PD: The dies, embossing folders and pattern
papers I bought from Itsy Bitsy. I have a huge stash of those and absolutely
adore them.
RC: How would you describe your style of
crafting?
PD: I would describe my style of crafting as
eclectic and ever evolving. I am enamored by different styles of art work including
CAS, mixed media and shabby chic. I like experimenting with all these styles
and varying it up.
RC: How
do you organize your time for crafting?
PD: I try to craft on most days during the week. I
just enjoy the process; sometimes it takes me a few hours and at others can
take a few days. A lot of times, thinking about the design and composition
takes a lot longer.
RC: Tips
for people who want to craft
PD: I
would say just jump into it, watch youtube tutorials, read a few blogs, try out
simple things with the materials you already have at home, see what piques your
interest. Try spending a little time every day crafting, coloring or pursuing
any creative endeavor because it is a great stress buster and your precious
“me” time.
RC: Your all-time favourite quote?
PD: “Determine to live life with
flair and laughter” – Maya Angelou
Here is a gorgeous project by Preety & step by step procedure:
Mixed Media Mini Canvas:
Step 1: Collect the materials required. I have
here supplies from Itsy Bitsy including a Mont Marte Canvas Panel (5 by 7),
Mont Marte Impasto Paste, Camel’s Gesso, Palette knives and Burlap Ribbon

Step 2: Apply Impasto paste or any other
texture/modeling paste you have onto the canvas through a stencil


Step 3: Add more texture (for added interest)
with some gesso. Randomly apply it with the edge of the palette knife to give
vertical textured lines. This will create movement in the piece

Step 4: Cut the Burlap Ribbon into thin strips
and adhere layers of these strips onto the canvas based on your composition, I
have kept them skewed to the right. I’ve adhered them with gesso itself.

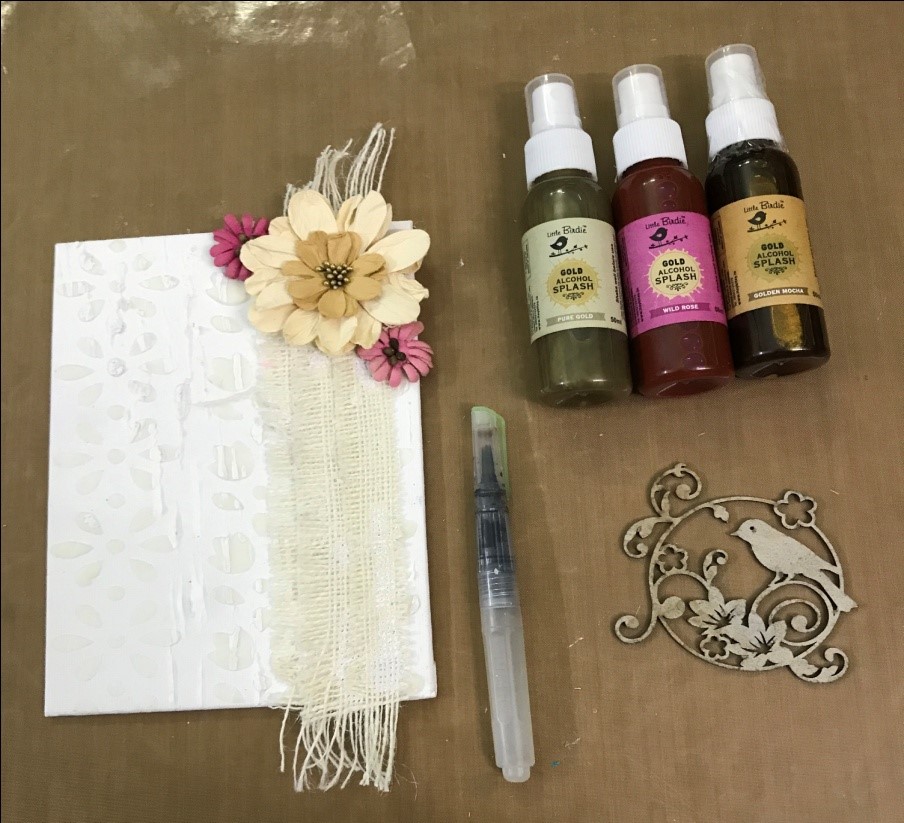
Step 5: Now comes the fun part, we get to add
the embellishments and color the project. Here is a selection of Little Birdie
Flowers, chipboard and sparkly bits I had in my stash, I will use some of these
on the project

Step 6: I will use the new Little Birdie Gold
Alcohol Splash Sprays to add color to the canvas as well as color the
chipboard. I’ve used 4 colors on the project ie., Pure Gold, Wild Rose, Golden
Mocha and Black Soot.


Step 7: Finally, adhered all the
embellishments. The title consists of a scripty die cut and a couple of word stickers,
then added some sparkle to the canvas with the hearty mélange (gold hearts).
Finished off by adding few details with inks and black and white markers and
then some splatters of ink.


Here are a couple of Preeti's other awesome creations:


Many congrats Preeti for being the CRAFTER IN THE SPOTLIGHT – ITSY BITSY!!

You will receive Rs.500/- Itsy Bitsy gift voucher 😊😊 & a Crafter in the Spotlight badge, which can be proudly displayed on the side bar of your blog and other platforms. Looking forward to many more creations, Happy Crafting!