Showing posts with label hearty melange. Show all posts

Thursday, June 8, 2017

Crafter in The Spotlight 53 - Itsy Bitsy


Hello Crafty Folks, this Thursday is special!! It’s our 53rd Crafter in the Spotlight; that means we have completed a journey of One Year. That’s exciting isn’t it?? We have celebrated a talented crafter every week for an entire year and will continue to do so to motivate and bring out hidden talents!

Today, I am here to feature yet another extremely talented crafter from Delhi. She is Preeti Datta, a crafter who chose to go with freelancing jobs to make time for crafting. She started with kid’s craft and moved on to discover various techniques of mainstream crafting like mixed media, card making, journaling and more.

Preeti rightly calls her crafting style eclectic and ever evolving because she likes to try out different styles, starting from simple cards to mixed media. Little Birdie color sprays, flowers and embellishments are among Preeti’s favourite craft supplies and she loves using them quite often.

 What are Preeti’s tips for fellow crafters, her favourite quote, how would she contribute to crafting world if she had magical powers?? To know all these & to know more about her interesting journey & to see a step by step project of hers, please read the interview & leave your comments for her.


Rashmi Closepet, MD, Itsy Bitsy: Tell us a bit about yourself & your background?
Preeti Datta: My name is Preeti Datta, my friends on facebook know me as Dutt Preety. I’m a resident of Delhi. I have studied Clinical Psychology and worked as a Psychologist and a Talent Acquisition Specialist. Currently, I work as a freelancer so that I have time to craft and work on other assignments.  Cooking, watching movies, listening to music and crafting are my favorite leisure time activities. My family consists of my parents. My dad was a Naval Aviator and my mother was a School Principal. I have 2 elder sisters, 3 nephews and 1 niece and I really enjoy spending time with the little ones.

RC: How did you get into crafting?
PD: I have always enjoyed crafting. Even as a child I spent hours dressing up my Barbie dolls and making new clothes and jewellery for them. Over the past few years, I have helped out my nephews, niece and friends’ children in their school art and craft work and holiday homework projects and that’s how I started children’s crafting. I got into proper crafting last year in September, 2016. Ever since then I have been hooked. I really enjoy creating, working with colors and learning new techniques.

RC: What is your favourite type of craft?
PD: I enjoy paper crafting and I think card making is my favorite followed closely by art journaling.

RC: What are your favourite products at Itsy Bitsy?
PD: I really love the Little Birdie color sprays; I use them on almost all my Mixed Media work. Also, the Little Birdie theme based embellishments and flowers are quite beautiful and I enjoy splurging on those every so often.

RC: If you had magical powers, how would you contribute to the Crafting world?
PD:  If I had magical powers, I’d contribute to the crafting world by making all kinds of art and craft tools, supplies and tutorials available and affordable to anybody who wishes to craft. So that everybody has the opportunity to learn and enjoy it.

RC: Your prized possession in your craft stash from Itsy Bitsy?
PD: The dies, embossing folders and pattern papers I bought from Itsy Bitsy. I have a huge stash of those and absolutely adore them.

RC: How would you describe your style of crafting?
PD: I would describe my style of crafting as eclectic and ever evolving. I am enamored by different styles of art work including CAS, mixed media and shabby chic. I like experimenting with all these styles and varying it up.

RC: How do you organize your time for crafting?
PD:  I try to craft on most days during the week. I just enjoy the process; sometimes it takes me a few hours and at others can take a few days. A lot of times, thinking about the design and composition takes a lot longer.

RC: Tips for people who want to craft
PD: I would say just jump into it, watch youtube tutorials, read a few blogs, try out simple things with the materials you already have at home, see what piques your interest. Try spending a little time every day crafting, coloring or pursuing any creative endeavor because it is a great stress buster and your precious “me” time.

RC: Your all-time favourite quote?

PD: “Determine to live life with flair and laughter” – Maya Angelou


Here is a gorgeous project by Preety & step by step procedure:

Mixed Media Mini Canvas: 


Step 1: Collect the materials required. I have here supplies from Itsy Bitsy including a Mont Marte Canvas Panel (5 by 7), Mont Marte Impasto Paste, Camel’s Gesso, Palette knives and Burlap Ribbon 


Step 2: Apply Impasto paste or any other texture/modeling paste you have onto the canvas through a stencil 


Step 3: Add more texture (for added interest) with some gesso. Randomly apply it with the edge of the palette knife to give vertical textured lines. This will create movement in the piece


Step 4: Cut the Burlap Ribbon into thin strips and adhere layers of these strips onto the canvas based on your composition, I have kept them skewed to the right. I’ve adhered them with gesso itself.


Step 5: Now comes the fun part, we get to add the embellishments and color the project. Here is a selection of Little Birdie Flowers, chipboard and sparkly bits I had in my stash, I will use some of these on the project


Step 6: I will use the new Little Birdie Gold Alcohol Splash Sprays to add color to the canvas as well as color the chipboard. I’ve used 4 colors on the project ie., Pure Gold, Wild Rose, Golden Mocha and Black Soot.


Step 7: Finally, adhered all the embellishments. The title consists of a scripty die cut and a couple of word stickers, then added some sparkle to the canvas with the hearty mélange (gold hearts). Finished off by adding few details with inks and black and white markers and then some splatters of ink. 


Here are a couple of Preeti's other awesome creations:


Many congrats Preeti for being the CRAFTER IN THE SPOTLIGHT – ITSY BITSY!!


You will receive Rs.500/- Itsy Bitsy gift voucher 😊😊 & a Crafter in the Spotlight badge, which can be proudly displayed on the side bar of your blog and other platforms. Looking forward to many more creations, Happy Crafting!

Wednesday, May 24, 2017

DIY bottles using alcohol sprays

Hello my dear friends.......

I am back again to share one more easy altered bottle project with alcohol sprays. I hope you are loving them, If you haven't tried it yet, then you have to grab them for sure from Itsy Bitsy.


Let me show you the pics first and then I will explain you how easy it is to do them.


  • I dry brushed and folded the petals of the flower to make it look layered, this is necessary because it comes flat in the packing.

Ahh... I have tried my level best to capture that gold shimmer it leaves on the project, that so awesome!

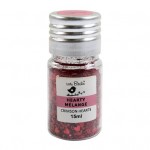
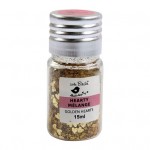
  • I have added Gold and Red Hearty Melange to the bottle using Itsy Bitsy scrapbooking glue as it dries clear and matte.
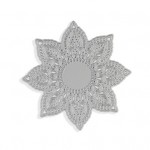
  • I used a thin cut doily die cut below the flower, which I picked from the store.
  • Added a little touch of gold metallic paint to the flower and the doily die cut to match with the colors used on the bottle.


Also sprinkle a little glitter on the body of the bottle when the sprays was semi dry as the hearty melange sticks to it.


Process:
1.   Take two bottles clean and dry. 
2.   For the small bottle I used Frosted Pool, Midnight Blue, and Purple Haze, Citron Breeze randomly.
3.   Tip : start spraying the lighter shade first.
4.   Once dry, apply gold metallic paint through stencil on the bottle using the rectangle sponge blender.  
5.   Stick the flower and cord.
6.   Dry brush the flowers with gold metallic paint.
7.   Big bottle : I have used Wild Rose and Golden Mocha instead of Purple Haze and Midnight Blue randomly.

List of supplies used from store:

Gold Alcohol Splash - Frosted Pool 50ml
frosted pool
Gold Alcohol Splash - Purple Haze 50ml
purple haze


Gold Alcohol Splash - Citron Breeze 50ml  
citron breeze
Gold Alcohol Splash - Midnigt Blue 50ml
midnight blue

Gold Alcohol Splash - Golden Mocha 50ml
golden mocha


HEARTY MELANGE GOLDEN HEARTS 15ML
hearty melange-gold
HEARTY MELANGE CRIMSON HEARTS 15ML
heart melange - crimson

ADHESIVES-SCRAP BOOKING GLUE 50ML SQUEEZE
scrabook glue
FLOWER EMBELLISHMENTS-DECORATIVE FLOWERS ASST 8PCS  
flowers

STENCILS-STENCIL FLORAL 18.5 X 24.5CM 1PC
floral stencil

METALLIC ACRYLIC PAINT 4 SHADES SET PMHS0012 50ML BLISTER MM
mettalic paints

Sponge Blending Rectangle 10pcs
sponge blending rectangle
COTTON CORD 0.5MM LEMON YELLOW 10MTR IB
cotton cord

Monday, March 13, 2017

Creating custom glitter backgrounds using Rainbow Dust


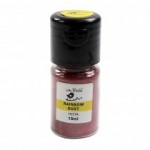
I'm sure there's no crafter out there who does not like glitter! We all just love to use glitter on our projects, as a cardmaker I have often used the gorgeous, high quality glitter paper by Itsy Bitsy.  The papers come a range of beautiful colors, but, what if you want ombre glitter paper, or rainbow glitter paper? Well, with the the new range of glitter, aptly called "Rainbow Dust", you can do just that! 
The glitter comes in a range of beautiful colors, is super fine and very high quality. I played with the pretty shades to came up with 3 fun ways to create your own custom colored glitter paper using them
.

Card #1

For my 1st card I wanted to make a shimmer background with blended colors from red to gold. Here are the steps I followed to create my card.
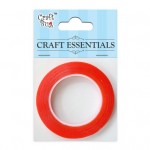
1. Start off with a white cardstock panel cut to the size of your card front. Cover it entirely with super strong double sided tacky tape while ensuring there is no gap between the rows of tape.
2. Peel off the top of the tape to reveal the sticky side.
3-4.Starting with the Fiesta Rainbow dust, pour the rainbow dust onto the cardstock panel and shake off the excess. The sequence of colors I followed were - Fiesta, Rose Quartz, Glazed Apricot, Glazed Fire.

 6. Take a scoring tool or any blunt long object, like the blunt edge of a scissors and burnish in the glitter powder. Move back and forth multiple times where one color meets the other to blend and mix the colors a bit. This will ensure that there are no sharp lines where one color ends and the next one starts. Once the glitter is nicely rubbed in, it will not come off if you run your fingers over it.
7-8. Once you are satisfied with the colors place the ornate doily die and die-cut in the center of the panel.
9. Take the negative of the die-cut and stick a piece of acetate or transparency behind it.
10. Line the outer edges of the panel with double sided foam tape.

11-12. Take a little of  Golden Hearts and Crimson Hearts Hearty Melange and sprinkled them in the middle of my white cardstock base.
13. Place the shimmer cardstock panel and stuck it on the white cardstock base.
14. Stick the die-cut doily on top of the acetate, from where it was cut originally.
15. Finish the card by stamping the sentiment on a piece of kraft cardstock and adhering onto the top panel.

Card #2

I created a bold striped, ombre background, moving from a darker to a lighter tone of the same color. I created a gradient from black to silver. Here's how I made it.

1. Start by sticking double sided tacky tape at equal intervals on prefolded, white cardstock base. I used the markings on my cutting mat as a guide, you can mark equal intervals with a ruler too.
2-3. Start peeling off the tape one row at a time. I poured black rainbow dust in the bottom 2 rows. Brush off the excess glitter powder with a brush.
4-5. For the next 2 to 3 rows mix a bit of silver and black rainbow dust in a small container and pour. Progressively increase the amount of silver rainbow dust in the mixture as you move towards the top rows.
6. Finish off the background with 2 rows of pure silver rainbow dust. As with the previous card, nicely rub in the glitter powder with a scoring tool.
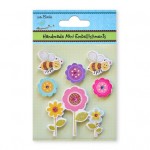
7. Finish the card with embellishments of your choice. I used cute floral 3-D sticker from the Itsy Bitsy store.

Card #3

I've created a rainbow shimmer background for my 3rd card.The process was just the same as the first card, only the Rainbow Dust colors were different. The colors I've used in sequence are - Fiesta, Rose Quartz, Glazed Apricot, Glazed Fire, Shiny Moss and Rich Berry.
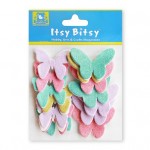
I finished the card by sticking glitter butterfly embellishments and stamping a sentiment.

I hope you like these projects, the possibilities are endless with Rainbow Dust, in cardmaking itself I can think of so many other ways to use these. I might cover a few more techniques in my next post.
Thank you so much for stopping by today!

Supplies Used: