Thursday, July 26, 2012

Cupcake Craft Flower Toppers - Try and Top That!

My mother-in-law was babysitting my little monsters on Saturday (I have a 3 year old and a 10 month old) and she sprained her back. Poor thing was in a fair amount of pain, unable to get out of bed and getting very little relief from pain killers. She also ended up missing her weekly golf game, card game and lunch with the ladies. I felt awful and really wanted to cheer her up. Cupcakes would do the trick I thought. Cupcakes combined with craft flowers - simply priceless! 


I got started on the project with some orange card paper from ItsyBitsy.in. Using my super cool Magnetic Twist Trimmer and Cutting Mat, I was able to score the folds for the box and put it together in just 10 minutes.


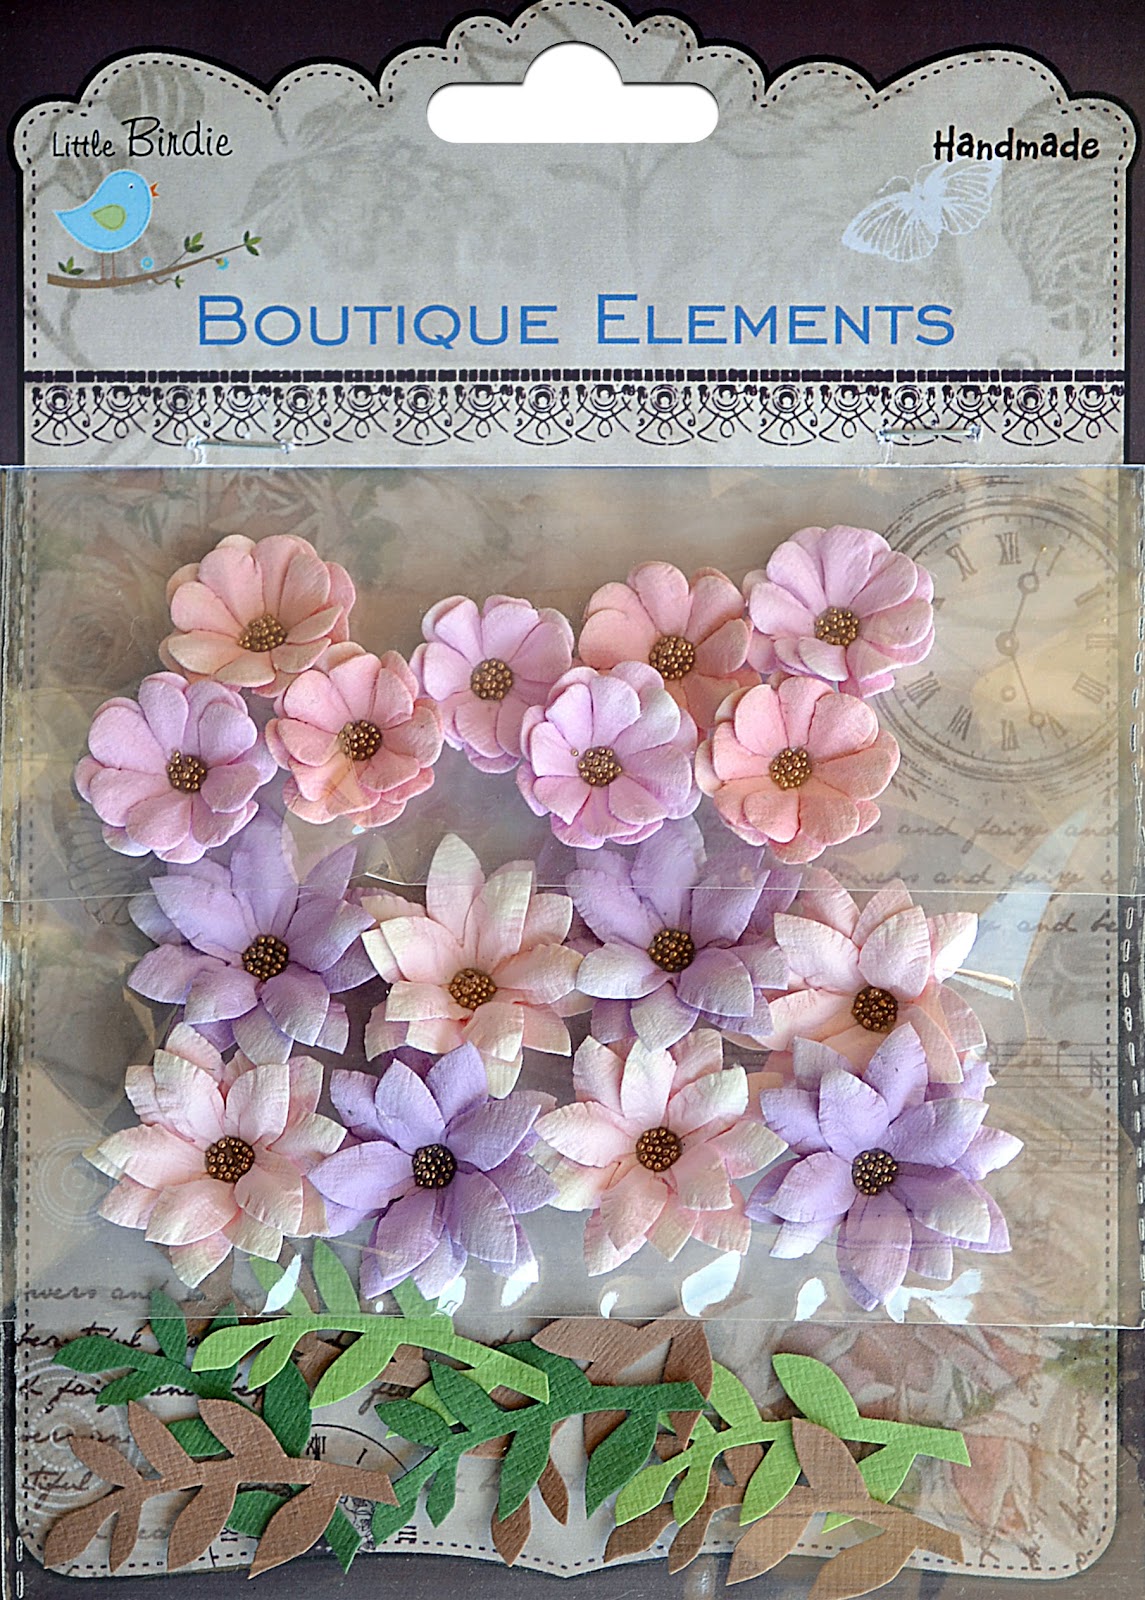
Then I got to work on decorating the box. I have the Boutique Elements range from ItsyBitsy.in and the Petite Daisies. After a few permutations and combinations I figured out the arrangement that looked best and glued everything down.


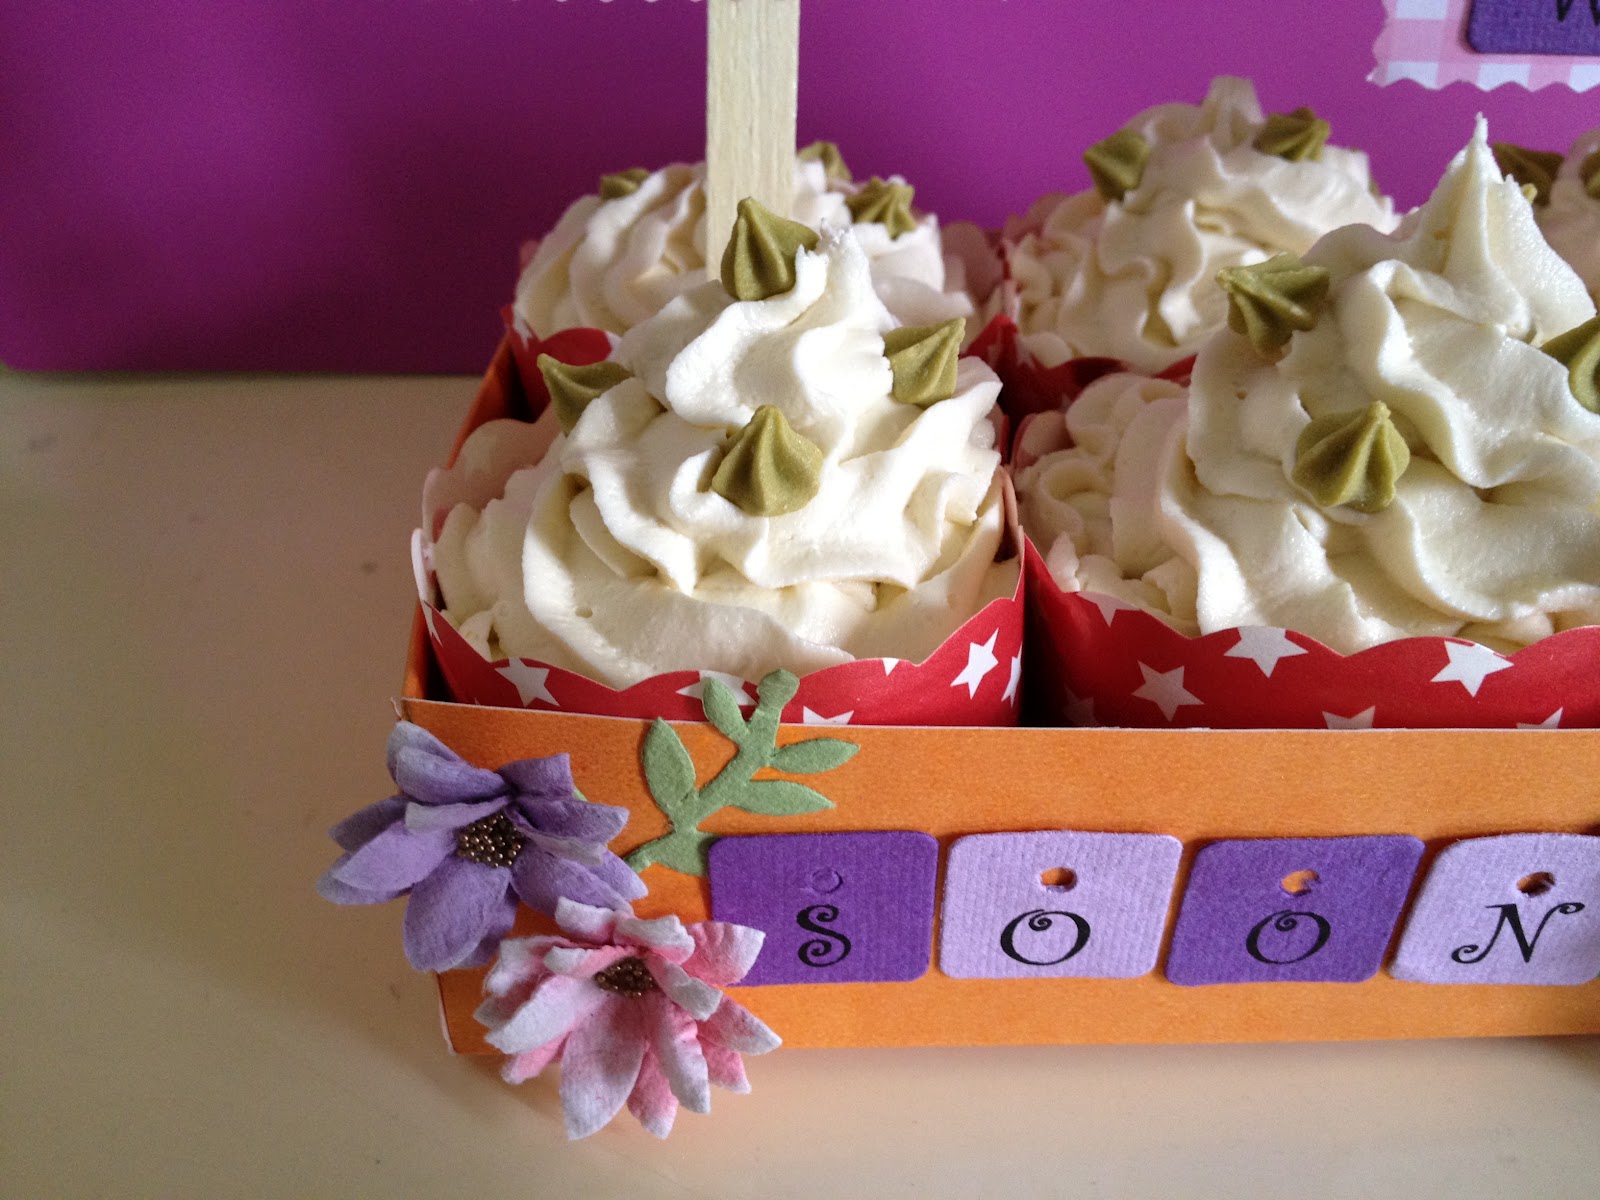
It was time for the sentiment. Using some craft letters, I glued 'S-O-O-N' on the box.  For the rest of the sentiment, I used some ItsyBitsy pattern paper cut with the scallop edge of the Magnetic Twist Trimmer. I added the words 'G-E-T' and 'W-E-L-L' and topped them with more flowers. This was stuck on a craft stick, ready for insertion. 


The cupcakes were iced and ready. I placed 6 of them in my beautiful cupcake box. I inserted the cupcake toppers and presto! We were ready to brighten up my mother-in-law's day.


She was really touched with the box and thanked me profusely. She was doing much better so she could sit up and eat the delectable treats. Here's a close-up of the cupcakes to give you a taste of how delicious they looked.


What a wonderful way to spend the afternoon!
  1. Creating a craft project - Relaxing!
  2. Nibbling on Cupcakes - Rewarding!
  3. Making Someone's day - PRICELESS!!!!

Monday, July 23, 2012

3 'Must Have' Tools for Crafters

As any crafter knows and probably experienced, without the right tools, a crafting experience can go from dream to nightmare. Your work will not turn out how you imagined, the satisfaction you get from creating it will be minimal and most likely, you will stop crafting. This post is dedicating to 3 must-have craft tools every crafter should have. Best of all, they're all available at ItsyBitsy.in.

1. A Cutting Mat 
During one of my craft projects, I failed to use a cutting mat while cutting a piece of chip board. A
few minutes later, my dining table was irretrievably scarred. I spent the next few days hurriedly placing a table mat over the damaged portion so that my husband wouldn't see the wreckage. At first opportunity I purchased a cutting mat and now I find they are useful in multiple ways. First of course, they protect your table top. Then because of the convenient gridlines provided, I was able to cut lines straighter, faster and easier than before. There are a variety of cutting mats available at ItsyBitsy.in.
The crafter's magnetic one is genius - it works well with the magnet circle cutter and the magnetic twist trimmer and ensures that neither your tool nor the paper will slip. Here's a video of how it works.


That said, it's heavy on the wallet which is why ItsyBitsy.in also stocks the regular non-magnetic self healing cutting mats, perfectly suitable for any craft project.

2. A Paper Trimmer
A paper trimmer is great to cut straight lines smoothly and professionally. Using a scissor just won't give you the finish you want which is why a paper trimmer is a great accessory. ItsyBitsy.in stocks the We R Memory Keepers Twist Trimmer. I have this myself and can't tell you how overjoyed I am. Firstly it is really sleek and functional. Just place the ruler with blade on the project and slide down to trim. It comes with 8 blades to offer a variety of trim options. You can create straight, deckle, wavy, stamp, scallop and pinking edges. There is also a scoring and perforating blade allowing you to fold card projects neatly or create rip off pieces. Love it! love it! LOVE IT! Watch this video to see what I mean. 


3. A Trusted Glue Gun
Nothing glues things down like a glue gun. Hot melted adhesive bonds practically everything as it dries up. Great for all kinds of projects that need a quick, mess free fix. ItsyBitsy.in has a great version, which comes with 2 hot melt sticks. Refill melt sticks are available at the online store. I recently used my glue gun to make a chart for my son's class. He is learning the letter 'B' so we glued all kinds of things to chart - a TT ball, a brush, a box - and everything stayed on firmly!


Do you have any of these tools? What is your opinion. Leave a comment and tell us!

Wednesday, July 18, 2012

It's Amazing What You Can Do With Craft Flowers

As you know, we at ItsyBitsy are focussing on craft flowers this month. We have an interesting challenge going on and so far we've got 5 fantastic submissions. The twist of the challenge is that you must create something other than a scrapbook or card using craft flowers. That leaves a world of options and to give you a taste, we've created this - a craft flower necklace with matching earrings. For more on the challenge, click on on our post - The Itsy Bitsy Craft Flowers Challenge.


Original isn't it? A craft flower necklace. Now you don't have to head to your favorite jewelry store to accessorize your look. Just pop into your craft closet and create your own accessories. I'm thinking this creation combined with a strappy white dress would be perfect for a brunch out with the girls. Or, add it to a rust silk sari and you've got an evening look. You probably won't find anyone else wearing the same thing or even something similar. Isn't that the best thing about craft?

To build this creation, here are some of the things you will need.

1. Some ear wire hooks and open jumprings to provide the framework.


2. Some Iridescent Round Sequins for support. 


3. And of course, you need some craft flowers. We used the boutique elements vintage Symphony Flowers and the vintage Petite Daisies.


And that's about it. Get working on your craft flower necklace today. We'd love to see what you come up with. Also drop by our Craft Flowers Challenge and send in your submissions. Just 12 days to go and 2 vouchers of Rs. 1000 each up for grabs!

Saturday, July 14, 2012

Craft Time with the Kids

We recently asked our Facebook fans what got them started on craft. A number responded that it was their mother that got them interested in this hobby. For me too, it was my mother. She introduced me to my first cross-stitching kit, my first knitting set and pretty soon I was hooked. Now I have two little children of my own and I find a great way to spend quality time with the kids is through craft. Not only do they learn to work with their hands and keep themselves occupied in something constructive, they also end up with a toy they can play with. 

So this post is all about craft projects for kids. We at ItsyBitsy want to encourage crafting moms everywhere to get their kids started on craft and to offer some inspiration, we came up with this giraffe project. Just a few craft supplies from our store, items which you probably already have at home, can produce a fairly elaborate and intricate outcome.

Here's a glance at the materials we used.


Craft projects for kids are the easiest and most fun to do. You will probably also find that kids are more appreciative too than other recipients. Have you worked with your kids on anything recently? We'd love to know. Leave a comment and tell us. 

Tuesday, July 10, 2012

Give Gift Vouchers Craftily!

A friend of mine turned thirty the other day and we girls all pooled in and got her a bunch of vouchers. She had recently lost a whole lot of weight so the idea was to gift her a new wardrobe. Now I don't know about you but I am totally over the whole 'gift vouchers in an envelope' routine. With a gift so dull, of course I turned to craft to jazz it up. Here's what I came up with. 


While from the outside it looks like a card, the inside contains an envelope in which I could slip in the vouchers. The message of the card was aptly coined. She was a 'Loser' after having lost so much weight and with the vouchers, she could now be a shopper.

Making the inside was actually really simple. I glued an A4 size envelope to the inside of the card and then glued this pretty striped paper from Itsy Bitsy on top of it. I very quickly had a perfectly strong and attractive envelope.


Doing up the front of the card was so much fun! I combined some green pattern paper with a white paper to create the wall and floor effect. Using some chipboard I drew and cut out the shape of the vanity and basin. Some more chipboard covered with foil provided the mirror and a door out of card was inserted. A touch of paint with some black pen detailing completed the look.


Then I got to work on the skinny girl cartoon. I drew it out on a piece of white card. Once I was satisfied, I cut out the shape and painted her body and towel. Some detailing with a black felt tip pin brought her to life and there she was, a happy skinny girl in her bathroom.


Now all that was left was to add some details around the picture. In keeping with our craft flowers theme, I inserted some Itsy Bitsy Daisies on the counter top. Some louvres for the cupboard made it more attractive. I also slipped in a chipboard weighing scale, making sure to get the weight right.

My gift voucher card was ready for presentation. She loved it to bits and exclaimed 'If only my legs were that skinny!' Now that's one remedy even craft can't fix! Yikes!

Thursday, July 5, 2012

The Itsy Bitsy Craft Flowers Challenge

We are overjoyed to announce that we are rolling out our second challenge. We know how much you love our craft flowers, so what better way to celebrate this beautiful embellishment than to build a challenge around it? At stake for 2 talented winners is a voucher of Rs. 1000 each from www.itsybitsy.in so saddle up and get crafting.


Here are the guidelines of the challenge:
  1. You can make anything you like as long as it is NOT a card, scrapbook or invitation.
  2. You must incorporate craft flowers in the project.
  3. At least one set of craft flowers should be from Itsy Bitsy (www.itsybitsy.in)
  4. The contest closes at midnight on 31st July 2012.
  5. In order to submit your entry, click on the blue box provided below, add your image and link to your blog.
  6. Each participant can submit a maximum of 3 entries. 
  7. Participants can withdraw entries at any time before the contest closes by deleting their submission.
  8. Backlinking to old projects is not permitted.
  9. 2 winners will be selected and will receive a voucher of Rs. 1000 each, redeemable at www.itsybitsy.in
To give you a taste of the craft flowers on offer, here are some of our flagship products. You can shop for these and other craft flowers by clicking here.


And if you're wondering how we created the photo frame pictured at the top, we took great pleasure in using our brand new product, a craft photo frame. We embellished it with some of our craft flowers, a few petite daisies, a splash of paint and voila, we had a one-of-a-kind piece, perfect to showcase special moments.


Happy crafting People!

Sunday, July 1, 2012

Using Craft to Create a Gift

Craft and creative applications of craft have strong transformational properties. With just a few well placed craft accents, you can transform a fairly ordinary item into something incomparable. I had forgotten a colleague's birthday and could only find a box of post-its to give her. It was incredibly dull and drab, hardly something worth presenting or receiving. But with the help of the folks at Itsy Bitsy and their exquisite embellishments, I soon had a treasure to offer.


This is what the post-it box looked like to begin with. Extremely uninspiring sandy brown, clearly not a gift for a woman and certainly forgettable.


Here's a collage of the articles used in the creation, all available at www.itsybitsy.in or their stores in Bangalore and Delhi.


From the color scheme you can tell we wanted a dried flower vintage look to the whole piece. We started with pasting the vintage paper on the jute sheet, which is something really unique. It gives an extremely natural feel to the project but is glue friendly and workable.


This was then glued onto the top of the post-it box providing an even space on all the sides.


Next we arranged the flowers, roses and daisies around the top left hand side corner. Once we were satisfied with the placement, we glued them down.


To add a little character we glued a strip of the jute paper across the bottom right hand side corner. A craft butterfly at the center of this band was the finishing touch.


Voila! The gift box was ready. Perfectly crafted and embellished as if it was purchased that way. It made for a beautiful gift, one that would certainly demand pride of place on my colleague's desk.


Isn't it great how gifts can be created through craft? We'd love to hear from you. Leave a comment or link with details of the gifts you crafted and let's all get inspired!