Saturday, October 27, 2012

There's Nothing More Dimensional than a Box!

We have just a few days remaining before our 'Make It Dimensional' Challenge closes and I figured it was time to do a post dedicated to the theme of the month. We've examined in awe the wonderful entries that have been coming in - 65 so far and we are not just impressed but amazed by the caliber of talent, creativity and style with all you lovely ladies! So I made a couple of gift boxes. And here are all the details.


My first is a Snowflake themed gift box. I usually make cookies, cakes and chocolates for Christmas which I distribute to my neighbors and close friends, so I decided to get started on the boxes in which I would present them. And I have to say, I'm really pleased with the outcome. The base is red pearl card stock from ItsyBitsy and all the die cut snowflakes are made out of ItsyBitsy's thick vellum. I added a scallop edge border can easily be replicated with ItsyBitsy's floral lace border die and finished it off with a snowflake tag on the top. Lovely right?


My second is a more neutral color tone and all occasion box. Once again the box was made out of burley wood pearl card stock and this time I went nuts on the embellishments - using patter paper, chipboard corners, some vintage sparkle florets and finally an easel card tag on the top.

The boxes themselves were really easy to do and I will very shortly be uploading a video tutorial on how to make it. You can check out other video tutorials on our blog.

There's nothing better than a personalized gift box - great for giving special presents or home made treats. And the best part is that its so inexpensive when you compare to the readymade stuff. Both the boxes I made just cost me Rs. 25 each!

Tuesday, October 23, 2012

The Beauty of Black

Whenever I'm stocking up on card stock, I always order extra sheets of white and black. White is of course compatible with almost everything and usually finishes very fast. So this past weekend, I found myself left only with black card stock and had no choice but to make cards with a black base. And to my delight, I found that they can be quite stunning.

For my first project, I stamped and heat embossed a damask stamp to a piece of white card. I love this design and the heat embossing made it more vibrant and glittery. I added a white ribbon and gorgeous ItsyBitsy flower for the bow. I finished it off with a digital sentiment backed by a black glitter foam Victorian Rectangle die cut and a few pretty flowers to accent it. Have to say I was real pleased with the result.

 For my second card, I wanted to add a dash of red. I had a few scraps of pearl red card stock in my stash and used the ItsyBitsy swirly rose die to make some roses. Watch our video tutorial on the Swirly Rose Die to learn more. Then I took a 4 by 6 piece of vellum paper and embossed it with ItsyBitsy's Damask embossing folder. I cut this into diagonals and created the striped background. For the sentiment I used ItsyBitsy's scallop square die to cut three layers and touched these up with my freshly made roses.


I still have a couple of sheets of ItsyBitsy black card stock with me and must admit, I can't wait to get back to creating cards with them. Has black brought out the best in you too? Tell us all about it.

Wednesday, October 17, 2012

Tips for Topping Craft Challenges!

 Every month a host of craft challenges are announced which form the inspiration for the month for us crafters. I really enjoy scouting all the blogs and checking out the submissions for each topic. I've seen some really awesome work but sometimes due to external factors, the submission doesn't fare as well as it potentially could. So I thought I would dedicate a post to giving a few tips on how to top craft challenges. These by no means will guarantee success, after all your work has to be best to win a challenge. But these will definitely help give your work its best appearance.

Photography is KEY
There was recently some discussion on this topic on one of the Facebook communities and I realized that a lot of us are thinking about it. Your work is being judged so it has to look its best.  Bloggers like Kavi Tha, Pooja of Lightbox Creatives and of course our reigning craft queen Mallika of Aola's Handmade Cards have got this nailed! Here's how to take great pictures of your work
  1. You don't have to have a really fundoo camera to take great photos. I use my phone camera for most of my photos but I always make sure to do the following:
  2. Always take photos in the daytime when you have the most natural light. We crafters are often times night owls crafting through the wee hours of the morning but wait till full on morning before you take a picture and submit your work.
  3. A white background best compliments any creation. 
  4. Ideally use a photo light box for photographing your work. It is really easy to make. Here is a link which gives step by step instructions. 
Here is an example of a card photographed with and without a light box. Which do you think looks better?

Without Light Box - Busy Background
With Light Box - Plain white background
Edit your Photos where Necessary
We are living in the age of digital cameras so take advantage and edit your photos where necessary. I have a Mac and use the Iphoto's application for my photo enhancements. Picasa is also a great tool. It isn't cheating because your work is still your work, it's just being made to look its best. Here is a photo of a card I made before and after editing. I have just cropped the photo, removed the shadows, improved the exposure and softened the edges.  Doesn't it look so much better after the touch ups?
Before Editing
After Editing
Avoid Hand Written Sentiments
The very best card can be ruined with a hand written sentiment. I'm really sorry if this sounds harsh but it's true. Unless you have a calligraphic handwriting, stick to stamps, printouts, tags (Itsybitsy has a fabulous range) or recycled sentiments from other cards. Stencils are also not a bad idea. Here is an example of a card with a handwritten sentiment against a stamped one. See what I mean...

Many Good Submissions or One Great Submission?
This I leave for you to decide. Should you submit many good submissions and hope for the best or make one great submission and again hope for the best? I really don't know which works best but from my perspective - I just want to craft and craft challenges offer a great purpose to my work. So if I have the time, I think I'll be submitting the maximum for all challenges - Ha!

So those are my pearls of wisdom. I'm sure you guys have more suggestions and tips. Would love to hear them and looking forward to seeing more fabulous submissions of our Make it Dimensional Challenge where we will name 2 winners and 6 finalists all of whom will receive a badge for their blogs.

Saturday, October 13, 2012

The ItsyBitsy Butterfly Die

First off, we wanted to say that we're so kicked with the response to our 'Make it Dimensional' Challenge. We're not even half way through the month and we've got a staggering 25 entries, some of which are absolutley stunning. And we want to announce the plan for the winners: Since we always recognize TWO winners who get Rs. 1000 vouchers each from our store, we will also be announcing SIX finalists, who from this challenge on will get a badge to display on their blogs. So keep the entries coming crafters! There's much at stake!

The ItsyBitsy new range of cutting dies called Thin Cuts, continue to impress me. They're really affordable and work just like all the other dies, making crisp clean cuts in a variety of designs. I just tried out the ItsyBitsy Butterfly Die and have to say, I simply love it. The set of 3 comes with 3 different butterflies, perfect to embellish a card project or scrapbook layout. Here is a card I made using the die along with a close up of the butterfly.


I've been toying with the idea of coloring outline stamps for the longest time. I was finally ready to take the plunge and now I'm addicted. I just love all the shading and touching up. Such a pleasure!! I used the ItsyBitsy Oval die to cut out my colored stamp and backed it up with a green glitter foam scallop oval. I placed both on top of a piece of white card stock embossed with one of my favorite ItsyBitsy Embossing folders. The card was finished with my freshly die cut butterflies and some glitter blooms from ItsyBitsy.

I've made another video demonstrating the die and how it works. You can watch it here. To stay connected with all our tutorials and demos, subscribe to our YouTube Channel.


Have you tried out our Thin Cuts dies? Let us know! We'd love to hear feedback and see your projects. Leave a comment and tell us all about it.

Wednesday, October 10, 2012

A Look at ItsyBitsy Swirly Rose Die

It's time to celebrate again as we have just launched our range of ItsyBitsy Cutting Dies and we've called them Thin Cuts. Have you ever known a die to cost as little as Rs. 249? Don't think so! But that's the starting price for our dies. And the quality, functionality and design is on par with all the international ones! Here's a look at the ItsyBitsy Swirly Rose Die

The swirly die is priced at just Rs. 299 and with it you can make the most gorgeous roses. Gotta say I just love that I can make any color rose and don't have to buy a bunch of pre-made ones anymore. I created mine in varying shades of pink and here are some close ups. This is the first time, I made the card to compliment the embellishment rather than the other way around! Ha Ha! Here are a few close ups of the roses. I'm actually really pleased with how they turned out.


I've also made a video tutorial demonstrating how the die works with a Big Shot Machine and how to use the resulting die cut to make a rose. You can watch it here:


Have you tried any of the ItsyBitsy Thin Cuts dies yet? We'd love to hear about it. And if you haven't already, it's time to connect with us on Facebook. We're constantly offering freebies, discounts and special offers and just recently gave away glitter alphabets to 200 lucky fans. So don't waste any more time, 'LIKE' our Facebook page today! 

And the Winner of our Blog Candy Is...

Crafters! We're so kicked with your unprecedented support of our 100 followers blog candy post. Your support, encouragement and enthusiasm is what got us 47 new followers! Woo hoo!!

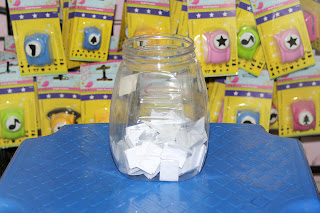
On Monday 8th October at 6:30 in the evening, we held the draw for the winner at our ItsyBitsy store in Banashankari Bangalore. We asked one of our customers to draw the names out of a jar and lo and  behold - Sathya of sathypapercrafts was the winner! Congratulations to Sathya! You will very soon be receiving your hamper of craft supplies worth Rs. 2722! We can't wait to see what you come up with!

Here are some photographs of the lucky draw. Thanks once again to all of you, our patrons, fellow crafters and dear friends for your fabulous support! Love Ya!


Saturday, October 6, 2012

A Closer Look at our Blog Candy

We have just 2 days to go before randomly selecting a winner who will win our awesome candy to celebrate 100 followers. The total value of the candy is Rs. 2722 and we thought it would be great idea to give you a closer look at what you might be winning. Needless to say - this will be a picture heavy post.


So if you haven't already made yourself eligible, it's time you did! Visit our blog for all the details and maybe, just maybe, you will walk away with this amazing stash of craft supplies!

Thursday, October 4, 2012

Winners of The ItsyBitsy BIG B Challenge


The results are in! We're ready to announce the winners of the The ItsyBitsy Big B challenge where you could create anything you like as long as it incorporates any 2 of the Big Bs - Beads, Brads, Bows and Bling. We had 64 awesome entries and spent the last 3 days agonizing over the creations and finally we are ready to crown the ItsyBitsy Queens of Craft for September 2012.

And so the 2 winners who will each receive a voucher of Rs. 1000 from www.itsybitsy.in are......

Mallika from Aola Creations for her incredible rotating frame and Sharon Gurnhill for her fantastic baby boy card.
Mallika's submission from Aola Creations

Sharon's submission from Nellie's Handmade Cards
We wanted to mention some of the other entries that totally wowed us. These are listed in no particular order. Gotta say it Ladies, you lot are SUPER TALENTED.

Poornima's Recylcled Booklet Box
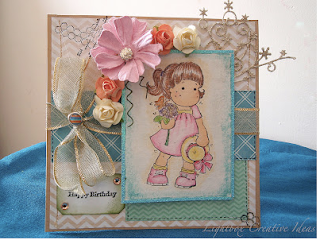
Pooja's Card from Lightbox Creative Ideas
Sharada's Mirror Mirror on the Wall Card.
Dr. Sonia's Chariot Card
Juhi's Turquoise and Brown Card
Kavitha's Card from Kalalayaa Art Studio

Poornima's Recycled Booklet Box
Pooja's Card from Lightbox Creative Ideas
Sharada's Mirror Mirror on the Wall Card
Dr. Sonia's Chariot Card
Juhi's Turquoise and Brown Card

Kavitha's card from Kalalayaa Art Studio

We want to congratulate the winners and all the finalists for their outstanding work. We are constantly in awe of your creativity, taste and style, not to mention the close camaraderie all of you share. We look forward to more exciting submissions for our next challenge - The Make It Dimensional Challenge - and to crown the next Queens of Craft!

Mallika and Sharon, please write in to info@itsybitsy.in to claim your voucher and badge from www.itsybitsy.in.

Happy Crafting Folks!


Tuesday, October 2, 2012

The ItsyBitsy 'Make it Dimensional' Challenge

Hi there crafters! We've had an absolutely STUPENDOUS response to our BIG B challenge. 64 entries!!! And each one so beautifully crafted. In all honesty we are having a really tough time assessing the winners so we will need a couple of days to reveal them. Till then, get your crafty fingers ready for our next challenge - Make It Dimensional. Create anything you like as long as it is 3 Dimensional.


As you can see I'm still working on my friend's baby scrapbook and this page is for her baby shower photographs. When you open this page, it looks like the picture above. But then in an effort to make it interactive and fun (after Dr Sonia's inspiring comments on my Easel Card Post) I've introduced a party setting pop up element. 


My friend has more than 50 photographs of the baby shower so I wanted to provide for as many picture spots as possible. So on Shubhra's suggestion, I introduced gate fold picture holders. Each holder can hold 5 photographs and with 3 of them, I can incorporate a total of 15 photographs. Fantastic!


I've embossed all the picture holders using this super cute cupcake embossing folder from ItsyBitsy. Here's a closer look. 
Here are a list of products I used for this page:


Now to the challenge specifications:
  • You can make, decorate or embellish anything you like as long as it is 3-dimensional in some way. 3d embellishments will be accepted as well.
  • The contest closes at midnight on 31st October 2012.
  • In order to submit your entry, click on the inlinkz button provided at the bottom of this page, add your image and link to your blog.
  • Each participant can submit a maximum of 3 entries. 
  • Participants can withdraw entries at any time before the contest closes by deleting their own submission.
  • Backlinking to old projects is not permitted. All submissions have to be created after 2nd October 2012.
  • In your blog post, create a link back to this page - The ItsyBitsy Make It Dimensional Challenge.
  • 2 winners will be selected and will receive a voucher of Rs. 1000 each, redeemable online at www.itsybitsy.in