Showing posts with label Die Cutting. Show all posts

Tuesday, May 30, 2017

Dream Cut - Manual Embossing & Die Cutting Machine

Hello friends,

This is Tanvi & I am here with a very special product today - the newly launched DREAM CUT, the first die cutting machine brought to you by an Indian company! 


I have been playing around with this for a few days now & am loving its sleek & compact design & let me tell you it is compatible with most dies! Isn't that wonderful!


Some distinct features of the Dream Cut
  1. Body is made up of high impact Polymer with smooth edges for easy handling.
  2.  The platform & the frame is made of high quality, non – corrosive Alloy.
  3. The cog wheels ( gears ) are made of high speed steel for durability & rough use.
  4. The gear tips are smoothened to give excellent user experience.
  5. The Roller diameter is larger than many other standard machines to increase the point of contact with the cutting die which enables to get a superior cut quality.
  6.  Roller mounts are designed to give a bit of cushion which helps in proper pressure distribution on the cutting die.
  7. High precision in the Casting & Assembly of this unit will last a long time compared to other machines.
  8. The cutting plates are made of moulded Acrylic which has self-healing properties compared to Acrylic sheets which are used in other machines.
  9.  The Bevelled edges of the cutting plates is a great feature which puts slow pressure on the Rollers & really gives you a Dream Cut experience!
  10. This machine is designed for crafters & promises to give an ultimate user experience!
  11. Spare parts & support from Itsy Bitsy will be made available.
  12. The icing on the cake is the pocket friendly price.
The Dream Cut comes with


REMEMBER these points & you can never go wrong with your cutting sandwich
*The white base platform plate 'A' is NOT the cutting surface
*Plate 'C' is thicker than Plates 'B'
*Plates 'B' & 'C' both have bevelled edges 
*Both the plates 'B' are of the same thickness
*By using the right combination of the plates 'B' & 'C' most standard dies can be used in the Dream Cut
*When using intricate dies add one or two layers of the accessory cutting pads to act as a shim

Here is a video, an answer to many queries regarding its cutting & embossing feature - 


Along with the Dream Cut Itsy Bitsy also introduces 3D dies in four designs to create fun & magical party decor in minutes.


Here are some images of the product launch party decor using these dies -


The Dream Cut is available online (remember it comes with free shipping) & can be purchased here or visit your nearest store.
Thank you for visiting today!

Wednesday, March 1, 2017

Set of CAS cards with Fairy Flower Thin Cut Dies

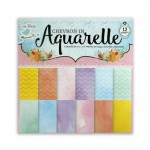
Hello everyone, it's Juhi. Today I'm sharing a set of 4 note cards that I made using the Thin Cut Fairy Flowers Dies and patterned paper from the Chevron in Aquarelle 12x12" Paper Pack.

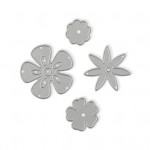
These cards measure 3 1/2" x 4 7/8" and are perfect for gifting as a set. I just love the Fairy flower Thin cut dies, it has 4 pretty flower dies which can be used individually or layered on top of each other.  I wanted to keep my cards Clean and Simple (CAS) hence I've used one type of flower and left a lot of white space on the cards.

To make the cards, I first started by cutting and scoring the white cardstock to 3 1/2" x 4 7/8". I then proceeded to created the background for the cards by cutting 4 different patterned papers from the Chevron in Aquarelle 12x12" Paper Pack to 3 1/4"x 4 5/8".

For the first card I stuck the blue chevron patterned paper at and titled at an angle from the edge, as shown in the image below. I then flipped open the card and trimmed of the excess. 

For the second card, I first stuck the orange chevron patterned paper in the middle of the card front. I then placed a piece of white cardstock slightly bigger than half the length of the orange patterned paper as shown in the image below. I drew a diagonal line on it with a pencil and cut it with a paper trimmer. I then stuck it on top of the orange patterned paper with double sided foam tape.


For the third and fourth card fronts I first stuck the patterned paper in the center of the card front and stuck smaller white cardstock panels on top.

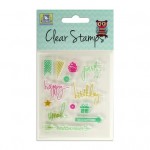
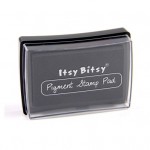
Once the card backgrounds were done I stamped the sentiments onto strips of white cardstock using Itsy Bitsy Black pigment ink. I marked a dot in the middle of the strip and cut out till the dot from both ends to create a fish tail banner.
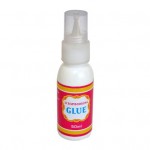
I then die-cut the flowers using the Fairy Flowers dies from handmade paper using shades similar to the patterned paper backgrounds and played around with their placements on the cards. Once I was happy with the placement I stuck them in place with liquid glue.
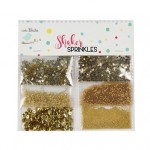
I also added some details like stems, leaves and a vase with a pen. For the flower centers I put dots of liquid glue, poured some gold shaker sprinkles onto them and simply shook off the excess.


I finally stuck or stamped on the sentiments on the cards to finish them. Here's a closer look at each of the cards.


Supplies Used:


Friday, February 10, 2017

Mixed Media creation with ALTERABLE PHOTO FRAME and Thin cut dies

Hello friends 

Today I am here to share a creation I made using Alterable photo frame and Thin cut dies


These amazing alterables are whitewashed making it easy for you to decoupage. 
Colour, embellish, decorate or decoupage to give a contemporary or rustic look, the possibilities are endless. Perfect for DIY projects and home decor.


Here is a step by step photo tutorial on how I made this  Mixed Media creation with Alterable Photo Frame and Thin cut dies


I started with covering the frame with pattern papers from 

HEART 12X12 INCH STACK PACK  

Using the 

DECOUPAGE GLUE GLOSSY


I painted the white visible parts inside the frame with  

METALLIC PAINT PINK 


Once the frame was dry I added chipboard embellishments over the edges by cutting them in desired size


Further I sprayed it with 

COLOR SPLASH HOT PINK


THIN CUT DIE ORNAMENTAL DOILY  


die cuts in various parts of the frames in blue :)


Finally decorated the frame with 

MARGARITA OCEAN MIST and BLANCHE OCEAN MIST


I also added splashes of  

METALLIC PAINT TEAL BLAST to complete the vibrant look of the frame. 


I totally enjoyed playing along with colours and the die :) 
Hope I have inspired you join us at the Itsy Bitsy challenge- February 2017 Challenge – Creations using Itsy Bitsy Thin cut dies 
Submit your creations.... We'd love you to join us!

Wish to see more of my creations for inspirations, please click here 


 Regards 

Tuesday, December 27, 2016

Flip album with with Lamour paper pack


Hello Friends ,

Today I am here to share a creation  with Lamour paper pack  from Itsy Bitsy 

This gorgeous paper pack is great for scrap-booking, card making, banner making, DIY and other creative projects .


I have created a Flip album with Lamour paper pack, 


You can call this a one sheet wonder mini album as I have used only one single 12x12 cardstock as base of the album


This is a quick and easy project sized 6"x 6"


Here it is open


Steps to create Flip album with with Lamour paper pack

  1. Score the 12x 12 sheet at 6" in the centers then just cut one side to 6" 
  2.  Fold the scored lines and your flip album is ready to be decorated 
  3. I have used all the different sheets of the pack to decorate each sides of the album 

The paper pack comes with a sheet of sentiments and borders which I have used to decorate the cover and inside pages  


Here I have created an pocket using the wrmk envelope punch board


Isnt this something you all would love to try :)
 wish to see more of my creations for inspirations  then please click here 

warm regards 
Sharada Dilip

Supplies used -