Showing posts with label itsy bitsy dies. Show all posts

Wednesday, March 1, 2017

Set of CAS cards with Fairy Flower Thin Cut Dies

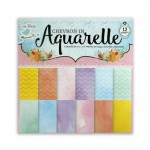
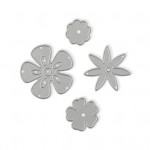
Hello everyone, it's Juhi. Today I'm sharing a set of 4 note cards that I made using the Thin Cut Fairy Flowers Dies and patterned paper from the Chevron in Aquarelle 12x12" Paper Pack.

These cards measure 3 1/2" x 4 7/8" and are perfect for gifting as a set. I just love the Fairy flower Thin cut dies, it has 4 pretty flower dies which can be used individually or layered on top of each other.  I wanted to keep my cards Clean and Simple (CAS) hence I've used one type of flower and left a lot of white space on the cards.

To make the cards, I first started by cutting and scoring the white cardstock to 3 1/2" x 4 7/8". I then proceeded to created the background for the cards by cutting 4 different patterned papers from the Chevron in Aquarelle 12x12" Paper Pack to 3 1/4"x 4 5/8".

For the first card I stuck the blue chevron patterned paper at and titled at an angle from the edge, as shown in the image below. I then flipped open the card and trimmed of the excess. 

For the second card, I first stuck the orange chevron patterned paper in the middle of the card front. I then placed a piece of white cardstock slightly bigger than half the length of the orange patterned paper as shown in the image below. I drew a diagonal line on it with a pencil and cut it with a paper trimmer. I then stuck it on top of the orange patterned paper with double sided foam tape.


For the third and fourth card fronts I first stuck the patterned paper in the center of the card front and stuck smaller white cardstock panels on top.

Once the card backgrounds were done I stamped the sentiments onto strips of white cardstock using Itsy Bitsy Black pigment ink. I marked a dot in the middle of the strip and cut out till the dot from both ends to create a fish tail banner.
I then die-cut the flowers using the Fairy Flowers dies from handmade paper using shades similar to the patterned paper backgrounds and played around with their placements on the cards. Once I was happy with the placement I stuck them in place with liquid glue.
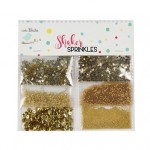
I also added some details like stems, leaves and a vase with a pen. For the flower centers I put dots of liquid glue, poured some gold shaker sprinkles onto them and simply shook off the excess.


I finally stuck or stamped on the sentiments on the cards to finish them. Here's a closer look at each of the cards.


Supplies Used:


Friday, January 6, 2017

Valentines waterfall album


Hello Crafty Souls,


Happy New Year , 


I am all excited to be a part of the Itsy Bitsy Design Team yet again this Term (Jan 17- june 17) !


I have always been a Big Fan of Itsy Bitsy stores and even till date I love to Shop at the stores more than Online , this is where it all started and now taking this to yet another Level... 


Thanks to Rashmi for having me over !

Today I am here to share a Valentines Theme Waterfall Album , I am a big Fan of mini albums and this ones my all time favorite ! 


I have used the Scalloped Flower die and created these roses for the album cover , this flower die is super sharp to cut and easy to assemble :)


I have used thin cut scalloped Circle dies in the background along with chipboard elements and completed the cover page 


Now moving toward How I decorated the album inside 


Further for the waterfall folio inside I have Cut 4 pieces of Red card stock at 4 x 4 1/2 inches. Scored the card stock at 4 inch and folded them to layer on each other 


Up close of the water fall and patterned paper used. 

You can make a pocket for the inside left side of the book. I cut a solid piece of card stock at 5 1/2 x 4 1/2. I scored on the 5 inch and 1/2 inch side. I put the non scored side diagonally in the paper trimmer to give it the pocket effect. I cut a piece of patterned paper slightly smaller to place on the front of the pocket. 


Here is the inside with the pocket attached. 


This is a fun pocket holding the tags. Up close of the pocket and tags. I added a Chipboard embellishments and lace to jazz up the pocket. I cut out 2 tags using tag die.


I totally love the stack pack collection as they are perfect for the V day creations isnt it ?


Supplies Used 


Now you know what to pick for your Valentines day creation this year :)

Hope to have inspired you 


Have a crafty day ahead 


see you soon


regards 


Wednesday, December 14, 2016

Nesting Dies Ideas

HI 
 Lekha here with my new post with Itsy Bitsy dies and would be playing around with few easy techniques to create some simple and fast cards. I am playing around with nesting dies (scallop heart die and decagon die) and 220 gsm thick white cardstock.
For the first card I have used the  decagon die to create a de-bossed effect. You can use the other side with embossed effect. 


I have placed the nesting dies in a eccentric pattern and taped it to the cardstock. While embossing place the first cutting plate on Tab 1(using Big Shot machine) followed by rubber pad and than second cutting plate. 


 Here is the deboss look.


I have hand cut the butterfly and stamped the flowers and sentiment from the hope and smile stamp set.


For my second card I have used the scallop heart die to create a window and frame for the front panel of the card.


For the window use the smaller die and for the frame use both smaller and larger one from the set. 


For stamping I have used Itsy Bitsy chalk ink trio. I love how juicy are these chalk inks. And you get three colors in single ink pad. 


The leaf background comes from the leaf die I cut multiple time from a single piece of card stock and later used it as a stencil. This way you can even use your scraps and create interesting backgrounds. 


Another interesting use of nesting dies can be in creating embellishments. Here are few I made. 
The birdie comes from my handmade resin embellishments stash and the papers are from the new Itsy Bitsy launch chevron aquarelle papers and used flowers to complete the shaped tags.


 I have used rose from the angle rose carnation collection, I totally love the roses from this set.


Also, you can maximize the use of dies by using them as templates for shaker embellishments. Here I have used WRMK Fuse tool with the largest die from the decagon die set as the template to my shaker pocket. I love creating shakers and fuse tool is one great tool to have in your stash. You can use them with your cards, embellishments, scrapbooks etc...


And the hearts are cut in felt  from the smallest scallop heart die. These dies cut felt like butter, you can check my last post on felt plushies for more ideas. 


Supplies used:
scallop heart die 
 decagon die
chalk ink trio
hope and smile stamp set
chevron aquarelle papers
flowers
WRMK Fuse tool 
felt  
lace trims
sequins

Hope you liked these ideas to maximize the use of your dies. And do not forget to join us for the #ITSY BITSY CHALLENGE 3 .