Hello arty-crafty folks,
It’s Thursday and as usual
I’m back to share another crafter’s story with you. This week the talented
Crafter to be in the ‘Spotlight’ is Shefali Agrawal, who originally belongs to Rajasthan but now is
a resident of Bangalore.
Shefali is a true crafter at heart as she not only loves
crafting but also enjoys shopping for craft supplies. What was earlier summer
holiday fervor, turned recently into serious crafting passion for Shefali. She
adores the art of decoupage and is also keen to try out different card making
styles.
How did Shefali get into crafting,
what inspires her, what are her tips for fellow crafters, her favourite
quote, how would she contribute to the crafting world if she had magical
powers? Read answers to all these questions, discover more about her
interesting journey and catch a glimpse of a step by step project by Shefali
in this interview. Don't forget to leave your
comments for her.

Rashmi Closepet, MD, Itsy Bitsy: Tell us a bit about yourself & your background?
Shefali Agrawal: Hi, I
am Shefali. I am from Beawar, Rajasthan, but I am staying in Bangalore for last
3 years. I am a software engineer by profession and a crafter at heart! I also
love reading, travelling and shopping, especially for craft supplies.
RC: How did you get into crafting?
SA: I used to do a lot of art and craft during
school summer holidays- like painting, ceramic clay work, up-cycling stuff etc.
I got into serious crafting a year and a half back when I attended a stained glass
mosaic workshop in Bangalore. That inspired me to try out other forms of
crafting as well.
RC: What is your favourite type
of craft?
SA: I love
decoupage. I am also trying my hands at card making.
RC: What are your favourite
products at Itsy Bitsy?
SA: All the lovely stamp sets and the chalk
paints.
RC: If you had magical powers,
how would you contribute to the Crafting world?
SA: I
would definitely create infinite storage space for crafters. I am always
looking for space to store new supplies and searching for the ones I know I
have kept somewhere J So, I guess, creating huge storage space for
crafters would make them utterly happy!!
RC: Your prized possession in your
craft stash from Itsy Bitsy?
SA: Chalk
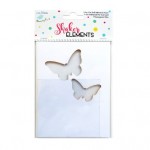
Paints and Shaker elements.
RC: How would you describe your
style of crafting?
SA: Whimsical. I like to try out whatever catches
my fancy at that time and I am always looking for new things to learn.
RC: How do you organize your
time for crafting?
SA: During
the weekdays, it’s mostly in the evenings after work. Even I don’t have time to
create something, I love to sit and watch videos of my favorite crafters on
YouTube. On weekends I spend most of my time crafting J
RC: Tips for people who want to
craft
SA: I would suggest that you don’t wait for
something to strike your fancy. Start small if you will!! Make time for it as
you can and keep trying.
RC: Your all -time favourite quote?
SA: “One day, or day one. You decide!”
Shaker
Grid card using Happy Bird-day clear stamps set
Step 1: Take a white cardstock and draw a grid
on it.

Step
2: Use a pair of scissors or a craft knife to cut out the inner squares to get
a grid frame like this. I created two grid frames like this. In case you have a
grid die, you can use that to combine step 1 & 2.

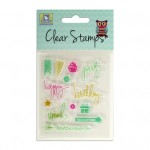
Step 3: Take the Clear Stamps - Happy
Bird-Day stamp set from Itsy Bitsy
and stamp 2-3 images of all the birds on a white card stock. Then color the
images and cut them out. Also stamp and cut the happy bird-day sentiment from
the stamp set.


Step 4: Cut out a
background for the card. I used the green paper from chevron in Aquarelle
cardstock and cut it slightly larger than the grid.
Step 5: Now its time
to assemble the shaker card. I stuck one of the grids on the green base, and
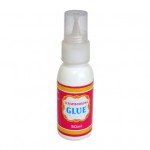
added double sided tape on it. Then I used some scrapbooking glue and used it
to stick some bigger shaker elements to the base of the card.

Step 6: Next I added
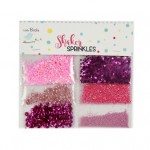
shaker elements from Shaker Sprinkles in red, green and silver and
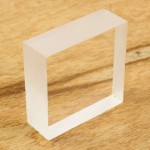
sealed them off using a piece of acrylic sheet slightly smaller than the grid
window size.

Step 7: I used the
other grid cutout to finalize the placement of the little birds on the card.

Step 8: I used some
double sided tacky tape to stick this window on top of the acrylic sheet and
then used foam dots to stick the little birds on top of that. Foam dots provide
a nice raised look to the cut outs and I love the effect. At the last minute
I also remembered to make space for the sentiment banner and added that as well.

Close
up shots of the card:


Here are a couple of Shefali's other awesome creations:


Many congrats Shefali for being the CRAFTER IN THE SPOTLIGHT – ITSY BITSY!!

You will receive Rs.500/- Itsy Bitsy gift voucher 😊😊 & a Crafter in the Spotlight badge, which can be proudly displayed on the side bar of your blog and other platforms. Looking forward to many more creations, Happy Crafting!