
Hey there, it’s Juhi with my first post as an Itsy Bitsy
Design Team Member. I’m super excited to be a part of this talented team. In
today’s post I’m going to show you how to make a shaker cards using Itsy
Bitsy’s newly released Shaker card elements line of products. Before we get
started with the card let’s talk a little about what exactly are shaker cards.

What are shaker cards :
Well, shaker cards are cards with a shaker element on them. Accents/embellishments
on the card will move around when you shake the card, hence the name ‘shaker
card’. The moving elements could be sequins, tiny beads or anything small,
non-bulky and light weight. These are usually kept in place under a piece of
acetate or transparency.
Shaker cards are interactive and fun; they have been around
for some time now and they surely are here to stay! Making a shaker card is not
as difficult as it may seem, they usually involve cutting out a window of the
desired shape on the card front, adding a layer of acetate below it, and sealing
the shape with foam tape to hold the sequins in place.
So without further delay let’s see how to make a shaker card
using Itsy Bitsy’s Shaker Card Elements. The Shaker Card Elements are just
perfect for making awesome looking shaker cards and what’s more they are incredibly
easy to make. So let’s get started
 You will need:

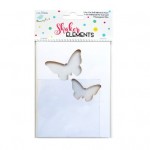
- Shaker Element Wings of Beauty
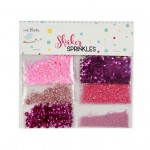
- Shaker Sprinkles in a color of your choice
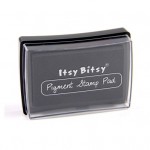
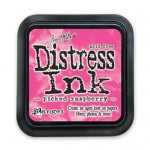
- Black pigment ink for stamping (optional)
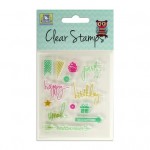
- Happy Birthday Sentiment stamp (optional)
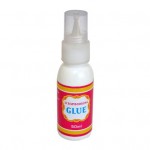
- Liquid PVA glue
Scroll to the bottom of this post for a complete list of products along with links.

The Shaker Element pack contains – 1 prefolded cardstock
base, 1 piece of acetate, 1 double sided foam adhesive sheet pre-cut to the
shaker shape, 1 pre-cut top panel for the shaker card.

I began by inking up the top panel for some added interest.

I then flipped it over and applied liquid glue around the
butterfly shape and placed the acetate sheet on it.

Peel the paper backing off from one side of the pre-cut self-adhesive
foam and stick it onto the back of the front panel above the acetate sheet.

Pour the sequins into butterfly shapes, take care not to
fill too much, the sequins, beads and sprinkle should have enough space to move
around. I used pink Shaker Sprinkles from the Itsy Bitsy store, each pack of
Shaker Sprinkles comes with 6 packs of beautiful, color co-ordinated sequins,
and beads which you can mix to create your own custom shaker card sequin mix
and what’s more, each pack of Shaker Sprinkles will last you through multiple
shaker cards.

Now peel the paper backing off the foam carefully, holding
the panel in place.

Cover up the butterfly shapes with the sequins in them with
pieces of pink paper big enough to cover each butterfly completely. Press hard
to ensure there are no gaps.

Flip and stick the panel onto the cardstock base. I trimmed
my front panel a bit from all sides so that it was a little smaller than the cardstock
base. I also used a pink card base instead of the white one that comes with the
kit.

I finished my card by stamping “Happy Birthday” and adding a
few sequins.
Now wasn’t this easy? So go ahead make one and impress your
friends and family!

Elegant card and beautifully explained juhi, its perfect all together with beautiful color...loved it
ReplyDeleteThanks so much Roshni!
DeleteBeautiful card Juhi...love how you got the amazing ombre' effect using card stock in two colors and the ink !!
ReplyDeleteThank you so much Suman!
DeleteBeautiful card Juhi!!! Congrats on being Itsy Bitsy DT! :)
ReplyDeleteHugs
Suchi xx
Thank you so much Suchi!
DeleteIt's really awesome and very well explained..
ReplyDeleteI will try it soon...
Thank you so much for sharing.. :)
Gorgeous card, Juhi! And great tutorial too! Thanks so much <3
ReplyDeletexx Suchi
This is really pretty. Loved the snooth blending of pink shade ;) the precut foam sheet that too with adhesive backing is great!
ReplyDelete