Good Morning, this is Tanvi & welcome to my first post here!
Those of you who follow me know how much I love decoupage & Itsy Bitsy has a wide range of not only decoupage paper, wood & tin blanks and we have recently launched decoupage glue too. Available in both glossy & matte finish this glue is acid-free and can be used as a topcoat and sealer. It can also be used on surfaces such as wood, glass, paper & fabric (not wearables). This glue is great for image transfers and sealing quilled embellishments as well.
Sharing a decoupage picture tutorial (skill level - beginner to intermediate) of a mini key holder using the glossy decoupage glue.
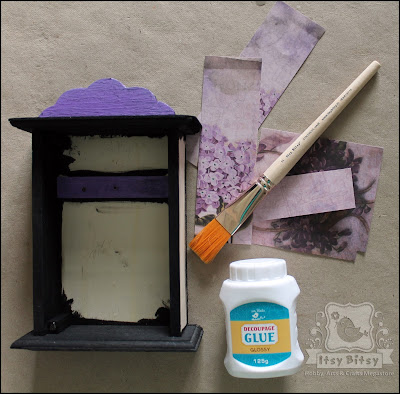
1. Remove all the hinges, hooks & screws . To prevent paint on the front glass mask the edges with washi tape/masking tape/paper tape. I wanted a crackle finish on the frame of the door, so I chose to paint it in black. Let the paint dry & apply a generous coat of crackle medium . Let dry again.
2. Once dry paint it with acrylic color to coordinate the decoupage paper. Cracks appear as the paint dries. TIP - If you want the cracks to be of the same color as your top coat, use the Mod Podge single step crackle medium, this creates egg shell cracks on the surface.
3. Next measure the inside & outer sides of the key holder & trim the paper to size.
I selected a gorgeous hydrangea paper & trimmed it such that the bloom shows through the glass door. Glue the paper inside & on both the sides. Let dry thoroughly & once again apply 2 - 3 coats of decoupage glue. This will seal & protect the paper. Later screw the hinges & hooks back.
4. Here is the finished key holder.
Some close ups -
Used silicon glue to stick the chipboard key & border -
Hope you enjoy this tutorial & should you have any query feel free to leave it in the comments below.
Stay tuned as we begin our design team reveal in the next post!
Until then Happy Crafting!
Link to products -


This is beautiful ! Thanks for the lovely tutorial !
ReplyDeleteThank you Sharada!
DeleteBeautiful!!!
ReplyDeleteThank you!
DeleteLovely work tanvi shah.
ReplyDeleteAnandhirajan
So glad you liked it Anandhi! Thank you!
Deletei lovvvvvvvveeeee Hydrangea...:)
ReplyDeleteIsn't it lovely!
Deleteit definitely is!!
DeleteLovely
ReplyDeleteNow that's a simple and quick tutorial...
DeleteAwww... This is wonderful!!! Those chipboard borders to the sides look stunning!!!
ReplyDeleteThank you!
DeleteWow. Loved how you totally transformed a plain key holder to such a warm lavender Hydrangea themed holder.
ReplyDelete- Khushboo Gandhi
Thank you!
DeleteCongrats on your first post Tanvi and with something you excel in too!!
ReplyDeleteCheers
Dr Sonia
Thank you so much Sonia! Yes, I love decoupage!
DeleteCongratulations Tanvi on your first post here! What a wonderful transformation of the key holder! Brilliant use of the lovely hydrangea paper!
ReplyDeleteThank you Rashmi! :-)
DeleteAmazing work Tanvi 😍
ReplyDeleteAnd congratulations for the golden opportunity 💐