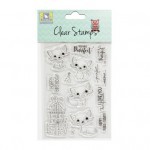
Hello everyone, it's Juhi with my first post for February. In today's post I'm sharing 3 romantic cards since Valentine's Day is just around the corner. I've used the adorable Purrfect Birthday stampset from Itsy Bitsy. All the products used are listed at the bottom of the post.
I will be showing you how I made these cards, with the focus on 3 ways to create backgrounds using chalk inks. So let's get started.Card 1:
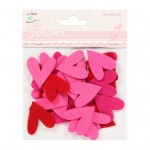
- I started with heart shaped felt die-cuts and a piece of white card-stock
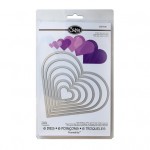
- Trace out a heart outline using a heart die on the piece of white card-stock
- Add red chalk ink within the outlined heart with any soft bristled brush. Use a light hand and add a little color in each step,
- Continue till you are satisfied with the result. It is ok if the results are uneven and splotchy as we are going to cover this up with felt hearts and only a little will show through.
5. Cover up the traced heart outline with felt hearts. I stuck them in place with liquid glue.
6. Make sure you go beyond the outline.
7. One the glue dries die-cut the heart.
8. Take another piece of white card-stock slightly smaller than the front of your card-base. My card-base measures 4.25"x5.5" so I chose my panel's size to be 4"x5.25". We want to create a red halo around the die-cut heart. In order to do this very lightly trace out the die-cut heart with a pencil. Now, similar to step 3 and 4 above add chalk ink with a soft bristled brush. Start at the centre of the heart, move outwards and build up color slowly. Be careful not to apply too much pressure as this will lead to ink splotches. We want to create an ombre effect, which means the red will be darker close to the heart and lighter towards the edges, so it is important to stroke the brush from inside the heart to the outside.
9. Now, stamp out images of 2 cats facing each other from the "Purrfect Birhtday" Stamp set.
10. Color and fussy cut them.
11. Finish the card by putting everything together. I added all the layers with double sided foam tape. The sentiment is from the set "Canvas Sentiments Just for you". These sentiments are just perfect for Valentine's Day, I love the fact that they are written on canvas, it adds interest to the cards.
Card 2:
In the second card, I'll be showing you a very easy masking technique to create a stripes background using washi tape.
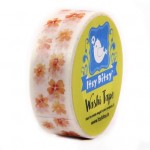
1. Stick washi tape at regular intervals on a piece of white card-stock.I used my cutting mat as a guide, you can also mark regular intervals with a ruler.
2. Start applying chalk ink using a soft bristled brush. Pick color on the brush and move from one end of the card-stock panel to the other to create and ombre effect. Slowly build up the color, adding a little color in each step and taking care not to apply too much pressure.
3. Carefully start peeling off the washi tape, once you are satisfied with the inked background.
4. The portions which were below the washi have remained white, creating a beautiful striped background.
5. I finished the card by stamping, coloring and fussy cutting another cat from the Purrfect Birthday Stampset and adding it to the card, together with some felt hearts and another sentiment from the Canvas Sentiments set.
Card 3:
I created a fun stamped background for my third card.
I took a couple a sentiment stamps from the same "Purrfect Birthday" stamp set and did second and third generation stamping with red chalk ink.
Second Generation Stamping Technique
Ink up your stamp and stamp on a piece of scrap paper, now, without reinking the stamp, stamp on your card-stock panel. This will create a slightly toned down or lighter image, which is perfect for backgrounds. Toned down stamping or second generation stamping is a great technique for backgrounds as a very bright stamping can make a background look too busy and take focus away from the main elements of the card.
You can also try 3rd or 4th generation stamping if you wish, by simply stamping multiple times on a scrap piece of paper before stamping on your project.
Once my background was ready I mounted it on top of my card-base and finished the card with 2 cute kitties and a sentiment from the Canvas Sentiments set.
I hope you enjoyed these 3 techniques to create backgrounds with chalk ink. I certainly did enjoy making these cards. Thank you so much for stopping by today!





wow soo cute !! love them all :)
ReplyDeleteThank you Sharada!
DeleteThank you Sharada!
Deletelove the simple & easy techniques and the bright cards
ReplyDeleteWow awesome card n technics thank you so sharing
ReplyDeleteVery pretty cards :) thanks for sharing the techniques
ReplyDeleteCheers
Preety
Thank you so much for the tutorials!
ReplyDeletexx
Suchi
Loved the cuties and the cards in pink are just lovely Juhi...
ReplyDeleteAbsolutely cute cards, loved the variety & the tutorials! Thanks Juhi!
ReplyDeleteThey are so pretty! The cats are super cute and love all the techniques. Well explained :)
ReplyDeletesuch pretty cards Juhi,love all the techniques and tips !!
ReplyDelete