Showing posts with label Gift Tags. Show all posts

Wednesday, December 7, 2016

Let's TAG along !

Hello Friends ,

Its time for a new challenge at Itsy Bitsy using Colour Splash Sprays. They have some rich vibrant Colour sprays and  I've used them in my projects here. 


Lets have a quick look on how we can play with them. On a white cardstock stick threads randomly as you can see in the picture. Once dry , spray the color splash randomly . Just play along and you can see how it gels with each other. The darker shades are when the colors merged


Now I cut the sheet into size of tags. Stuck it on a black cardstock and embellished it with chipboard from Itsy Bitsy. They have a wide variety of chipboard. 


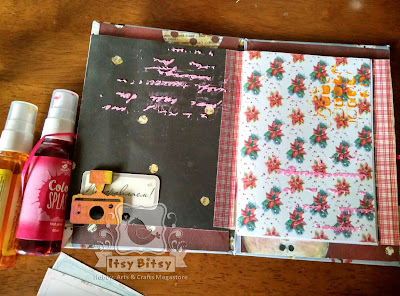
I got so carried away with these sprays ( You will get carried away !) That I created a note book from Handmade paper from  Itsy Bitsy and play around the cover page.
You can also mix it with texture paste and stencil on required areas - like you see below.


Looking forward to see some of your lovely creations using Colour sprays.

Monday, August 15, 2016

Butterfly Tag

Hello  & Good Morning!!!

Firstly wish you all Happy Independence Day...

This is Gopi here and today’s project showcase few wonderful products available at Itsy Bitsy – Studio G Markers, Kraft Embellishments, Clear Stamps & Cardstock


So lets get started...

I have used Kraft CS & White CS for the base of the tag. Kraft CS size: 3 ¼’ x 6 ¼’ and the white CS size: 3’ x 6’.
Firstly I scribbled the Pink & Wine (just 2-3 strokes) markers on my craft sheet and mist water to it. 


Then laid the white cardstock into the colour and made sure the entire tag is coloured pink. Lastly used the hest gun to dry the colour.

The same process was repeated using the Yellow, Forest & MidNight marker and heat set after every layer.


Next, using a script clear stamp (from my stash) & blackarchival, I randomly stamped the tag.
Then using the Script stencil added a little more element to the tag. This was done by scribbling the marker on the craft sheet and using a felt piece picked the colour and apply it to the tag through the stencil.


Thereafter white gesso was sprinkled using a painting brush.


The edges of the tag were distressed using a scissor and highlighted with the yellow marker.


The sentiment used is from the the clear stamp set - Love Sentiments and was stamped using black archival ink. Each word was then cut and edged using the light pick marker.


The tag was then attached to the Kraft CS base using tacky tapes. To embellish the tag, kraft embellishment – glitter butterflies was used.


While sticking the butterflies, golden thread is used to highlight the tag. 


Lastly sentiments were added to the tag using double sided tape.


To give a finishing touch to the tag, a coordinating ribbon along with the golden thread is attached.


Overall it was such a fun creating this tag. The studio Gmarkers are very smooth to use. They come in 2 variants – Bullet tip (thick & strong tip) & Brush tip (soft)


Do try out the products and the techniques used here and post your creations.

Material Used:
Studio g Markers - Pink, Wine, Yellow, MidNight, Forest
Kraft CS

Happy Crafting!!!


Sunday, March 16, 2014

A Gift Tag - Easel Style!

Folks thank you so much for your fabulous participation in the Roses Challenge. We will be sharing the results very soon. I had a very bad bout of flu the whole of last week so our next challenge will be a little delayed. Watch this space for something sweet coming very soon. 

Now on to this project. I see a lot of crafters creating these really elaborate tags full of distressing, die cutting, embossing and heavy embellishments and I always find myself thinking - what are they going to do with such an elaborate gift tag? Just stick it on a gift or bag? And where do they write the message to the recipient? Won't it get lost when it's glued to the gift box? I was always quite confused with this particular project.


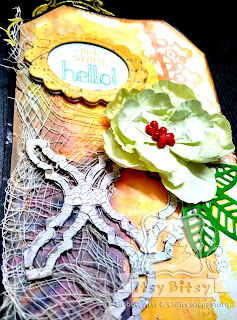
So when I joined the herd and made an elaborate gift tag, I couldn't leave it alone. I had to provide solutions to all the questions I just asked above. Ultimately I decided to put it on an easel card frame as I thought it would be more functional and attractive if it could stand up on a gift. Plus there is ample space to add a personal message to the recipient. 


The picture on the left shows how the tag looks when it's closed or lying flat. It looks just like a regular gift tag. The picture on the right shows it standing upright. I stamped a little message on the base and used the ribbon knot to keep it upright. 


 To embellish the tag I used some of my favourite ItsyBitsy supplies. Their corrugated papers are just awesome - so many colours and great to create different effects. I used the Sizzix Curly Frame die to outline my stamped image. Then I distressed it with Worn Lipstick Distress Ink. I covered the entire die cut with Ranger Rock Candy Crackly paint which adds this cracked porcelain finish, just beautiful! The stamp is one of ItsyBitsy's Little Darling ones, had it for a while and finally found a project to use it. Then I added some fabulous ItsyBitsy blooms all over the corner. I found crochet flowers too that perfectly complemented the tag and I was happy to add it on. 


Here's a closer look at the sentiment on the bottom. Love how it can go with any occasion because it reads 'Something Special For You.

How do you like my Easel Gift Tag? Would love to know!

Supplies Used

Wednesday, August 28, 2013

Baggage Labels For a Fun and Memorable Holiday!


Craft can be applied to so many aspects of our daily lives. It isn't just for cards or scrapbooks. It can apply to the most mundane of accessories - luggage tags. I first saw this on Snehal's blog. She had made luggage tags for a friend and I thought - OMG what a clever idea. Now many months later as my family was planning a holiday, I thought - I'm going to make me some Crafty Luggage Tags. 

For any project practicality has to find a place in the conception. So I decided that my luggage tags had to be durable. After all they were going to get quite a beating with all the traveling, loading and unloading. I knew I couldn't add too many 3D elements, they would most definitely fall off somewhere along the way. So that was my challenge. Making minimalistic yet fun and exciting luggage tags. 


As always the fabulous range of supplies from Itsy Bitsy came to my rescue. As I mulled over how to make my durable luggage tags I came upon the chipboard sticker section of the store. Right in front of me were fabulous chipboard stickers, perfectly sized for luggage tags and perfect for my project. The picture above is the tag I made for my son. I added the chipboard frame to some red card stock, provided a space for the ribbon and a few buttons on the corner. That's it! A colourful and fun luggage tag for a colourful and fun loving little boy. 


For my daughter, I found an awesome girly chipboard sticker pack. Full of bright pinks and blues, it was just perfect for her. All I had to do was add the pink felt backing, some alphabet stickers and some pearls. For the ribbon I used one of the crochet lace trims at Itys Bitsy. 


My husband's luggage tag was a little tricky. He needed something masculine and minimalistic. Once again I found the perfect chipboard frame for the tag. I glued it onto some brown card stock, added the alphabet stickers, attached the ribbon and voila - I was done!


Practicality continued to play a role in this project. Luggage tags should provide space for the owners's contact details so that if lost, the bags can be reached to the original user. Here's a look at the reverse side of each tag. As you can see I left plenty of space for the address and phone numbers. 


Finally here's a look at the luggage tags in action. I attached them to each individual suitcase and was delighted to see that they worked quite wonderfully.

Isn't it a fun idea - crafty luggage tags! What do you think? Leave a comment and let me know. As always I love hearing from you!

Supplies Used:

Wednesday, June 26, 2013

Spectacular Gift Wrappings

I think the origins of my love for craft began with wrapping gifts. I loved going over the top with dressing up my presents. Even if the gift itself wasn't much, I felt it made the experience of receiving a gift substantially more enjoyable when the gift itself was wrapped impeccably. So this blog post is all about spectacular gift wrappings. 


I have 2 gifts to present. For one I have created the gift box from pattern paper and dressed it up with ribbon, flowers and bows . For the other, I used a gift wrapping paper set from Itsy Bitsy which I draped over the gift box in a fairly unique way. I saw it done once at a toy store and it was so original I had to try it at home. So here's my first gift.


I used blue pattern paper combined with blue pearl card stock to create a custom made gift box. A neighbour had just had a baby so I was presenting some home made cookies in this box. Then I wrapped this stiff silver ribbon around and added a few extra loops to make an extravagant bow. As a final touch, I added a blue crochet flower from Itsy Bitsy and a few roses around the lid as well. 


 For my next gift, I picked up this wonderful gift wrapping paper set from Itsy Bitsy. It's simply marvellous as it comes with a substantial amount of paper, coordinated organza ribbon, a matching tag and matching tissue paper to make the inside look great too. All this for just Rs. 20!! Isn't that a steal! After draping the paper and tying the bow, I added some Itsy Bitsy flowers and embellishments to jazz it up a bit and voila! My gift was ready.

Do you share my love for spectacular gift wrappings? Would love to see your creations. Leave a comment and let us know! Till then Happy Crafting!!

Supplies Used

Thursday, May 30, 2013

Pretty Sets with the New Range of Washi Tapes


Itsy Bitsy recently introduced this gorgeous new range of washi tapes from We R Memory Keepers and  when I got my hands on them, I couldn't wait to get started! Each pack comes with 2 rolls of Washi's one slightly thicker than the other and length will last you all your crafting days! I've been meaning to make some coordinated Bag, Tag and Card sets for a while now and this was the perfect opportunity. 


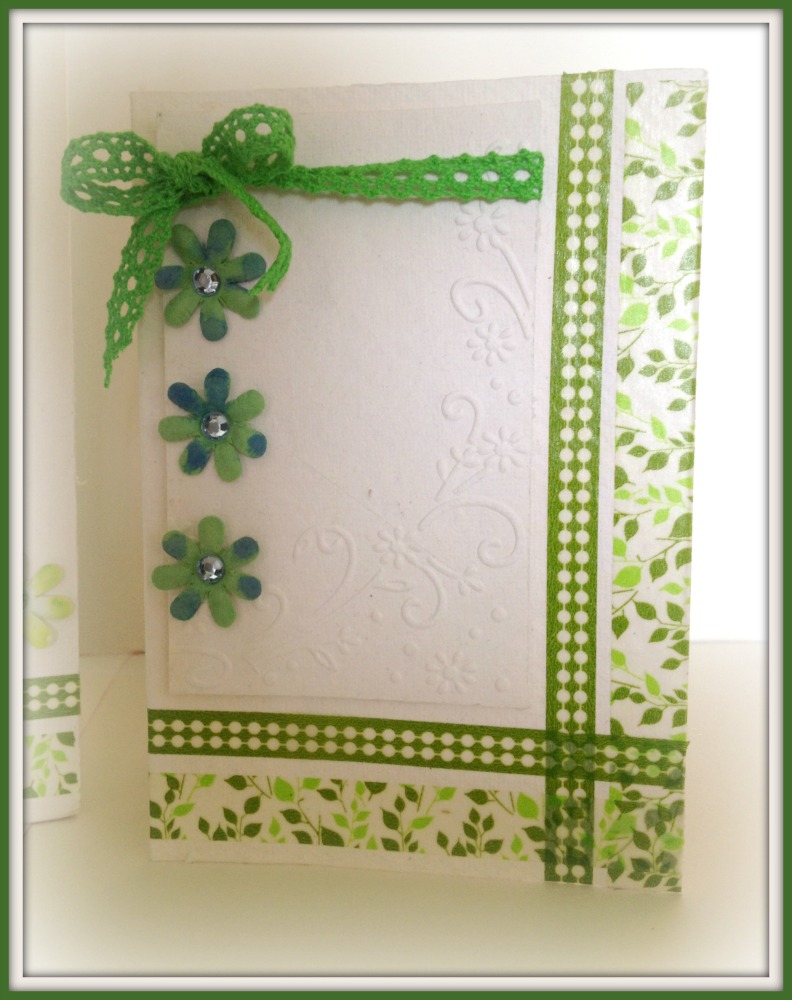
For my first set, I decided to go with the green washi's available at Itsy Bitsy. The white base for both the bag and the card is handmade paper. I used the washi's to add this one sided grid design, it was super easy to do and the result is quite clean and crisp. Some tie die gypsy flowers for a pretty touch and I decided to make a bold statement with the beaded straps. Isn't it awesome! I also used one of the many We R Memory Keepers tags available at Itsy Bitsy. There's literally so  many of them, in so many colours and sizes, it was the perfect accessory to my set. 

For the card, I pretty much followed the same design and in the empty space, I used a corner embossing folder along with one of the Sew Easy Ribbons trims which is also new at Itsy Bitsy.


 For my next set, I decided to create a slightly larger bag and this time the colour scheme was all  white and pink. I started with the same white handmade paper for the base and then used the pink washi pack to jazz it up. I created a four stripe pattern at the bottom alternating between ruffled and straight washi tapes. I love the effect of ruffled washi's and I find that the imperfection of the ruffle actually makes it quite perfect!


For the straps, I used some wooden pink beads from Itsy Bitsy and another We R Memory Keepers tag.  Like I said, there are so many to choose from and they're all pretty reasonably priced - like Rs. 29. I finished it off a pretty butterfly from Itsy Bitsy with a pearl trail. For the card, I followed the same principle except for a change, I changed the washi stripes from horizontal to vertical and added some embossing too. Love how it ultimately turned out!


I am in LOVE with the washi's at Itsy Bitsy!! I think I'm going to be adding them to a lot of my projects going forward! It's such a versatile accessory and so much fun to use too. I'm thrilled with the sets I made, can't wait to present it to someone! Arghhh!!! The agony of crafting for no reason in particular! Ha ha ha!! Thanks for dropping by folks! Have a good one!

Supplies Used:

Saturday, December 15, 2012

The ItsyBitsy Christmas Range

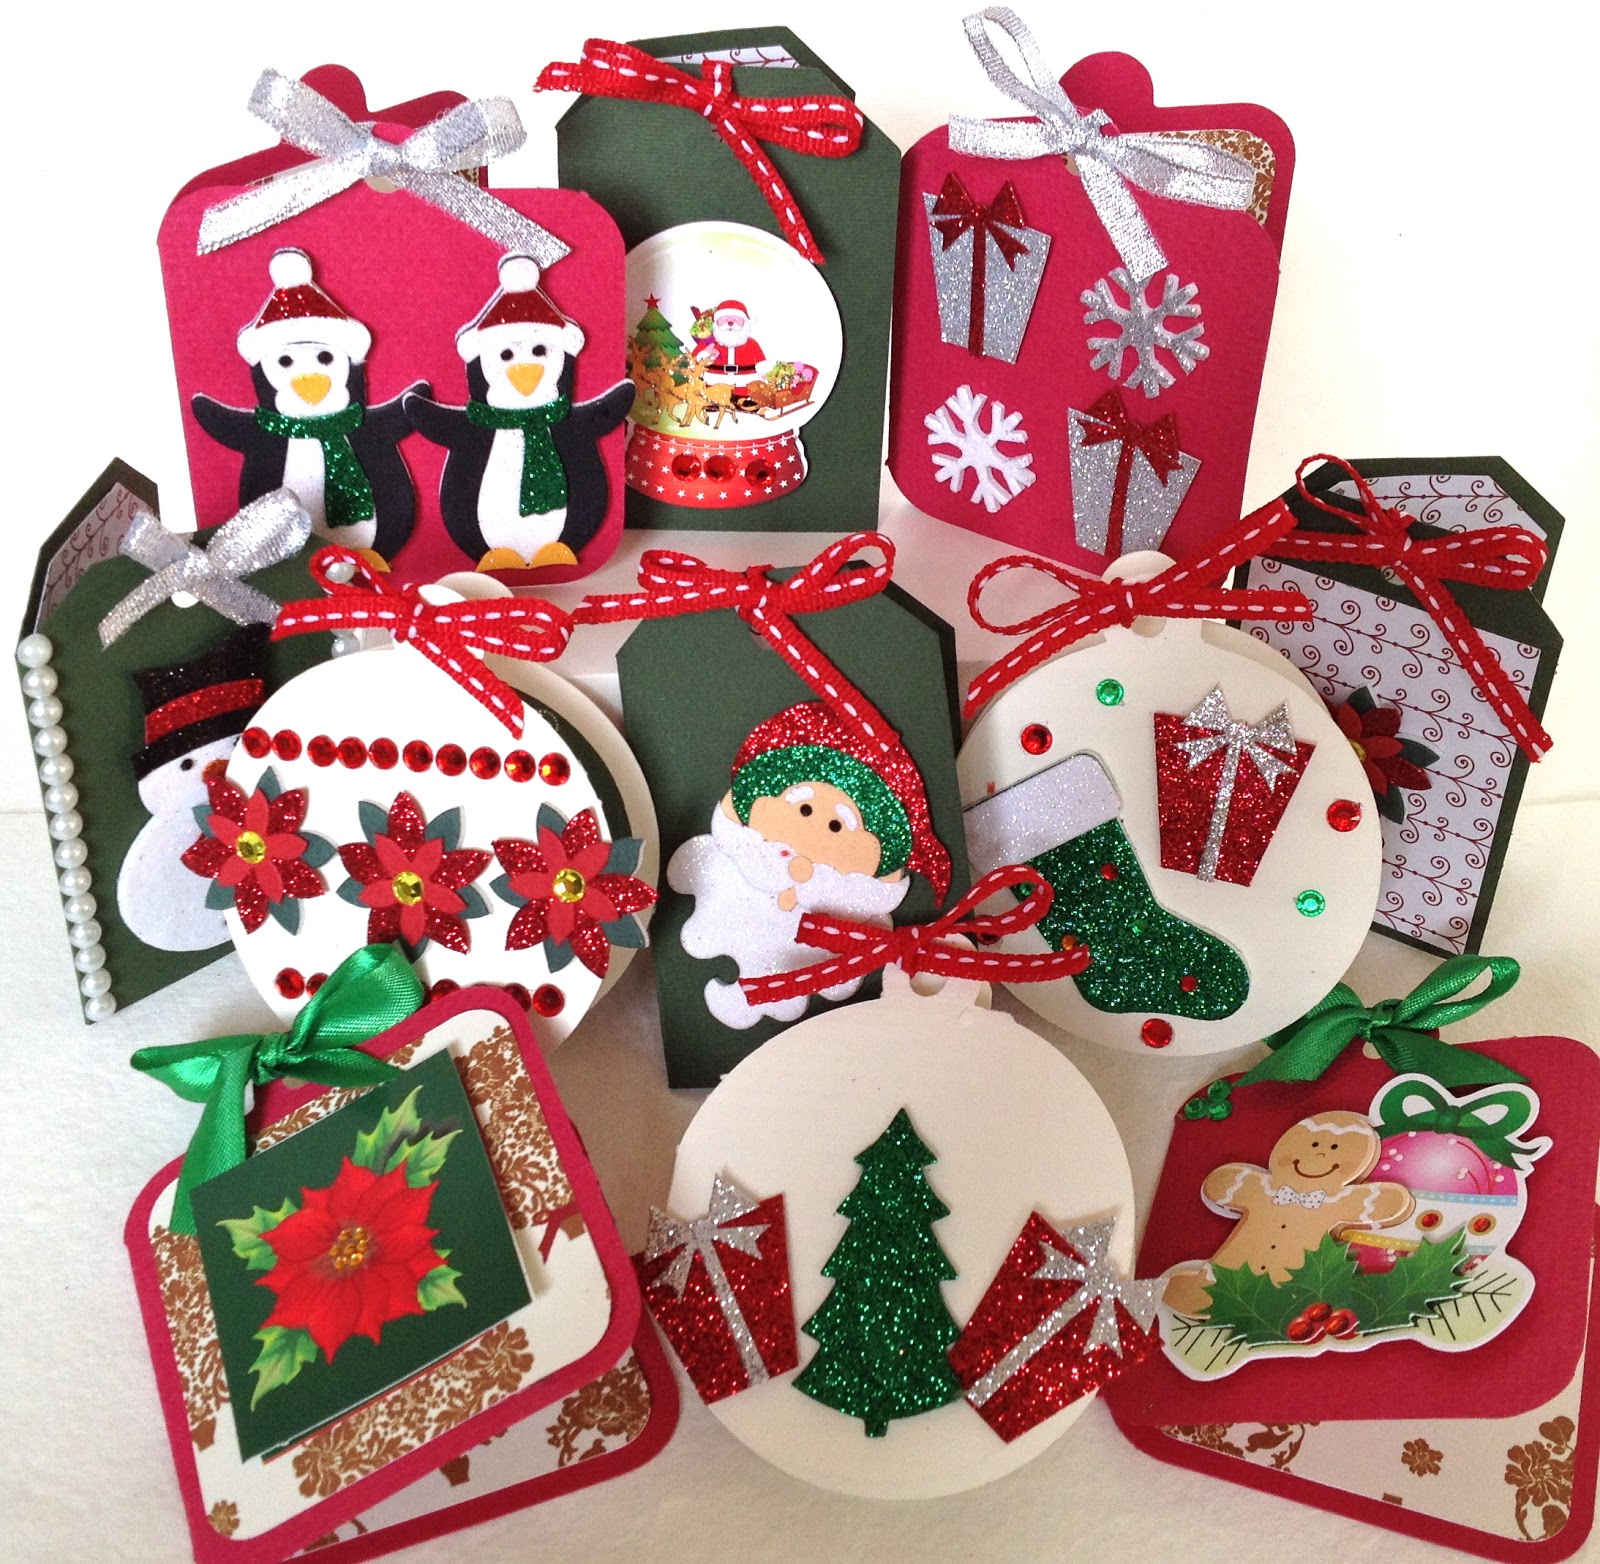
My fellow crafters... have you had a look at ItsyBitsy's new range of Christmas embellishments? They are just FANTABULOUS!!! So many options, so very cute and so so Christmassy!!! I got my hands on them last night and by 3am I had made 12 tags. I planned to use pattern paper and stamps and what not but I realized these little 3D stickers were all I needed. Have a look at my collection of Christmas gift tags! They are all about 3 inches tall.  

I've got Santa's and snowglobes, penguins and poinsettias, Christmas trees and Christmas presents - it's literally endless! Such adorable little embellishments, wonderfully designed, with glitter and bling. Here's a closer look at each set of tags.


Here are the embellishments I used in my projects but it's TOTALLY worth the time to view the entire range. 


Have you used our Christmas embellishments on any project? Leave a comment with your link, we'd love to see what you made and feature it too!