Showing posts with label Stamping. Show all posts

Friday, June 2, 2017

1 Stencil, 3 ways to create Card Backgrounds


Hello everyone, it's Juhi, I'm sharing how to use one stencil to create 3 different looks.


Look 1:


For the first background I began by placing the stencil onto white cardstock and applying distress inks to create a ink blended background. I used 4 colors in shades of red, orange and yellow.
Starting with red at the bottom I worked my way up to to yellow.
After removing the stencil I repeated the same process, this time over the entire cardstock. This created a muted, stenciled background. Finally I sprinkled some water onto the background and dabbed it with a piece of tissue paper.

Look 2:

I followed the same steps to create the second stenciled background. In this background I carefully placed the stencil back in place on the cardstock and outlined the leaves with a black pen. This gave a nice defined look.

Look 3:


For the third background, I masked out few leaves of the stencil with washi tape and applied distress ink over the remaining leaves. Following which I removed the washi tape one by one from each leaf and inked them with a different, darker color.
I finally created cards using the 3 backgrounds, I diecut a window in the middle of background 1 and mounted it on white cardstock base with double sided foam tape after stamping the sentiment.

I stamped the sentiment on a piece of black die cut cardstock and stuck it on top of background 2, and finally mounted the background panel on black cardstock.
For the third card, I stamped the sentiment onto the diecut piece from the 1st card and mounted on top of background 3.

Supplies Used:


"

Leaf Stencil
Shop at:
Itsy Bitsy
" Non-stick Craft Sheet
Non-stick Craft Sheet
Shop at:
Itsy Bitsy
Card Stock - Bright White
Shop at:
Itsy Bitsy
Dream Cut Machine
Dream Cut Machine
Shop at:
Itsy Bitsy
Acrylic Stamping Block
Shop at:
Itsy Bitsy
Pigment Ink Pad - Black
Shop at:
Itsy Bitsy
ADHESIVE SCRAPBOOKING GLUE
Shop at:
Itsy Bitsy
Clear Stamps - Jumbo Wishes
Shop at:
Itsy Bitsy
Mini Distress Pad - Festive Berries
Shop at:
Itsy Bitsy
Thin Cut Dies - Square
Shop at:
Itsy Bitsy
Mini Distress Pad - Fossilized
Shop at:
Itsy Bitsy
Distress Ink Pad - Spiced Marmalade
Shop at:
Itsy Bitsy
Washi Tape - Floral Flowers
Shop at:
Itsy Bitsy
ADHESIVE FOAM DBL SIDED TAPE
Shop at:
Itsy Bitsy

Friday, April 28, 2017

Watercolor cards with Say it Flowers stampset and Fairy Dust Glitter


Hello everyone, it's Juhi with some watercolor cards. I have used the beautiful "Say it with Flowers" Stamp set for today's cards. I have also used Fairy Dust in various colors on my cards.
As I have mentioned in my earlier posts, watercoloring is my favorite technique.


I started by stamping the flowers from the stampset on 3 watercolor panels cut to the size of my card fronts. I stamped randomly, taking care to change the orientation of the flowers and also stamp off the edges to create a random looking pattern. I stamped 2 panels with black pigment ink and 1 watercolor panel with gold pigment ink.


I then watercolored the area between the flowers on one of the watercolor panels with Crimson Mont Marte tube watercolors. I also added some red on the flowers.


For the second watercolor panel I watercolored the flowers in shades of blue, purple and yellow and added a mustard background.
For the 3rd panel I added some bright pink to the center of the flowers, I did not fill the flowers completely to create a messy watercolored look.
Now that I was happy with the watercoloring, it was time to add some glitter!!!
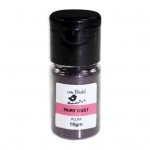
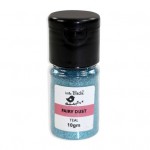
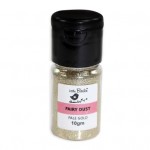
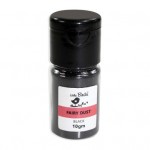
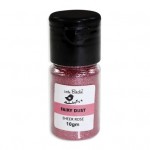
I used one of my favorite ways to add glitter to my projects, I used Itsy Bitsy's gorgeous fairy dust super fine glitter with double sided tacky tape. I will not go into the details of how I did it in this post as I was already shared the method in detail here and here.
Fairy Dust comes in a huge variety of colors so I could find just the right colors for my cards!!!
I finally stamped the sentiments and mounted the watercolor panels onto white cardstock with double sided foam tape! I just love how these cards turned out, I hope you will also give stamping and watercoloring a try, it's very easy and fun and the results are beautiful!!!
Thanks so much for stopping by today!


Supplies Used:


Thursday, March 30, 2017

Easy Watercolor Cards


Hello everyone, it's Juhi and today I'm sharing 3 watercolor cards. 
Watercoloring is one of my favorite techniques, you'd be surprised to know that it is not as hard as it looks, at least not the watercoloring I'm going to show you in today's post. What I really like about watercoloring on cards is that you don't need any fancy supplies to make beautiful cards. I'll be using the Berry Special Stamp set from Itsy Bitsy and Mont Marte Tube Watercolor paints for my cards.
 I love how the images and sentiments work together in the Berry Special stamp set.

Card #1:

Here are the steps of making this card.
1. Begin by stamping the beetroot from the stamp set on watercolor paper using black pigment ink. Take care to rotate the stamp and also stamp off the edge of the watercolor panel, this will create a random beetroot pattern.
2. Watercolor the beetroots, do not color all the way through, leave some white space in each beetroot. I mixed a bit of Violet  in Crimson from the Mont Marte Watercolor Tubes to create the beetroot color. Don't worry about coloring within the lines. Coloring a little outside the lines creates a beautiful watercolor effect.
3. Once the colors are dry, take a wet brush and spread the color over the white areas in the beetroots. Take care to keep the color lighter than the rest of the beet in these areas. This lighter area represents the part where light is falling on the beets.
4. Color the leaves. I used a mix of Sap Green and Yellow.
5. Spread out the color at the outlines of the beetroots with a wet brush and your watercolor background is ready.
6. For the front panel, stamp a single beetroot in the middle of the watercolor panel and color it in the same way as the background beets.
7. Stamp the sentiment, cut to size and adhere the background panel and front panel on white cardstock base with double sided foam tape.

Card #2

I tried no line watercoloring on this one, it was very easy to do and I am very happy with the results. Here's how I did it.
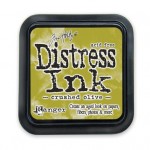
1. Stamp the olive from the stamp set with Crushed Olive Distress ink. As distress inks are not waterproof, watercoloring on it will remove the stamped outlines and we'll get no line watercoloring.
2. Leave some white space in each olive and color the rest in.
3. Once dry, spread the color with a wet brush.
4. Color in the leaves and add some paint splatters to finish the background.
5. I wanted a color coordinated cardstock base but did not have any, so I just painted the edges of my white cardstock base using the same color as the olives. I know it looks messy right now, but trust me it'll look great once the card is finished.
6. Finish the card by sticking the watercolor panel on the card stock base and stamping the sentiment on a strip of white cardstock.

Card #3

Putting my 3rd card together was very quick and easy. I first stamped the watermelon slice randomly on a piece of white cardstock using red chalk ink. Then, I stamped the slice on watercolor paper , watercolored it and cut it out. Finished the card by mounting it on the cardstock base and adding the sentiment.
I hope you enjoyed how I made these cards, I certainly enjoyed making these. Watercolor CAS cards are my all time favorite projects!  Thanks so much for stopping by today.

Supplies Used: