Showing posts with label Tutorial. Show all posts

Wednesday, February 1, 2017

3 Techniques to Create Card Backgrounds with Chalk Ink


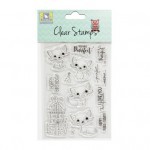
Hello everyone, it's Juhi with my first post for February. In today's post I'm sharing 3 romantic cards since Valentine's Day is just around the corner. I've used the adorable Purrfect Birthday stampset from Itsy Bitsy. All the products used are listed at the bottom of the post.
I will be showing you how I made these cards, with the focus on 3 ways to create backgrounds using chalk inks. So let's get started.

Card 1:

  1. I started with heart shaped felt die-cuts and a piece of white card-stock
  2. Trace out a heart outline using a heart die on the piece of white card-stock
  3. Add red chalk ink within the outlined heart with any soft bristled brush. Use a light hand and add a little color in each step, 
  4. Continue till you are satisfied with the result. It is ok if the results are uneven and splotchy as we are going to cover this up with felt hearts and only a little will show through.
5. Cover up the traced heart outline with felt hearts. I stuck them in place with liquid glue.
6. Make sure you go beyond the outline.
7. One the glue dries die-cut the heart.
8. Take another piece of white card-stock slightly smaller than the front of your card-base. My card-base measures 4.25"x5.5" so I chose my panel's size to be 4"x5.25". We want to create a red halo around the die-cut heart. In order to do this very lightly trace out the die-cut heart with a pencil.  Now, similar to step 3 and 4 above add chalk ink with a soft bristled brush. Start at the centre of the heart, move outwards and build up color slowly. Be careful not to apply too much pressure as this will lead to ink splotches. We want to create an ombre effect, which means the red will be darker close to the heart and lighter towards the edges, so it is important to stroke the brush from inside the heart to the outside.

9. Now, stamp out images of 2 cats facing each other from the "Purrfect Birhtday" Stamp set.
10.  Color and fussy cut them.
11. Finish the card by putting everything together. I added all the layers with double sided foam tape. The sentiment is from the set "Canvas Sentiments Just for you". These sentiments are just perfect for Valentine's Day, I love the fact that they are written on canvas, it adds interest to the cards.

Card 2:

In the second card, I'll be showing you a very easy masking technique to create a stripes background using washi tape.
1. Stick washi tape at regular intervals on a piece of white card-stock.I used my cutting mat as a guide, you can also mark regular intervals with a ruler.
2. Start applying chalk ink using a soft bristled brush. Pick color on the brush and move from one end of the card-stock panel to the other to create and ombre effect. Slowly build up the color, adding a little color in each step and taking care not to apply too much pressure.
3. Carefully start peeling off the washi tape, once you are satisfied with the inked background. 
4. The portions which were below the washi have remained white, creating a beautiful striped background.
5. I finished the card by stamping, coloring and fussy cutting another cat from the Purrfect Birthday Stampset and adding it to the card, together with some felt hearts and another sentiment from the Canvas Sentiments set.

Card 3:

I created a fun stamped background for my third card. 
I took a couple a sentiment stamps from the same "Purrfect Birthday" stamp set and did second and third generation stamping with red chalk ink. 
Second Generation Stamping Technique 
Ink up your stamp and stamp on a piece of scrap paper, now, without reinking the stamp, stamp on your card-stock panel. This will create a slightly toned down or lighter image, which is perfect for backgrounds. Toned down stamping or second generation stamping is a great technique for backgrounds as a very bright stamping can make a background look too busy and take focus away from the main elements of the card.
You can also try 3rd or 4th generation stamping if you wish, by simply stamping multiple times on a scrap piece of paper before stamping on your project.
Once my background was ready I mounted it on top of my card-base and finished the card with 2 cute kitties and a sentiment from the Canvas Sentiments set.
I hope you enjoyed these 3 techniques to create backgrounds with chalk ink. I certainly did enjoy making these cards. Thank you so much for stopping by today!
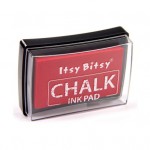
Supplies Used:


Monday, December 5, 2016

Colour splash spray Inspiration

Good Morning crafty folks,

This is Sharada Dilip here to share a few of my Colour Splash Inspiration as the 


I have been playing with sprays and cant get to do without them these days? 
Have you tried them? aren't they awesome ??
The colours are soo nice soothing and bright and the white card stocks are just in love with it !! 
These work best on paper, card stock, water color paper, handmade paper, fabric, burlap & other porous surfaces.

Here are my Colour splash spray Inspiration 


For my First creation I have played along with the irregular dot stencils and 2 colours -
Lime and Ocean Mist  sprays
I have used white card stocks as the base and layered the stencil and sprayed them unevenly to create my own background .
I let it dry and later added Handmade flowers and my favourite stickers !!


For my Second creation I have played along with Ocean mist spray and periwinkle shade of color splash spray along with Honey comb stencil ! Isn't the effect and blending of these two colors amazing ! 
Once my background was dry and ready to work on I stamped the butterflies in black .
I have hand stamped and heat embossed the sentiments and added them to the card with double sided tape to give it  dimension  .

I totally enjoyed creating these background with sprays and stencils ! 
In addition to these cards I have  made a Christmas ornament , with these sprays to create a bright background on canvas 

For the ornament I began with the Mini canvas and layered it with gesso .


after it died , I have textured it with script stencil and  later  sprayed ocean mist and Lime splash green to give it shading .


Once they are dry to work on I have layered a border and adhered the Christmas theme stickers !!
I am fascinated with the glittery reindeer's and couldn't resit using up all my Christmas stickers 

I hope I have inspired you all enough,  will love to drop in at your blog and  see your creations with Our Color splash sprays  

warm regards
Sharada Dilip


Supplies used - 


Monday, August 8, 2016

Beautiful Cards - Tejal Shah

Hello Crafty friends, we have a very special guest designer on our blog today, it’s none other than the very talented crafter / blogger Tejal Mehta Shah! An extremely dynamic & talented crafter, Tejal has done some elegant & stunning creations despite some health issues in the family! We deeply appreciate it Tejal & thank you for being our guest designer! Hop over to our blog friends & leave your valuable comments for Tejal.

Hello everyone,
Its Tejal here from Creative Expressions (www.tejalcreates.blogspot.in)
It is my pleasure to be posting on the Itsy bitsy blog today. It was during the blog and website relaunch that Itsy Bitsy team got in touch with me and very generously sent me some amazing products to review.

My post was due to go live during the Sizzix fest last month but due to some health issues I was unable to do so. And I really appreciate the team for understanding and giving me this extra time to post. Thanks guys.

Here is what my amazing gift pack held. Amazing pattern papers, beautiful embossing folder set from sizzix and Versacolor ink pads. Perfect for a cardmaker like me.

The first card - 

I have embossed the white panel with the stars embossing folder and then used the pigment inks to ink up the raised area of the panel. I absolutely love how soft it looks.

So those ink pads can also be used for blending, other than just stamping!

I also used the cake embossing folder to emboss the cake on the rectangle panel. Colored it with my zig markers and popped it on a foam.

The sentiment is stamped with the Versacolor ink pad.

The second card -
In this card, I simply embossed the stars embossing folder with Blue cardstock.

Cut out a circle and embossed the cupcake on it.

Colored the cupcake with my copics (to be very honest, my niece who was visiting me wanted to help, so its actually her coloring! And I am amazing how neat she was..she is only 8)

I die cut the birthday greeting in black and white and offset to get a cool shadow effect.


Finished the card off with some sequins.

The third card -
I loved the Magenta PP that was sent...even though it was plain, I wanted to see if it had a white core..and voila!! it did

I simply embossed the PP and used my nail filer over it lightly...Wherever the edges were, the white core came out...and such a fantastic effect! 

I also used some butterflies and colored them with....yup...the Versacolor inkpad. I just smooshed it on a plastic sheet and picked up the ink with my paint brush. I attached them at just the centre so the wings of the butterflies are lifted up.
I cut the panel on a diagonal before embossing and white heat embossed the sentiment.

Finished the card with some glitter and glossy accents.
And the final project that I will share soon (As soon as my health permits to finish it up) But I could not let you go without a sneak peek of it! 
Thank you Team Itsy Bitsy. And I do hope you enjoyed my few inspirations. 


List of Products


Thursday, July 28, 2016

Crafter In The Spotlight 8 - Itsy Bitsy

Hello friends!! Itsy Bitsy brings you "CRAFTER IN THE SPOTLIGHT" – a unique way of encouraging and appreciating the talented crafters. We recognize talented crafters week after week, turn the spotlight on them & feature them in our "CRAFTER IN THE SPOTLIGHT"! We love what you talented crafters create & are amazed at each of your unique creations every single day! We love the way you use Itsy Bitsy products & give life to those products.
We are delighted to announce this week’s “CRAFTER IN THE SPOTLIGHT” - July 2016 – MANISHA GUPTA! A Commerce graduate by academics, this extremely talented crafter got bitten by the Craft Bug when she first walked into an Itsy Bitsy store in Bangalore! :-) Card Making is her favourite craft & her creations are clean & elegant ! This young mother plans her crafting on Weekends & at nights & loves experimenting with various techniques!!
CONGRATULATIONS Manisha Gupta! Wishing you loads of success on your creative Journey!
Here are excerpts of my interview with Manisha:

Rashmi Closepet, MD, Itsy Bitsy: Tell us a bit about yourself, your background? Where are you originally from?
Manisha Gupta: Hello Rashmi. Thank you and the entire team of Itsy Bitsy for appreciating my work and giving this great platform to showcase the creations.I was born and brought up in Assam, completed my graduation in commerce from Kolkata and shifted to Bangalore in 2004, spent half my life in Bangalore and this city has become my Home now. I am working for HP as a Program Manager. I am blessed with 2 beautiful children (5 &1/2 yr n 7 months old)

RC: How did you get into crafting?
MG: I was always inclined towards arts and craft from the very childhood but it was ignored for few years till the time I walked into an ItsyBitsy store. I was thrilled to see the huge variety of supplies under one roof in Itsy-Bitsy. It just gave me the motivation to explore the world of crafts again. Since then I have always made birthday invitation/thank you gifts, favour bags on my son’s birthday every year. I am so happy that I started crafting, it’s a huge stress buster for me.

RC: What is your favourite type of craft?
MG: I love to learn and try new techniques, however I just love card making. I like sewing as well but don’t get much time to do that.

RC: What are your favourite products at Itsy Bitsy?
MG: If I could afford I would have bought the entire store, love all the products. To name a few I usually pick up Papers, ribbons, stamp sets, embossing folders, Inks, heat embossing supplies, embellishments and the list can go on & on.

RC: What products from Itsy Bitsy do you think are must have’s for a crafter?
MG: BIG SHOT machine is a must for any crafter.

RC: What product would you like to see at Itsy Bitsy?
MG: I would like to see more varieties and options of die-cut, stamp set, inks, ribbons

RC: What do you do to make your workplace inspiring?
MG: All my craft supplies are sorted and segregated in separate boxes which keep my Workstation neat and tidy. Apart from that I always keep a calendar which tells me the events for the year stuck on the soft board. Any occasion like birthdays, anniversary, baby arrival or festivals inspire me to create something new which can be gifted. It give me immense pleasure and so much satisfaction to gift a handcrafted item to the loved ones on their special day/occasion.

RC: What are your other interests?
MG: I enjoy spending my time with my little ones. Gardening is my second passion after crafting. I have a 2 beautiful terrace gardens with more than 100 pots and love to get my hands dirty whenever possible.

RC: If you had magic powers, what would you want to contribute to the Crafting world ?
MG: If I had magical powers I would want handicrafts to be a part of school curriculum for both Urban and Rural children. The traditional, diverse and rich handicrafts of india are dying, as it doesn’t fetch enough money for a decent living. Also the platform to showcase the art is limited. Given a chance I would like to design a curriculum for the Subject “Craft” which would give the platform for children to learn the rich & traditional handicrafts from all around the world. Also would like to revive some exquisite form of traditional art/craft which is gradually dying out in India.

RC: What is your most treasured possession in your craft stash?
MG: My Bigshot machine - I love to flaunt my BIGSHOT to the visitors who want to see my crafts & creations.

RC: How would you describe your style of crafting?
MG: Well my crafting style changes as per the project I am working on. There is no one particular style which I can call out. I love learning and exploring new techniques and styles which I implement in the projects.

RC: What do you do when you’re suffering a creative block?
MG: I take a break and go with the flow and don’t bother much.  However, with technology at our finger tips I always take help of online videos and blogs to channelize my creative thoughts. My 5 and half year son also helps me with amazing ideas. My husband is the biggest critic and that helps me to refine my creations.

RC: How do you organize your time for crafting?
MG: I am not a full time crafter, however very ambitious of become one someday. Most of the time I design the layout in my mind before starting the project, so that saves me from wasting time on experimenting different techniques and styles. I usually do all my crafting during weekends. During week days if I plan to finish any project, I prioritize my chores and save some time out for crafting at night post kids are off to sleep.

RC: Tips for people who want to craft?
MG: Crafting world is humongous. The more you explore, more you learn. The wide variety of craft supplies that is available today makes it easy to try and learn different techniques. All creations are unique and there is nothing right and wrong in Crafting. Just wear your creative hats and create wonders.

Here are a couple of Manisha’s awesome creations :


Many congrats Manisha for being the CRAFTER IN THE SPOTLIGHT - ITSY BITSY :-) :-)
You will receive Rs 500/- Itsy Bitsy gift voucher :-) :-) & a Crafter in the Spotlight badge, which can be proudly displayed on the side bar of your blog.
Also, visit our Youtube channel to view & to know more about this crafter – https://www.youtube.com/watch?v=M60mkBgwm7Y

Looking forward to many more creations, Happy Crafting!


Monday, July 25, 2016

Mixed Media Layout by Dr. M.V. Pratyusha

Hello Crafty friends, today we have another guest designer at the Itsy Bitsy blog. She is the extremely talented and versatile Dr. M.V. Pratyusha! She is a well-known name in the crafting industry and we are delighted and happy to have her with us today. Quilling is her forte, however, today she has tried her hands on mixed media. Check out the blog to see this amazing creation & please show your love by leaving your valuable comments for our guest designer. 

Over to Pratyusha..

This is a mixed media layout.

Step by step guide by Pratyusha:

First I coated the 12x12 inch chipboard with 2 coats of gesso.

 Used Tim Holtz damask stencil and the crafters workshop Art is stencil to
add in some texture using texture paste. I randomly stamped tim holtz script
stamp using black stazon ink.

Then cut different laces- A white broad one, rhinestone chain and a pink
lower lace to create a cluster in one side of the layout. To make the focal
point I made a cluster using doilies and used a pattern paper which reads
‘our great adventure’ from Poolside ephemera collection. The frame
Chipboard elements and the flowers are also added in.

The whole of the layout is then coated with watered down gesso. To bring the layout to getter I used Viva décor inka gold paints to add in highlights of gold color, violet, purple and pink.

The butterfly used here is a metal embellishment which is coated with gesso and a layer of viva décor inka gold- gold paint is added and buffed.
I then used the alphabet stamps from my stash to write the names to customize the layout!!


Materials used : 

Wednesday, July 6, 2016

STAR FOLD CARD


Good Morning!
This is Tanvi & today I have a pictorial of star fold card. 
This is a fun fold to make & like me if you love pattern papers super way to use them!
So lets begin with a 12x12" card stock. 
Here are the pictures to take you through the steps - 


Cut off the remaining trianglar sides. We will use the 12" equilateral triangle for the fold.

Next, score the triangle at 4", 6" & 8" on each side


Select papers of your choice, trim & glue them to the base. I used coordinating papers from the Maggie Holmes Stack


As you will see later I changed the pattern paper over the 3 smaller triangles.


The new handmade flowers (silicon glue is very handy to add 3D embellishments to projects) were a  perfect adornment for the  card. Doilies, glitter glue & pearls completed the card. 


Using the WRMK envelope punch board I also made a coordinating envelobox to hold the card.


Here is a list of supplies used - 

Card stock
Scale
Scoring tool
Rubber stamp - Dream big
Glue 
Maggie Holmes Stack
Handmade flowers 
Doilies 
Silicon Glue
Glitter glue 
Pearls 
Scissors
WRMK envelope punch board

Hope you like this super easy fold!
Thanks for vivitng & happy crafting!

Theres still time to play along the Sizzix challenge. Find all the details here.