Showing posts with label Paper Flowers. Show all posts

Monday, May 22, 2017

DIY Desk Caddy with Itsy Bitsy Burlap


Hello everyone, its Juhi. Today, I'll be sharing a super easy up-cycled Desk Caddy with you. As crafters we can never have enough of  pens, pencils, markers, brushes, scissors, the list is endless, which also means that we are constantly running out of ways to store them!!
Here's a fun and easy way of making your own pretty desk caddy (it has to be pretty... right?? you're a crafter after all!) with minimal supplies.


You will need:

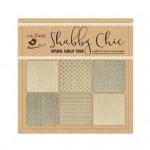
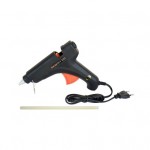
The method is extremely straight forward, just take a 12"x12" sheet of your choice from the Itsy Bitsy's 'Shabby Chic' burlap stack and cut it to the length of the cardboard box and adhere with hot glue. Apply hot glue only at the ends.


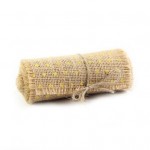
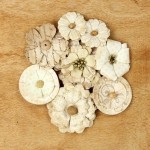
Embellish with lace,  burlapribbon and flowers and you are done!!! Isn't that easy! You could also use your choice of embellishments to match it with your table decor.

Supplies Used:


Monday, July 18, 2016

Sew Easy

Fellow Crafters,

Its me, Remya and am back with a new project using We R Memory Keepers - The "Sew Easy Stitch Piercing Tool". I have made a card for you all today with hand stitching incorporated.  


We R Memory Keepers Sew Easy Stitch Piercing Tool helps us to pierce equally spaced holes onto papers. Its very convenient for crafters to add a pseudo "stitch design" without a sewing machine. I do not have one and always thought how I could get to have a stitch design without investing on a machine. Received my answer now ! The Sew Easy stitching tool  includes a handle and a straight stitch head.


Place your cardstock on Foam - Piercing mat and Roll over the tool onto the cardstock  in the direction you want to make the stitch. Take Sewing needle and attach thread in it. Stitch along the holes and add beauty to your project ! Here I used Zig Zag Head and created a diagonal stitch around the borders. Added Ribbon, Mini embellishments  and flowers from the latest flower pack to embellish the card.


The charm of the piercing tool is that we could swap the piercing heads with multiple others to get the stitches of your choice - straight line, zig-zag, loop or many more depending on your mood and need !

A Stitching Guide

Yes Its as simple as that ! Hassle free stitching !


A note of caution

Make sure that you use a Foam - Piercing Mat, a conventional cutting mat or any other products used may cause extra strain on the piercing heads breaking them.

Materials required :
Cardstock
Sew Easy Stitch Piercing Tool
Sew Easy Stitch Piercer Head
Sew Easy Floss - Brown 
Mini Embellishment
Flowers

Hugs
Remya

Tuesday, August 25, 2015

Anthurium Bouquet


Hi Folks! Hope you guys are doing great! A while ago we posted an image of Paper Anthurium Flowers on our Facebook wall. We got requests for a tutorial and as promised, we are here with detailed step by step instructions. These flowers are made with duplex crepe paper. Duplex Crepe paper has a lot of stretch and holds the shape beautifully on stretching, perfect for making realistic looking flowers.
(The image that we had posted is on the right.)


These flowers look very elegant and are great for a formal table decor, home decor, a corner table, or to make a paper flower bouquet. Because of the fantastic properties of the duplex paper, these are very easy to make. So let's find out how you can make your own bouquet. 


You will need the following supplies:

Duplex Crepe Paper - (your choice of colours)
Floral Tape - Green
Floral wire
Craft Glue
A pair of Scissors

Instructions:

To make the petal, fold the crepe paper and draw an approximate shape on the folded edge as shown in the image. The length should be approximately 2” -2 ½” and the width (from the folded edge) should be approximately ¾ “ – 1”. Each piece will form the petal of a flower, so cut out one piece per flower as per your requirement.
Stretch, curl and shape the petals as shown (using a pencil or a dowel)  
Cut a strip of crepe paper about 1”wide and 10” long. Wrap it around one end of the floral wire as shown and stick the end with glue.
Cut a small piece of paper and glue it around the wrap to close the top.
Apply glue to the base of the petal and place the wrapped wire as shown. Wrap the petal at the base as shown to form the flower.


Start wrapping the floral tape tightly, beginning at the base of the petal. Wrap the entire wire to make the stem.


Make a few flowers using slightly different lengths of wire for every flower. Arrange in a vase to display. You can also cut a thermocole ball in half, wrap it entirely with floral tape and insert the stems to display as shown in the image above. You can also make some long leaves cut out of green crepe paper to add some foliage.

Do leave your feedback in the comments below and send us images if you make these flowers.
Happy Crafting J


Tuesday, May 19, 2015

Duplex Crepe Paper Rose Bouquet


Hi Friends, it’s Tuesday and we are back with another tutorial here on the Itsy Bitsy Blog. Summer is in full swing and it’s the time of roses. So here we are with a step-by-step tutorial on how to make a beautiful bouquet of roses. These flowers can be made with very limited number of supplies and will brighten up any room!


So let’s get started. Here is the list of supplies we used for making the flowers:

  1. Duplex paper  in your choice of colour
  2. Floral wire
  3. Floral Tape
  4. Green Handmade paper for leaves
  5. 10-12mm beads
Note: You can also make these roses with crepe paper but you will get better results with Duplex crepe paper. Duplex paper is thicker than the regular crepe paper and has different colour tones on the two sides. This makes the duplex papers one of the most sought after paper to make realistic looking flowers. This paper has anywhere between 25 – 50% stretch making it possible to manipulate parts of it to give more realistic looking shapes to the petals.

Method:

Cut the duplex paper in heart shapes of roughly about 2”-2 ¼ “ dimensions. The hearts need to have somewhat flat base. These hearts will be used to make the petals of the roses


The easiest way to cut out hearts is to fold the paper, and trace half a heart (as shown) on the folded edge.
Cut out the heart shapes as shown. One flower will require about 8-9 hearts. Cut out as many heart shapes as you need.
Prepare all the heart cut outs by gently rolling the edges of the hearts as shown. The edges should be rolled away from the darker side of the paper and towards the lighter side. This is important for a realistic looking flower.
Take one of the hearts and wrap it around the folded floral wire.

Twist the paper as shown. This will form the centre of the flower.
Tightly wrap some floral tape at the base of the petal to keep it in place. Wrap a second petal in the similar way.
Keep adding more petals and wrap the base with floral tape.
After about 8-9 petals, your flower will look just like a rose bloom. Make as many roses you would like for your bouquet.
Thread a bead onto one end of a floral wire and fold back the end ( about  ½ “) as shown.

Wrap the bead completely with floral tape. This will make the rose buds.
Cut 3 pieces of floral tape in the shape shown here. Line them at the base of the bud to simulate sepals.

Tightly wrap some floral tape to keep the sepals in place. The rose bud is ready!

Cut some leaf shapes with the green handmade paper and wrap them about an inch below the base of the flowers using floral tape.

You can add leaves in this way to all the flowers or just some of them depending on how much foliage you want in your bouquet.


Start assembling the flower bunches by arranging them in a staggered fashion and twisting the stems together.
Wrap the stems with more floral tape. 
Your rose bunch is ready! Make as many such bunches as you want and in as many colours as you want. 
As you can see in the picture below, we made them in different colours and they looked so beautiful together that we did not have the heart to segregate them by colours!


The last but not the least step - Sit back and enjoy the beautiful roses! :)

Hope this tutorial has inspired you to try it out. Do leave your feedback in the comments below and send us pictures on our Facebook page if you try it.

Here’s a handy link for the supplies.
Link for Supplies:
Duplex paper:
Floral Tape:
Floral Wire:
Handmade Paper:


Tuesday, April 21, 2015

Accordion Album


Hi Friends! Hope you had a wonderful weekend! 
We had the album workshop planned for last Saturday, which got rescheduled due to Karnataka Bandh. For those who missed the workshop, here is a step by step tutorial on how to put together this lovely photo album to display your favourite photos. It will be great addition for your dresser, desk or bureau. It will also make a great gift!

The measurements of this album are suitable for 4”X6” photographs and it can hold 6 photographs but you can customize these attributes as per your requirement. This album is in portrait orientation but you can also make a landscape version of it.

The base of this album is chipboard. We recommend using the 2mm thick chipboard to make the album sturdier. So let’s get started:

Supplies used for this album:
A4 2mm Chipboard Sheets– 4 pcs  (or 2pcs of A3 Chipboard Sheets)
A4 Laminated Jute Sheets (Deep Turquoise)– 5 pcs
12”x12” Hand Made Paper (Turquoise) –  2pc (You can also use a full sheet, or 2 A4 sheets)
DCWV Safari Chic Cardstack- 6 sheets
Ribbon
Silicon Glue (Recommended for laminated jute)
Craft Glue
Double sided tissue tape             
Cutting Knife
Scissors
Cutting Mat

Note: If you are using the 12”x12” or A4 paper or Jute sheet you will need to glue two of them together to make a longer sheet for the album.
Method:

Measure and cut your chipboard. We need 2 pcs of 5”x7” Chipboard and 4 pcs of 4 ½ “ x 6 ½ ” Chipboard.

Cut your paper sheet to measure about 20”x8”. You can either cut it out of a full sheet or join two 12”x12” or A4 sheets together and trim them to get the right size. In our case we used two 12”x12” sheets and joined them together as shown in the image.

Glue the 4 ½ “ x 6 ½ ” chipboards onto the paper as shown in the image. Leave about 2mm space in between the chipboard pieces. This will allow room for the album to fold smoothly.
Snip the edges of the paper and trim the corners as shown. This will reduce any bulkiness on corners and folds in the finished piece.


Apply craft glue and fold the edges of the paper on the top and the bottom of the chipboards. Leave the edges on the ends as is. Once we attach the jute sheet on the other side of the chipboards, these open edges will be glued to the front and the back cover.

You piece will now look like this.

Cut the jute sheet to measure 20 “ X 6 ½ “. Apply silicon glue on the laminated side of the entire sheet.
Note: If you are using A4 jute sheets then join two sheets using silicone glue (just like we did for the paper) and trim the joined sheet to get the right size. Here, it’s important that the width of the jute sheet is same as the height of these chipboard pieces (in this case 6 ½ “ )

Stick the jute sheet on top of your chipboards as shown in the image above.
The base body of the album is complete. Fold and unfold gently a few times to get rid of any tightness around the folds. Now we will start with the front cover.
Cut a piece of jute measuring 6 ½ “ x 8 ½ “. Apply silicon glue on a 5” x 7” chipboard piece and stick it on to the laminated side of the jute piece as shown in the image.

Trim the corners of the jute as shown to avoid bulkiness on corners. Apply the silicon glue on the edges of jute, fold and stick them as shown in image.

Now we will join the front cover to the body of the album. Apply silicon glue to one of the long edges of the front piece and stick the loose edge on one end of the body as shown. Once the glue is dry, proceed with the next steps to cover the chipboard completely.


Cut a 5” x 7” piece of jute, apply silicon glue on it and stick it on top of the front piece. Press firmly and wait for it to dry. This is a crucial joint and it’s advisable to wait until the glue is completely dry before proceeding to join the back cover.

Note: The steps to join the back cover are same as the steps for the front cover. So repeat all the steps for the back cover as well.

Your album will look like this. Now we will start adding layers to it. We have used patterned cardstock from DCWV, but you can choose any other kind of paper (Thai Natural Fibre Paper, Mulberry Paper or even another layer of Jute!) Its really depends on the look that you want.

Cut pattern paper rectangles for the layers to frame your photograph. Centre the paper panels over the jute panels and stick them using silicon glue.

Note:  You need 2 pieces in size 4 ¾ “x 6 ¾ “ for front and back covers. For the rest of the panels (4 pcs), the pattern papers should measure 4 ¼ “ X 6 ¼ “.


Your album is ready! Stick your favourite photos to these panels using double-sided tissue tape and display them proudly on your desk or mantel shelf!


You can embellish your album with flowers, rhinestones, crystals, mulberry roses, chipboard shapes, twine, ribbon – options are many! Here we have embellished it with chipboard flourishes and mulberry roses. If you would like to gift the album to someone, you can add a sentiment; we have matted a chipboard sentiment tag with Handmade Paper.

Hope you liked the tutorial and are tempted to try it J
Please leave your feedback in the comments below. And do send us pictures on our Facebook Page if you make it.
Link for Supplies:
Chipboard:
Jute:
Hand Made Paper:
DCWV Pattern Papers:
Silicon Glue:
Cutting Mats:
Cutting knife: