Showing posts with label Floral Tape. Show all posts

Tuesday, January 12, 2016

Bright and Beautiful Sunflower

Hello All! Hope you all are having a great week! Itsy Bitsy is back with another fun tutorial. Today we are going to make Sunflower which is big and bright, to upgrade the beauty of your room.
Supplies required:

To make Flower:
1.      Cork sheet- cut to round shape, diameter 7 inch
2.      Chip board- cut to round shape, diameter 7 inch
3.      Handmade Paper-Yellow-cut to sunflower petal shape (length 7 inch)
4.      Handmade Paper- Green- cut to round shape, of diameter 6 inch
5.      Flower making Stem- 5mm

To make the Leaves & Stem
1.      Handmade Paper- Green- cut the shape of leaf
2.      Floral Tape
3.      Flower making stem 1mm (to make the leaves)
4. Pipe (Any)

Method:
Step 1- Glue the cork sheet to the chip board
Step 2 - Glue the petal end and press it to the chipboard. Keep adding the petals closely throughout
Step 3 - Glue the stem to the completed flower and cover the back using green handmade paper
(To make the Leaves and Stem)
Step 4 - Glue the leaf at the edges and place the floral stem on the leaf. Place another leaf on top and press. Using the hand embossing tool, make venation pattern on leaf
Step 5 - Use the floral tape to wind a pipe (use any), which will be the stem of the flower. Keep adding the leaves one below another and continue winding the tape to the entire length of the pipe
Step 6 - On completion of the stem, bend the leaves
Step 7 - Place the sunflower on a stem, as shown
Place the completed sunflower in a pot and brighten up your room corner. Place your sunflower in a vase or a decorated pot of your choice and make the boring corner bright. You can try making different flowers by changing the pattern of the petals.  Do let us know what you think of this tutorial.
Happy Crafting :)

Link for Supplies:
1.       Handmade Paper- Green - IBSC11823
2.       Floral Tape -       IBCR28805
3.       Flower making stem for leaves - IBCR30652
4.       Flower making stem  - IBCR30654
5.       Cork sheet - IBCR12106
6.       Chip board - IBPP12090
7.       Handmade Paper- yellow - IBPP19043
8.       Scissors - IBHA70589

Wednesday, January 6, 2016

Quilled Flower Sprig

Hello friends! Wish you all a Happy New year!!
Welcome to yet another tutorial from Itsy Bitsy.
Create this beautiful flower sprig using quilling strips. The flowers and the fringed pollens are made from quilling strips. You can make different kind of flowers using quilling strips.
Get inspired and create your own work of art.

Things required

  • Quilling strips: Pink- 3mm
  • Yellow- 3mm, Black-3mm
  • Floral stem
  • Vellum paper- white
  • Glue
  • Round plier
  • Quilling tool
  • Handmade Paper–Green

Method
Step 1 - Each petal needs two strips. Using the quilling tool, make round coils from the quilling strips and glue them at the end. Pinch at one end to make the petal shape. Gently press the coil to give depth to the petal
Step 2 - Make fringes using scissor on yellow quilling strips. Using the quilling tool make round coils
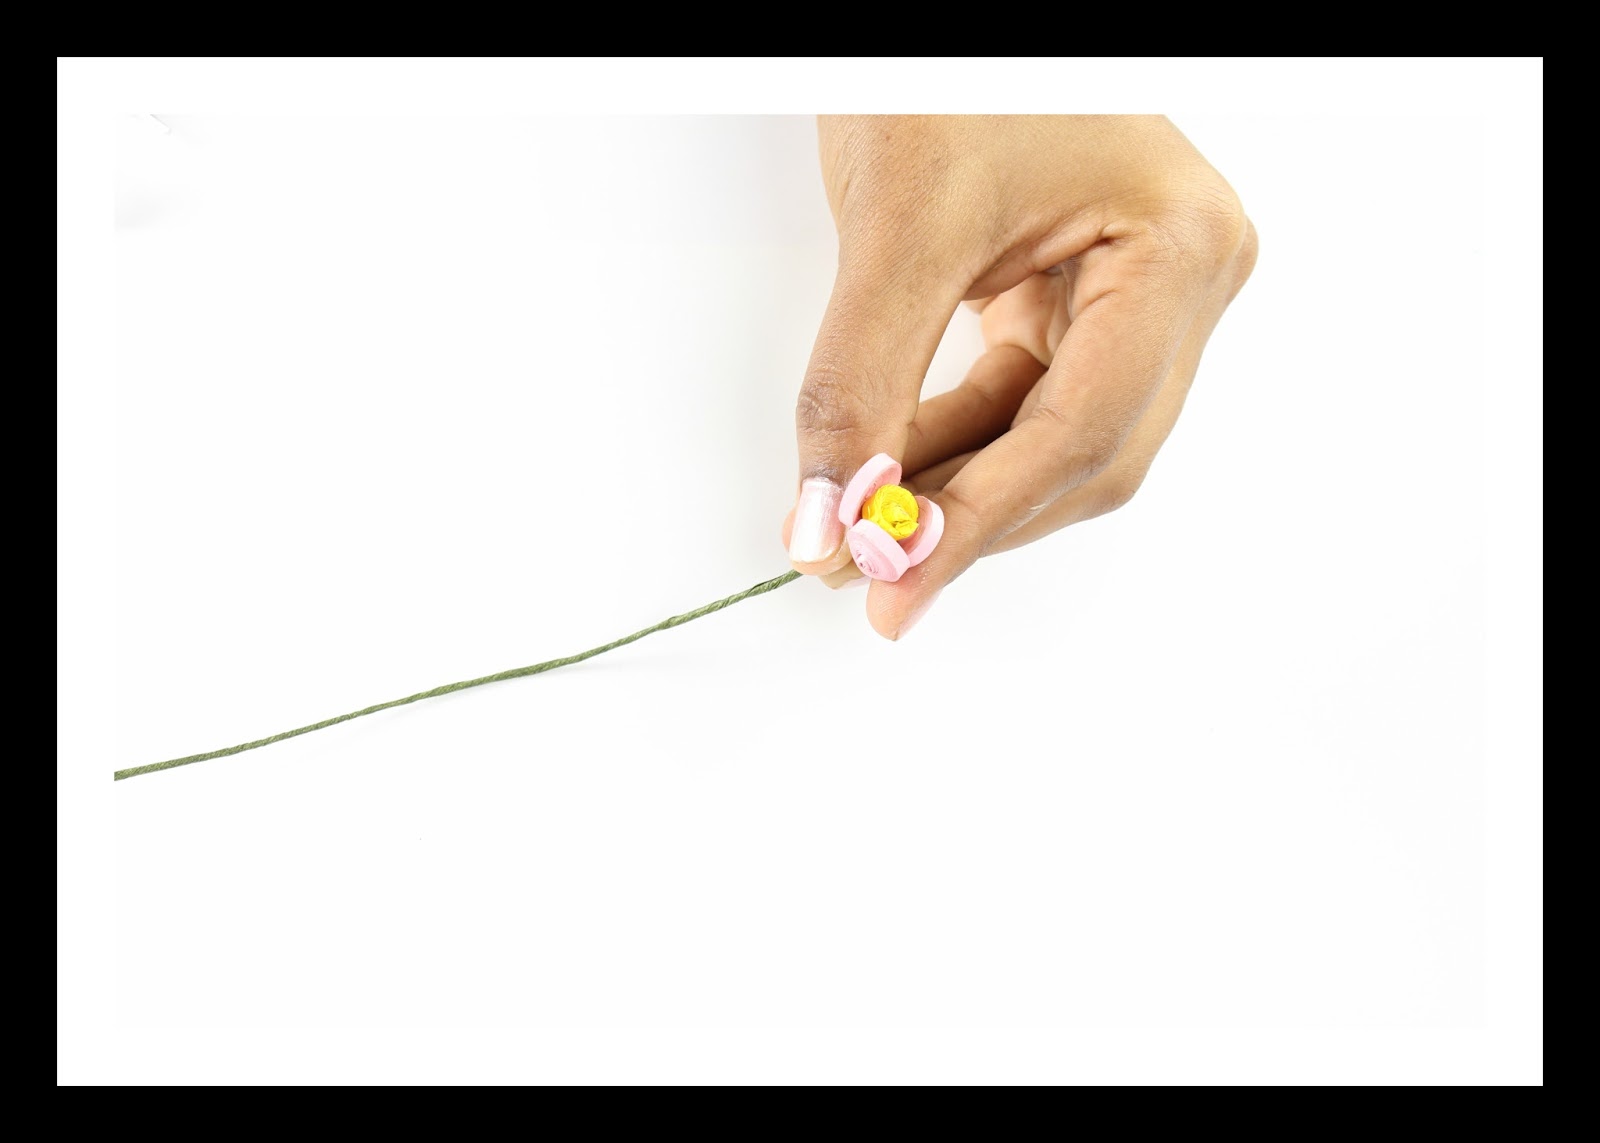
Step 3 - Using the round plier, bend the floral stem to make a small loop. Insert the fringed coil to the stem from below and glue
Step 4 - Glue the petals to the fringed coil. Make buds by gluing the petals directly to the flower stem
Step 5 - The completed flowers
Step 6 - Use Green handmade paper and cut the patterns as shown. Glue it to the base of the completed flowers to make the sepal
Step 7 - Use the green handmade paper and cut the shapes of leaves, attach them to the floral stem using floral tape. Wind the flowers and the leaves together to make the flower sprig
Step 8 - Wind the Sprig with green floral tape, paint it with decoupage for glossy finish
Step 9 - Make round coils using 3mm quilling strips (2- black coil, 3- yellow coil)
Step 10 - Make the wings of the bee by using the vellum paper. Glue the 3 yellow coil and 2 black coil one after the other, glue the wings on top and attach the feelers that are made from the quilling strip
Place the flower sprig on a painted chipboard or box .Glue the bee near the flowers, as shown
Our Pretty Sprig is ready. Use it as a wall hanging or as flower arrangement.

Link for supplies:
Quilling strips:
 Floral stem   
 Vellum paper- white
http://www.itsybitsy.in/store/craft/alpha/glitter/paper-glitter-alpha-6inc-b-pastel-blue-1pc-ib
Glue
 Round plier        
 Quilling tool
Handmade Paper–Green
 Floral tape

Tuesday, August 25, 2015

Anthurium Bouquet


Hi Folks! Hope you guys are doing great! A while ago we posted an image of Paper Anthurium Flowers on our Facebook wall. We got requests for a tutorial and as promised, we are here with detailed step by step instructions. These flowers are made with duplex crepe paper. Duplex Crepe paper has a lot of stretch and holds the shape beautifully on stretching, perfect for making realistic looking flowers.
(The image that we had posted is on the right.)


These flowers look very elegant and are great for a formal table decor, home decor, a corner table, or to make a paper flower bouquet. Because of the fantastic properties of the duplex paper, these are very easy to make. So let's find out how you can make your own bouquet. 


You will need the following supplies:

Duplex Crepe Paper - (your choice of colours)
Floral Tape - Green
Floral wire
Craft Glue
A pair of Scissors

Instructions:

To make the petal, fold the crepe paper and draw an approximate shape on the folded edge as shown in the image. The length should be approximately 2” -2 ½” and the width (from the folded edge) should be approximately ¾ “ – 1”. Each piece will form the petal of a flower, so cut out one piece per flower as per your requirement.
Stretch, curl and shape the petals as shown (using a pencil or a dowel)  
Cut a strip of crepe paper about 1”wide and 10” long. Wrap it around one end of the floral wire as shown and stick the end with glue.
Cut a small piece of paper and glue it around the wrap to close the top.
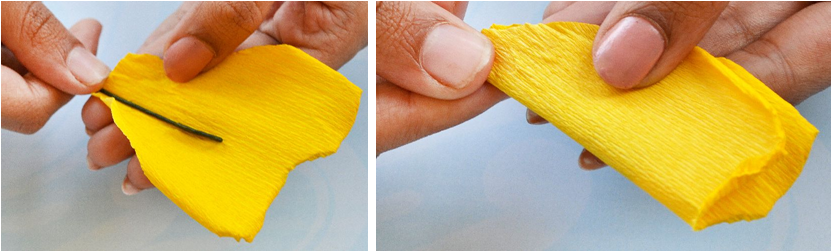
Apply glue to the base of the petal and place the wrapped wire as shown. Wrap the petal at the base as shown to form the flower.


Start wrapping the floral tape tightly, beginning at the base of the petal. Wrap the entire wire to make the stem.


Make a few flowers using slightly different lengths of wire for every flower. Arrange in a vase to display. You can also cut a thermocole ball in half, wrap it entirely with floral tape and insert the stems to display as shown in the image above. You can also make some long leaves cut out of green crepe paper to add some foliage.

Do leave your feedback in the comments below and send us images if you make these flowers.
Happy Crafting J


Tuesday, May 19, 2015

Duplex Crepe Paper Rose Bouquet


Hi Friends, it’s Tuesday and we are back with another tutorial here on the Itsy Bitsy Blog. Summer is in full swing and it’s the time of roses. So here we are with a step-by-step tutorial on how to make a beautiful bouquet of roses. These flowers can be made with very limited number of supplies and will brighten up any room!


So let’s get started. Here is the list of supplies we used for making the flowers:

  1. Duplex paper  in your choice of colour
  2. Floral wire
  3. Floral Tape
  4. Green Handmade paper for leaves
  5. 10-12mm beads
Note: You can also make these roses with crepe paper but you will get better results with Duplex crepe paper. Duplex paper is thicker than the regular crepe paper and has different colour tones on the two sides. This makes the duplex papers one of the most sought after paper to make realistic looking flowers. This paper has anywhere between 25 – 50% stretch making it possible to manipulate parts of it to give more realistic looking shapes to the petals.

Method:

Cut the duplex paper in heart shapes of roughly about 2”-2 ¼ “ dimensions. The hearts need to have somewhat flat base. These hearts will be used to make the petals of the roses


The easiest way to cut out hearts is to fold the paper, and trace half a heart (as shown) on the folded edge.
Cut out the heart shapes as shown. One flower will require about 8-9 hearts. Cut out as many heart shapes as you need.
Prepare all the heart cut outs by gently rolling the edges of the hearts as shown. The edges should be rolled away from the darker side of the paper and towards the lighter side. This is important for a realistic looking flower.
Take one of the hearts and wrap it around the folded floral wire.

Twist the paper as shown. This will form the centre of the flower.
Tightly wrap some floral tape at the base of the petal to keep it in place. Wrap a second petal in the similar way.
Keep adding more petals and wrap the base with floral tape.
After about 8-9 petals, your flower will look just like a rose bloom. Make as many roses you would like for your bouquet.
Thread a bead onto one end of a floral wire and fold back the end ( about  ½ “) as shown.

Wrap the bead completely with floral tape. This will make the rose buds.
Cut 3 pieces of floral tape in the shape shown here. Line them at the base of the bud to simulate sepals.

Tightly wrap some floral tape to keep the sepals in place. The rose bud is ready!

Cut some leaf shapes with the green handmade paper and wrap them about an inch below the base of the flowers using floral tape.

You can add leaves in this way to all the flowers or just some of them depending on how much foliage you want in your bouquet.


Start assembling the flower bunches by arranging them in a staggered fashion and twisting the stems together.
Wrap the stems with more floral tape. 
Your rose bunch is ready! Make as many such bunches as you want and in as many colours as you want. 
As you can see in the picture below, we made them in different colours and they looked so beautiful together that we did not have the heart to segregate them by colours!


The last but not the least step - Sit back and enjoy the beautiful roses! :)

Hope this tutorial has inspired you to try it out. Do leave your feedback in the comments below and send us pictures on our Facebook page if you try it.

Here’s a handy link for the supplies.
Link for Supplies:
Duplex paper:
Floral Tape:
Floral Wire:
Handmade Paper: