Showing posts with label Craft Butterfly. Show all posts

Friday, April 7, 2017

Cereal box journal cover with Classy Chic burlap stack


Hello Friends , 
I'm back to journaling for the brand new month and I love creating my own journals. This time I have made my Journal cover using a cereal box and have given it a makeover with Classy Chic burlap stack .


I am still a little old-fashioned when it comes to taking notes and I usually have at least two pocket notebooks in my purse at all times (one for craft ideas and the other...for making to-do lists). I realized that I am also very picky when it comes to choosing the perfect notebook


Shabby Chic Burlap Stack--one of the latest releases at the store,  
is a whole pack of 12x12 inch laminated burlap sheets which are perfect for mini album covers, embellishments, layouts...I can go on :D


Layout with burlap sheet


Inside the album I have used double sided sheets and will be decorating them as and when I put them to use .


I have embellished with butterflies to match with the theme 


These are so easy and fun to make!! Hope to have inspired you all to play along this month's challenge
ITSY BITSY BLOG CHALLENGE #4-2017

Supplies used 


KRAFT PRINTED GLITTER BUTTERFLIES 10PC PBCI IB

KRAFT PRINTED GLITTER 

KRAFT PRINTED GLITTER BUTTERFLIES 6PC PBCI IB

KRAFT PRINTED GLITTER 

Burlap Stack - Classy Chic

Burlap Stack - Classy Chic

ANTIQUITIES 12X12 INCH STACK PACK #0985 48SHT STUDIO G

ANTIQUITIES 12X12 INCH STACK 

KRAFT PRINTED EIFFEL TOWER 4PC PBCI IB

KRAFT PRINTED EIFFEL TOWER 4PC 


Wednesday, November 16, 2016

Scrapbook layout with stencils

Hello Friends ,
A Warm Welcome to you all from Sharada Dilip 
Today I am here to share a Fun layout I created using stencils !


Have you checked our ongoing  challenge?  
 It is ANYTHING GOES using Itsy Bitsy Stencils 


Itsy Bitsy has a huge range of stencils to choose from, 
I have used 


I have layered Pattern papers from 

AMY TANGERINE STITCHED 12X12 INCH STACK PACK and started with Script Stencil and VINTAGE PHOTO DISTRESS INK PAD  and unevenly stenciled it till I was happy with the results 


With STENCIL HONEY COMB  I have used Modelling paste and 

METALLIC PAINT MINT to give it a stunning contrast 


I have layered the layout with a sizzix frame die cut and 

KRAFT BUTTERFLIES & FLOWERS along with stamps to complete the look !


It was awesome fun playing along with stencils stamps and these lovely butterflies 


Hope this creation of mine has brought a smile on your face and we would love to see how you play along these products 


Supplies used - 

AMY TANGERINE STITCHED 12X12 INCH STACK PACK 

Stencil

Tuesday, July 21, 2015

Metamorphosing Butterfly

Hi Folks! Welcome to our Tuesday tutorial! Today we will show you how to make this metamorphosing butterfly. Fold the wings and you see only the caterpillar. Open the wings, and it transforms into a beautiful butterfly! A fun and easy craft for kids! They will have fun making it and showing it off :) 


Supplies needed:

  1. Ice cream sticks - 8 pcs
  2. Tempera paints or Acrylic paints - (in your choice of colours)
  3. Handmade Paper - 11.5x12cm piece
  4. 20mm Pompoms - 5 pcs (in your choice of colors)
  5. Google eyes (3mm)- 1 pair
  6. A small piece of red paper or felt
  7. Sequins
  8. Paint brush
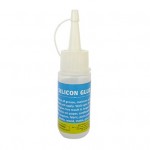
  9. Craft glue or Silicon Glue


Here's how:

Paint all the ice cream sticks. (You can also use pre-colored ice cream sticks)

Cut the green paper into 11.5X12cm rectangle.
Glue the ice cream sticks to the paper as shown. 
Important: The two sticks in the center should be close together but the rest of the sticks should have 2-3mm of space between them.
Glue the pompoms on the two centre sticks as shown. The green pompom is the head and the red pompoms are the body of the caterpillar/butterfly.

Fold the sticks like a fan as shown in the image.
 
Cut a piece of the chenille stem and form it into the shape shown in the image. This will form the antennae.


Glue the antennae to the ice cream sticks just under the "head" pompom.

Make the wings in desired shape using the provided glue. Glue the sequins to make wings. Stick the google eyes and small triangle of red paper to make the mouth.

Make dots and patterns on the wings of butterfly with other colours.

You can make the wings' shape as per your choice!

Your metamorphosing butterfly is ready! Fold it to make the caterpillar and open the folds to transform it to a butterfly!