Showing posts with label Google eyes. Show all posts

Wednesday, December 16, 2015

Bottlecap Reindeer

Hi Folks! Here's something to do during the Christmas holidays. We are going to make a Bottle cap Reindeer, which is easy to make & can be a fun activity during Christmas. This is part of CRAFTY COUNTDOWN TO CHRISTMAS

Materials Required:

Bottle cap
Google eyes
Itsy Bitsy glue
Floral tape
Wire
2mm Quilling strips – red
Ribbon
Scissor

Method :

Step 1 – Take a bottle cap and stick 2 google eyes with the help of Itsy Bitsy Silicon glue
Step 2 – Make a round coil using 2mm quilling strips

Step 3 - Stick the mouth to the bottle cap

Step 4 – Take 3 wires and cut them to 2 inches in length. Twist them together till 1.5 inches and spread the ends. Wrap brown colour tape around the wires. Repeat the same & make another similar strand
Step 5 – Stick the strands on the back of the cap with Itsy Bitsy glue
Step 6 – Stick a ribbon on top of the bottle cap to hang it
The Bottlecap Reindeer is ready. This can be a great decoration on the eve of Christmas. You can make plenty of these and decorate your room. You can hang it on the Christmas tree or you could stick a magnet & make it a Fridge Magnet.  Let us know what you thought of this tutorial J

Link to supplies –

Saturday, December 5, 2015

Reindeer Fridge Magnet

Hi Folks! Hope you had a great day. Here's something to do for the coming Christmas holidays. Enjoy and have fun making this reindeer fridge magnet.

They not only serve the purpose of a fridge magnet but also your fridge becomes a display area for your Christmas craft collection. 


Things Required:
Chenille stem- 1
Pompom- 1
Magnet- 1
Silicon glue
Google eyes- 1 pair
Small pompom- 1 red


Let's start to make this reindeer magnet:

Step 1 - Glue the Google eyes and the nose to the Pompom

Step 2 - Cut the chenille stem into 4 pieces to make the antennas and ears of our rein deer
Step 3 - Wind the chenille stem on a pencil to make the antennas


Step 4 - Twist the chenille stem in a loop, to make the ear


Step 5 - Glue the pompom and stick the antennas and ears
Step 6 - Glue the magnet to the reindeer


Proudly stick your reindeer on the fridge :-)
Link for supplies:

Tuesday, December 1, 2015

The Puffed Up Fish


Hi Folks! Hope you had a great weekend. Here's something to do with your kids coming weekend. Make a fun fish at home! This cute fish will win hearts. It's easy to make and kid's can make it with little or no help.


Here are the supplies needed to make this fish:

Supplies:
Thermocol Ball  - 1 pc
Tissue Paper – 1 sheet
Google Eyes - 1 pair
Crystals - 20-30 pcs
Here’s How:


Wrap the thermocol ball in the tissue paper as shown. 

Bunch the paper and wrap a strip of the tissue paper, gluing it in between. The loose paper will form the tail fin and the thermocol ball will form the body.

Cut two small piece of the tissue paper. Bunch them and glue them to the body to make the fins.

Cut two bumps of the bumpy chenille stem and make the mouth as shown by twisting the ends together. For more ease you can first twist the bumps and then cut them.


 Glue the mouth to the body. Stick the google eyes. 
Glue the crystals to the rest of the body to add some sparkle. You can also use glitter or sequins to decorate your fish.


Your cute puffy fish is ready!! Make few of them in different sizes & colours to make a school of fishes!! Do let us know what you think of this tutorial in the comments below :)

Tuesday, November 24, 2015

Surprised Frog!

A very Happy Tuesday to all! Today we are going to make a cute little frog for our little friends! It's an easy to make and fun pompom project. Pompoms are such versatile little things, cute, colourful and full of fun! Combine them with chenille sticks, craft sticks, thermocol balls and google eyes and you are looking at endless fun opportunities. Today we are going to make a cute frog which looks kind of surprised. Imagine the stories one could tell with this froggie as a puppet!


Supplies required to make this frog:


Pom Poms: 4 (1 – 40 cm, 1 – 30cm, 2 – 15cm)
Google Eyes- 1 pair
Felt – Green, Purple, Red

     Cut out the lily pad and the mouth from green felt. Cut the Webbed feet from purple felt and tongue from the red felt.


Loop and twist the Chenille stem in the middle to make a “8” shape.


Shape the loops to resemble frogs legs. 

Glue the webbed feet on the lily pad with silicon glue. 
Glue the legs (hold for a while to let the glue dry a little)


Stick the 40 cm pompom and then the 30 cm pompom to make the body.

Stick the two smallest pompoms to make the base for eyes.

Stick the google eyes.

Your awesome frog is ready to play! Experiment with different colours and sizes of pompoms and see what you can come up with. Happy Crafting :)


Tuesday, September 29, 2015

The Busy Hive Magnet

Hi Folks, Welcome to another Itsy Bitsy Craft Tutorial. Today we are going to make this super cute beehive magnet with little busy bees! A great weekend activity or a perfect gift J


Supplies:
  1. Yellow Cardstock (A4 or 12”x12”) – 1 sheet
  2. Orange Craft Foam
  3. Yellow Pompoms (8-12mm) – 3 pcs
  4. Black Chenille sticks – 2 pcs
  5. White Pollen/Stamen- 6 pcs
  6. Tempera Paint – Black
  7. Silicone Glue or Craft Glue
  8. Google Eyes - 1Pair
  9. Magnet


Here’s How:
Cut a piece of cardstock – 13.5cm X 10.5cm. Refer to the diagram below. Score on the dotted lines and then cut on the solid lines. You will have 9 paper strips – each measuring 1.5cmX10.5cm, scored at every 1.5cm. (Scoring is important to fold the hexagons later.)
 

Make hexagons from the strips by gluing the ends as shown. Make more hexagons if you want a bigger hive.

Glue the hexagons together and make the hive. You can make some cells open or make it completely symmetric.

Apply glue to the edges and stick it to the felt piece.


Trim the excess felt. You hive is ready


To make the bees, cut a 2- 3” piece of chenille stem and coil it. Stick the pompom on one side of the 
coil.

Paint the pollen black, trim them to size and glue them to make the antennae. Stick the google eyes, and a small piece of cord for the mouth.

Make as many bees as you like and house them in your hive J. Just apply a little glue so they do not fall off. 

Stick the magnet at the back and proudly display your awesome creation!!
Do let us know what you think of the tutorial in comments below. Happy Crafting :)

Tuesday, September 22, 2015

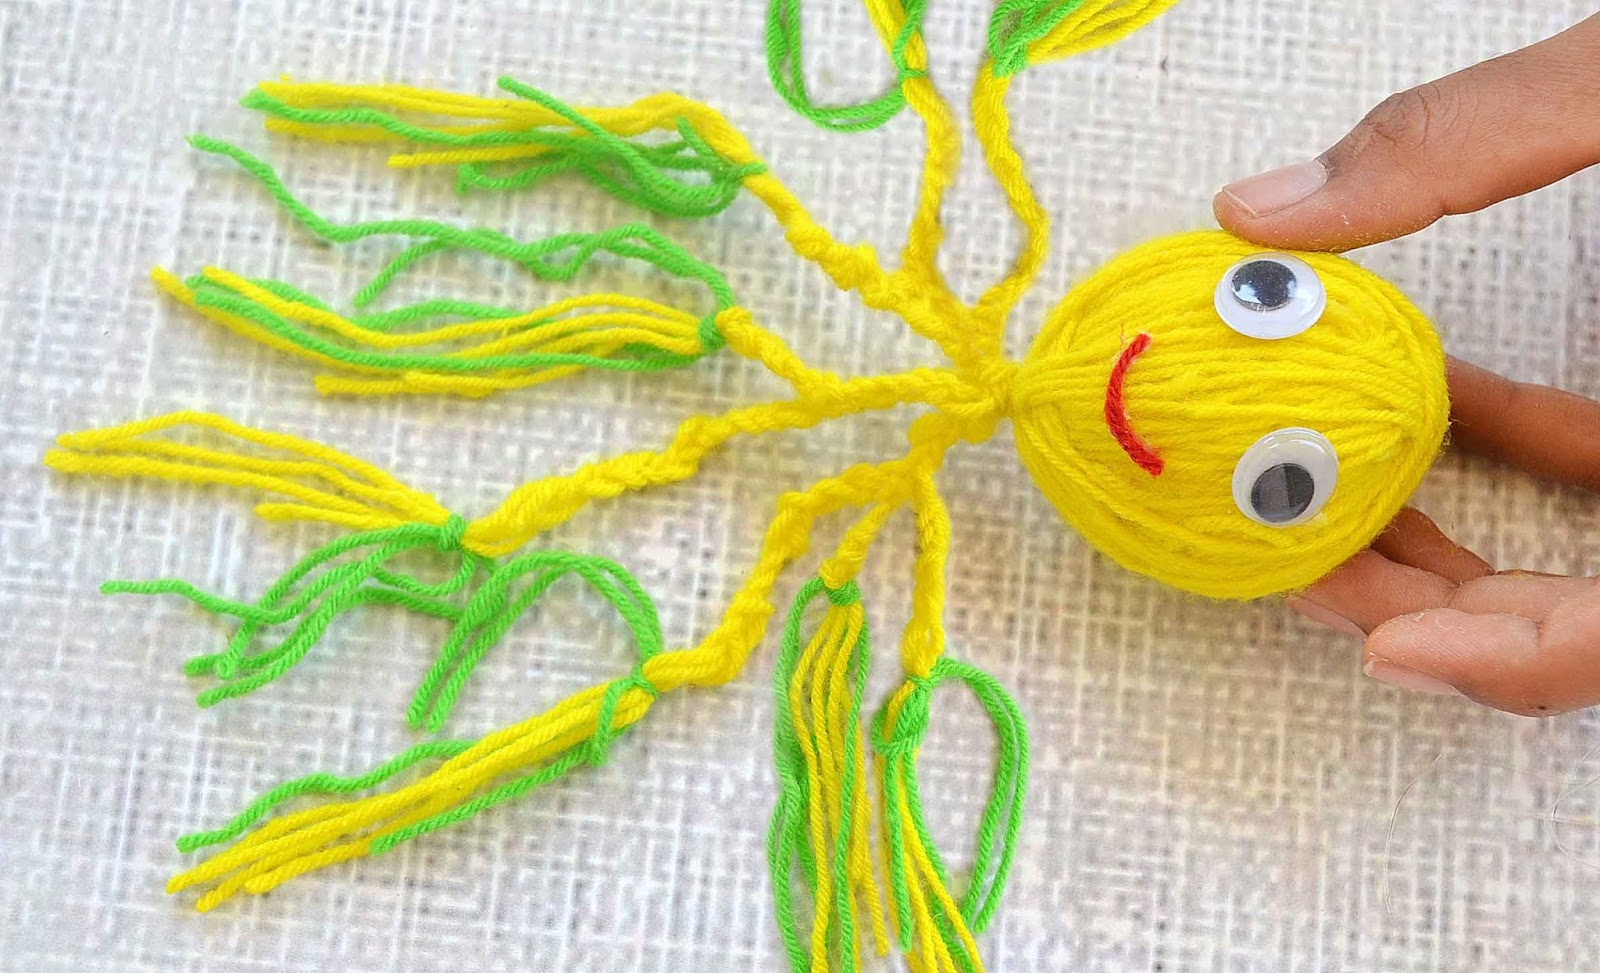
Flip Flop Octopus

Good Morning Everyone!! Welcome to another Itsy Bitsy Tutorial! Another fun-filled tutorial for kids and anyone young at heart. Kids will just fall in love this cute little octopus. With eight swinging arms, big google eyes and a such a friendly smile, what's not to love?


It’s very easy to make and a perfect craft to do with young kids. Not only will the kids enjoy making it; once made, it has some serious potential to become a favourite toy! 
So let’s get started. And you only need following 4 supplies!


  1. Yarn (we have used two colours but you can use more or less or even make a multicoloured octopus!)
  2. Red Yarn for mouth
  3. A 2” thermocol ball (take a bigger ball for bigger octopus and accordingly take more yarn)
  4. A pair of google eyes
  5. Craft Glue


Method:
Apply glue on the thermocole ball and wrap the yarn all over the ball.

Make sure that the ball is fully covered and trim the yarn.

Take a few lengths of yarn and wrap it around the ball as shown.

Tie at the bottom with a piece of yarn.

Divide the bunch of yarns in 8 bunches of roughly equal thickness. Braid all the 8 bunches to make 8 arms 

Tie off the braids with yarn of another colour.
Glue the eyes and the piece of red yarn for the mouth.
You flip flop Octopus is ready!!
You can also try out other variations, other creatures or even raggedy style dolls using the same technique. Try using fuzzy yarns or ruffle yarns for a more fuzzy and fun look.
Do let us know what you think of this tutorial and send us pictures on our Facebook page if you do try it. 
Happy Crafting :)