Showing posts with label Kid's Craft. Show all posts

Friday, December 25, 2015

Bottle cap Snowman

Hello Folks!! Welcome to another step by step tutorial. Here's something to do for the coming Christmas holidays. Enjoy and have fun making this cute Bottle cap Snowman as part ofCRAFTY COUNTDOWN TO CHRISTMAS".

Materials Required:
Bottle cap
Silicon glue
Card stock
Satin ribbon (red & silver)
Button
Crystals
Scissor

Method:
Step 1 – Take a bottle cap & glue crystals as eyes with the help of Itsy Bitsy silicon glue

Step 2 – Cut a triangle out of orange card stock
Step 3 – Glue black crystals as lips
Step 4 – Take another bottle cap & glue 3 green crystals as shown
Step 5 – Take a silver ribbon & glue the bottle caps
Step 6 – Glue an empty bottle cap at the end of the ribbon
Step 7 – Tie a red ribbon as muffler & glue a green button on top
The super cute bottle cap snowman is ready. You can use it as a pendant or a tree hanging! This is a fun & easy tutorial during the holidays. Let us know what you thought of it.

Link to supplies –

Thursday, December 24, 2015

Chenille Stick Bug

Hello Folks!! Welcome to another step by step tutorial. Here's something to do for the coming Christmas holidays. Enjoy and have fun making this cute Chenille Stick Bug as part of “CRAFTY COUNTDOWN TO CHRISTMAS". 

Material Required:
Chenille stick – Green, red & brown
Itsy Bitsy Silicon glue
Google eyes
Pompom
Scissor

Method:
Step 1 – Take 2 different color of Chenille sticks (red & green) & twist as shown. Make 2 such strands
Step 2 – Bend one end of both the strands as shown
Step 3 – Wrap a brown color Chenille stick around the strand
Step 4 – Glue google eyes on the body with the help of Itsy Bitsy glue
Step 5 – Glue a small red pompom below the eyes
Step 6 – Cut a small piece of chenille stick and wrap it around the waist of the bug

The chenille stick bug is ready. Make these with your friends during any party and have a gala time. You can use multicolour Chenille sticks too. Happy crafting!! Let us know what you thought of it.
  
Link to Supplies:

Wednesday, December 23, 2015

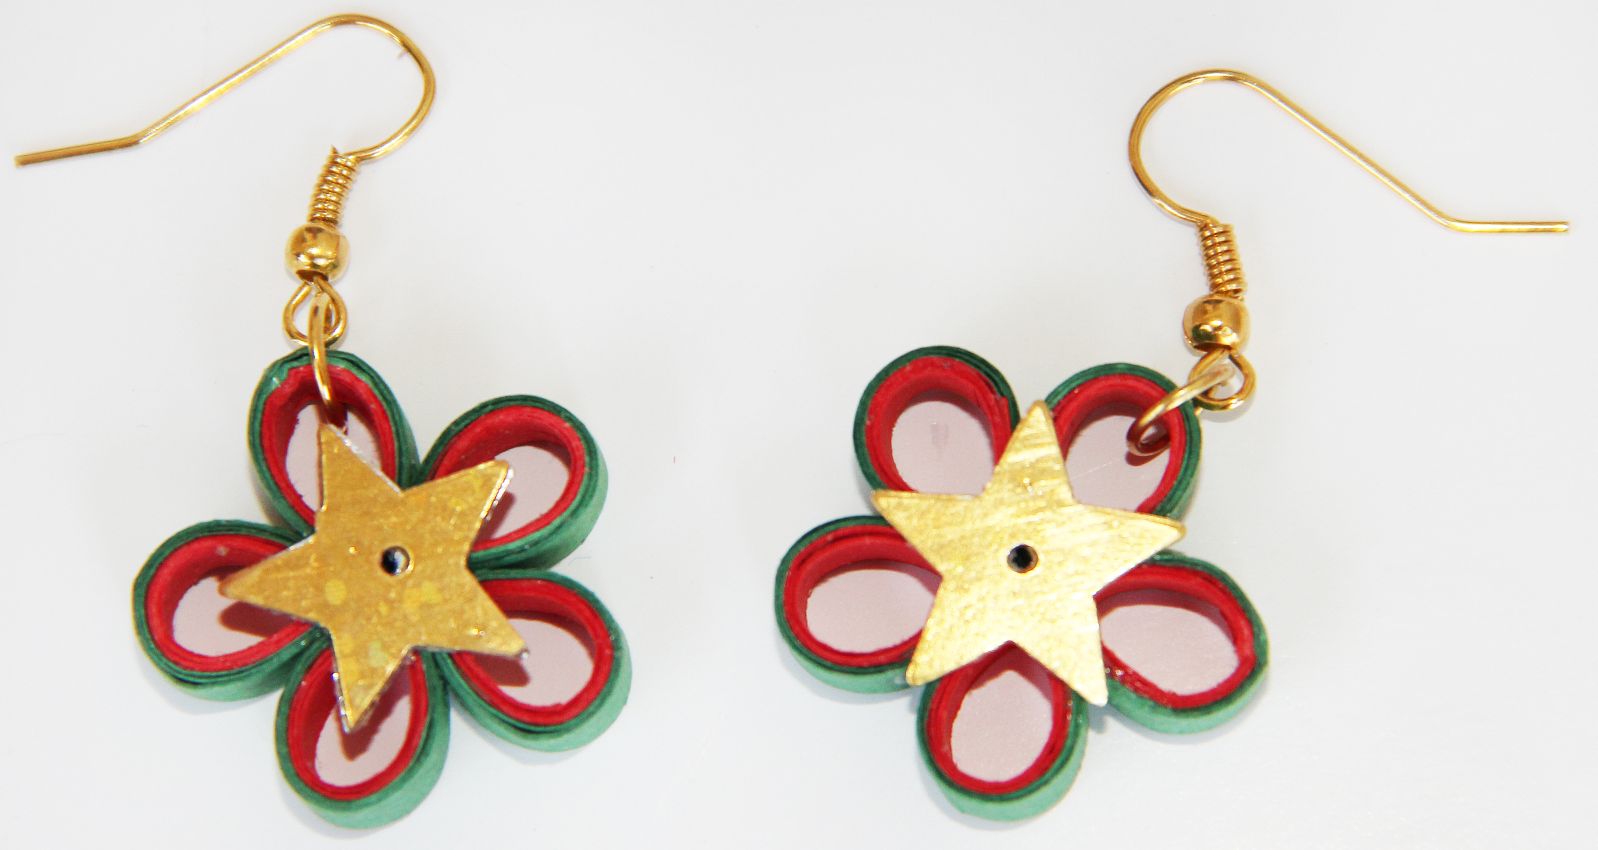
Quilled Jewellery

Hello Folks!! Welcome to another step by step tutorial. Here's something to do for the coming Christmas holidays. Enjoy and have fun making this simple quilled jewellery as part of "CRAFTY COUNTDOWN TO CHRISTMAS".

Material Required:
Quilling strips 3mm
Star embellishment
Craft glue
Findings ear wire hook
Finding clasp
Finding end piece
Cord
Border buddy
Jump ring
Flat nose plier

METHOD:
Step 1 – Take 2 quilling strips (red & green) and glue the ends
Step 2 – Apply Itsy Bitsy silicon glue throughout the strip and roll it around the border buddy to make a coil
Step 3 - Take out the coil and press the edges (in the shape of tear drop)
Step 4 – Make 5 similar coils
Step 5 – Glue the coils as shown
Step 6 – Glue a star embellishment
Step 7 – With the help of flat nose plier, put a jump ring around a coil
Step 8 – Attach an ear wire hook to the jump ring (as shown)
Step 9 – The earings are ready
Step 10 – Make a small red coil & glue it to one of the big coils

Step 11 – Take a cord, put it inside an end piece & press it inside with the help of a plier. The cord has to be tightly locked. (Repeat on both sides of the cord)

Step 12 – On one side, attach a clasp to the end piece (as shown). On the other side, attach a jump ring
 

The quilled neckpiece & earings are ready. This is simple & very easy to make. This can be a great addition to your accessories. You can make plenty of these and gift your friends too. Let us know what you thought of this tutorial. J

Link to supplies –

Tuesday, December 22, 2015

Clay Snowman

Hello Folks!! Welcome to another step by step tutorial. Here's something to do for the coming Christmas holidays. Enjoy and have fun making this cute Clay Snowman as part of "CRAFTY COUNTDOWN TO CHRISTMAS". 

Material Required:
Thai clay
Chenille stem
Cord
Itsy Bitsy Silicon glue
Scissor
Eye pin
Black crystal

Method:
Step 1 – Take 3 clay balls & press the middle (as shown in the image)
Step 2 – Glue black crystals for the eyes on one of the balls

Step 3 – Cut a Chenille stick & glue it for the nose
Step 4 – Now, glue the second clay ball with the help of Itsy Bitsy Silicon glue
Step 5 – Similarly, glue the third clay ball
Step 6- Glue 3 black crystals to the second ball and tie a chenille stick (as a scarf)
Step 7 – Insert an eye pin from the top of the head (as shown) and put a cord to hang
The super cute clay snowman is ready. You can use it as a pendant or a tree hanging! This is a fun & easy tutorial during the holidays. Let us know what you thought of it.

Link to supplies –

Monday, December 21, 2015

Finger Puppet Santa

Hi Folks!! Welcome to another tutorial which is based on Christmas theme. This December let us celebrate the magical season with Christmas crafts. Enjoy and have fun making this cute finger puppet Santa as part of "CRAFTY COUNTDOWN TO CHRISTMAS".

Materials required:
Felt sheet (red & white)
White cardstock
Thermocol ball
Silicon glue
Brush
White & red pompom/cotton
Needle & thread
Color
Flower stem
Black crystal

Method:
Step 1 – Take a thermocol ball & color it with the help of Itsy Bitsy brush & color
Step 2 – Take a white cardstock, roll it & glue the edges

Step 3 – Roll a red felt sheet over it & glue the edges (to make the body). Glue another sheet as Santa’s coat. (Optional)
Step 4 – Cut 2 white felt sheets (as shown on the image) & glue it to the body (one at top & another in the middle of the body)

Step 5 - Glue the thermocol ball (as head) to the top of the body
Step 6 – Glue the red pompom or cotton (as nose), white felt (as moustache) & black crystal (as eyes)
Step 7 – Glue the beard (spread out the white pompom)
Step 8 - Cut a red felt sheet (as shown on the image) & stitch the edges to resemble Santa’s cap
Step 9 – Insert a flower stem to it
Step 10 - – Cut a white felt sheet (as shown on the image) & glue it to the cap

Step 11 – Glue a white pompom to the top with the help of Itsy Bitsy glue. The cap can be bent with the of the wire
Step 12 – Put the cap to the body. The wire is pierced into the head to keep the cap in place

The finger puppet Santa is ready. This can be a great decoration on the eve of Christmas. You can make plenty of these and decorate your room. You can hang it on the Christmas tree too. Let us know what you thought of this tutorial. J

Link to supplies –