Showing posts with label Pigment ink. Show all posts

Friday, June 2, 2017

1 Stencil, 3 ways to create Card Backgrounds


Hello everyone, it's Juhi, I'm sharing how to use one stencil to create 3 different looks.


Look 1:


For the first background I began by placing the stencil onto white cardstock and applying distress inks to create a ink blended background. I used 4 colors in shades of red, orange and yellow.
Starting with red at the bottom I worked my way up to to yellow.
After removing the stencil I repeated the same process, this time over the entire cardstock. This created a muted, stenciled background. Finally I sprinkled some water onto the background and dabbed it with a piece of tissue paper.

Look 2:

I followed the same steps to create the second stenciled background. In this background I carefully placed the stencil back in place on the cardstock and outlined the leaves with a black pen. This gave a nice defined look.

Look 3:


For the third background, I masked out few leaves of the stencil with washi tape and applied distress ink over the remaining leaves. Following which I removed the washi tape one by one from each leaf and inked them with a different, darker color.
I finally created cards using the 3 backgrounds, I diecut a window in the middle of background 1 and mounted it on white cardstock base with double sided foam tape after stamping the sentiment.

I stamped the sentiment on a piece of black die cut cardstock and stuck it on top of background 2, and finally mounted the background panel on black cardstock.
For the third card, I stamped the sentiment onto the diecut piece from the 1st card and mounted on top of background 3.

Supplies Used:


"

Leaf Stencil
Shop at:
Itsy Bitsy
" Non-stick Craft Sheet
Non-stick Craft Sheet
Shop at:
Itsy Bitsy
Card Stock - Bright White
Shop at:
Itsy Bitsy
Dream Cut Machine
Dream Cut Machine
Shop at:
Itsy Bitsy
Acrylic Stamping Block
Shop at:
Itsy Bitsy
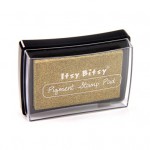
Pigment Ink Pad - Black
Shop at:
Itsy Bitsy
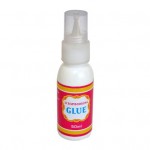
ADHESIVE SCRAPBOOKING GLUE
Shop at:
Itsy Bitsy
Clear Stamps - Jumbo Wishes
Shop at:
Itsy Bitsy
Mini Distress Pad - Festive Berries
Shop at:
Itsy Bitsy
Thin Cut Dies - Square
Shop at:
Itsy Bitsy
Mini Distress Pad - Fossilized
Shop at:
Itsy Bitsy
Distress Ink Pad - Spiced Marmalade
Shop at:
Itsy Bitsy
Washi Tape - Floral Flowers
Shop at:
Itsy Bitsy
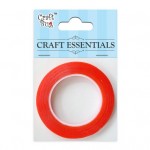
ADHESIVE FOAM DBL SIDED TAPE
Shop at:
Itsy Bitsy

Friday, April 28, 2017

Watercolor cards with Say it Flowers stampset and Fairy Dust Glitter


Hello everyone, it's Juhi with some watercolor cards. I have used the beautiful "Say it with Flowers" Stamp set for today's cards. I have also used Fairy Dust in various colors on my cards.
As I have mentioned in my earlier posts, watercoloring is my favorite technique.


I started by stamping the flowers from the stampset on 3 watercolor panels cut to the size of my card fronts. I stamped randomly, taking care to change the orientation of the flowers and also stamp off the edges to create a random looking pattern. I stamped 2 panels with black pigment ink and 1 watercolor panel with gold pigment ink.


I then watercolored the area between the flowers on one of the watercolor panels with Crimson Mont Marte tube watercolors. I also added some red on the flowers.


For the second watercolor panel I watercolored the flowers in shades of blue, purple and yellow and added a mustard background.
For the 3rd panel I added some bright pink to the center of the flowers, I did not fill the flowers completely to create a messy watercolored look.
Now that I was happy with the watercoloring, it was time to add some glitter!!!
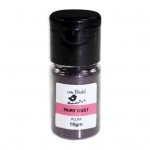
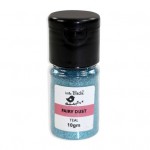
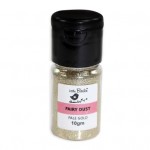
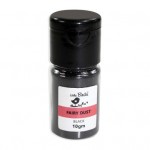
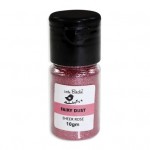
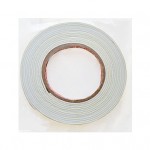
I used one of my favorite ways to add glitter to my projects, I used Itsy Bitsy's gorgeous fairy dust super fine glitter with double sided tacky tape. I will not go into the details of how I did it in this post as I was already shared the method in detail here and here.
Fairy Dust comes in a huge variety of colors so I could find just the right colors for my cards!!!
I finally stamped the sentiments and mounted the watercolor panels onto white cardstock with double sided foam tape! I just love how these cards turned out, I hope you will also give stamping and watercoloring a try, it's very easy and fun and the results are beautiful!!!
Thanks so much for stopping by today!


Supplies Used:


Thursday, April 6, 2017

Crafter in The Spotlight 44 - Itsy Bitsy

Hello arty-crafty folks,

The week rolled over and Thursday is here again! It’s time for me to introduce a talented crafter and her outstanding craft skills. This week’s chosen one is Aangee shah, who feels there is nothing else that makes her happier than crafting.

Aangee worked in a school for a year as an art and craft teacher but realised that it did not make her completely happy. She always wanted to establish her own identity and found crafting to be the perfect way to do it.


 How did Aangee get into crafting, what inspires her, what are her tips for fellow crafters, her favourite quote, how would she contribute to the crafting world if she had magical powers? Read answers to all these questions, discover more about her interesting journey and catch a glimpse of a step by step project by Aangee in this interview. Don't forget to leave your comments for her.


Here are excerpts of my interview with Aangee Shah:

Rashmi Closepet, MD, Itsy Bitsy: Tell us a bit about yourself & your background?
Angee Shah: I graduated from Gujarat University and have completed my M.Com. I worked for a year in a school as an art and craft teacher… but  that didn't give me the happiness that I was looking for although I had to work just on creativity. I always wanted my own identity and wanted to do something with my own name. For me, art and craft slowly turned to my day by day work from my hobby. Crafting gives me immense joy. Buying craft materials gives me more pleasure than buying cloths.
Crafting is my soul. From childhood I was a brilliant student in art and craft and even got many certificates for the same. I always wanted to be a painter and wanted people to know me by my art work. Thought not known as a painter, but I am known as a passionate crafter.  My strongest support for crafting comes from my sister, who always stands by my side for the same.

RC:    How did you get into crafting?
AS: I never thought of being a crafter. But suddenly one day I just started and tried my hands on an exploding box and then don't know what went into my mind and slowing I started creating more and more album cards. Playing with paper and glue made me go crazy and I wanted to create something new every day.

RC:    What is your favourite type of craft?
AS: My favourite is album making as I believe in creating memories. What can be better than an album that can store all those memories? However, nowadays I started playing with colours to get deep into mix media projects. My very 1st colour sprays were Itsy Bitsy colour splash…..

RC: What are your favourite products at Itsy Bitsy?
AS: Flowers, stamps, colour splash and the new release chalk paints are among some of my favourites.

I really want to thank Itsy Bitsy for providing such beautiful raw materials with which I can finish my projects… just amazing!!! Itsy Bitsy has become the regular shop for my craft things.

RC: If you had magical powers, how would you contribute to the Crafting world?
AS: If I had magical powers I would frankly make some money with crafting. I would also introduce the art of crafting to the world.

RC:   Your prized possession in your craft stash from Itsy Bitsy?
 AS: Those would be Chalk paints and Stamps. 

RC:   How would you describe your style of crafting?
AS: My way of working is just simple... I love to create something new every day. My style of creating means…it should give satisfaction after completion so that I get motivated to create more each day.

RC: How do you organize your time for crafting?
AS: I regularly work on crafting for 3-4 hours a day. I make a target and complete that too.

RC: Tips for people who want to craft
AS: Don't just wish to craft. Start it up. Because I believe if you want to craft, there are endless things to create.

RC: Your all -time favourite quote?
AS: It's my tag line.. " Spreading handmade love beyond boundaries "


 Here is a gorgeous project by Aangee  & step by step description:


Step 1: Collect goodies like stamps, distress ink, brush pen...all available at Itsy Bitsy store.


 Step 2: Stamp your choice of flowers and colour them with ink of your choice and cut them as shown.


Step 3: Blend in pigment ink on the white card stock as shown with the help of your blending tool. 


Step 4: Arrange the coloured cuttings of your stamped flowers and sentiment. Stick the card stock on your envelope. It's done....


Here are a couple of  Aangee's other awesome creations:


Many congrats Aangee for being the CRAFTER IN THE SPOTLIGHT – ITSY BITSY!!


You will receive Rs.500/- Itsy Bitsy gift voucher ðŸ˜ŠðŸ˜Š & a Crafter in the Spotlight badge, which can be proudly displayed on the side bar of your blog and other platforms. Looking forward to many more creations, Happy Crafting!