Showing posts with label Monte Marte. Show all posts

Friday, April 28, 2017

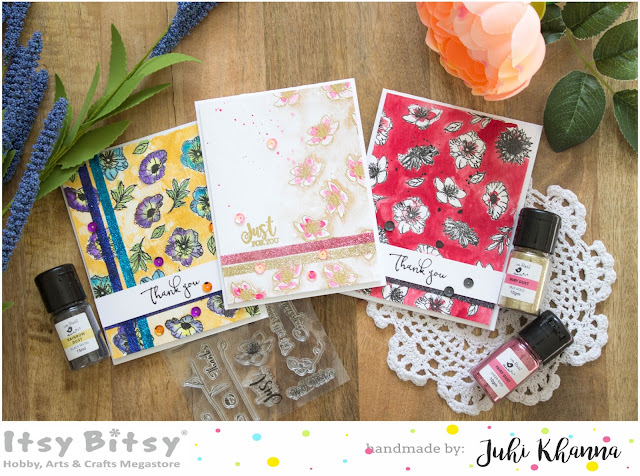
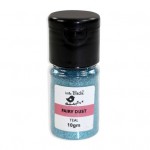
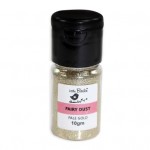
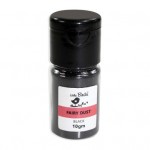
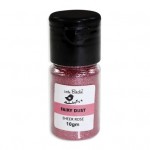
Watercolor cards with Say it Flowers stampset and Fairy Dust Glitter


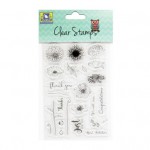
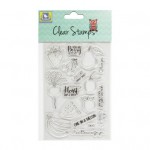
Hello everyone, it's Juhi with some watercolor cards. I have used the beautiful "Say it with Flowers" Stamp set for today's cards. I have also used Fairy Dust in various colors on my cards.
As I have mentioned in my earlier posts, watercoloring is my favorite technique.


I started by stamping the flowers from the stampset on 3 watercolor panels cut to the size of my card fronts. I stamped randomly, taking care to change the orientation of the flowers and also stamp off the edges to create a random looking pattern. I stamped 2 panels with black pigment ink and 1 watercolor panel with gold pigment ink.


I then watercolored the area between the flowers on one of the watercolor panels with Crimson Mont Marte tube watercolors. I also added some red on the flowers.


For the second watercolor panel I watercolored the flowers in shades of blue, purple and yellow and added a mustard background.
For the 3rd panel I added some bright pink to the center of the flowers, I did not fill the flowers completely to create a messy watercolored look.
Now that I was happy with the watercoloring, it was time to add some glitter!!!
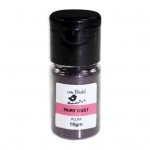
I used one of my favorite ways to add glitter to my projects, I used Itsy Bitsy's gorgeous fairy dust super fine glitter with double sided tacky tape. I will not go into the details of how I did it in this post as I was already shared the method in detail here and here.
Fairy Dust comes in a huge variety of colors so I could find just the right colors for my cards!!!
I finally stamped the sentiments and mounted the watercolor panels onto white cardstock with double sided foam tape! I just love how these cards turned out, I hope you will also give stamping and watercoloring a try, it's very easy and fun and the results are beautiful!!!
Thanks so much for stopping by today!


Supplies Used:


Thursday, March 30, 2017

Easy Watercolor Cards


Hello everyone, it's Juhi and today I'm sharing 3 watercolor cards. 
Watercoloring is one of my favorite techniques, you'd be surprised to know that it is not as hard as it looks, at least not the watercoloring I'm going to show you in today's post. What I really like about watercoloring on cards is that you don't need any fancy supplies to make beautiful cards. I'll be using the Berry Special Stamp set from Itsy Bitsy and Mont Marte Tube Watercolor paints for my cards.
 I love how the images and sentiments work together in the Berry Special stamp set.

Card #1:

Here are the steps of making this card.
1. Begin by stamping the beetroot from the stamp set on watercolor paper using black pigment ink. Take care to rotate the stamp and also stamp off the edge of the watercolor panel, this will create a random beetroot pattern.
2. Watercolor the beetroots, do not color all the way through, leave some white space in each beetroot. I mixed a bit of Violet  in Crimson from the Mont Marte Watercolor Tubes to create the beetroot color. Don't worry about coloring within the lines. Coloring a little outside the lines creates a beautiful watercolor effect.
3. Once the colors are dry, take a wet brush and spread the color over the white areas in the beetroots. Take care to keep the color lighter than the rest of the beet in these areas. This lighter area represents the part where light is falling on the beets.
4. Color the leaves. I used a mix of Sap Green and Yellow.
5. Spread out the color at the outlines of the beetroots with a wet brush and your watercolor background is ready.
6. For the front panel, stamp a single beetroot in the middle of the watercolor panel and color it in the same way as the background beets.
7. Stamp the sentiment, cut to size and adhere the background panel and front panel on white cardstock base with double sided foam tape.

Card #2

I tried no line watercoloring on this one, it was very easy to do and I am very happy with the results. Here's how I did it.
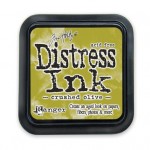
1. Stamp the olive from the stamp set with Crushed Olive Distress ink. As distress inks are not waterproof, watercoloring on it will remove the stamped outlines and we'll get no line watercoloring.
2. Leave some white space in each olive and color the rest in.
3. Once dry, spread the color with a wet brush.
4. Color in the leaves and add some paint splatters to finish the background.
5. I wanted a color coordinated cardstock base but did not have any, so I just painted the edges of my white cardstock base using the same color as the olives. I know it looks messy right now, but trust me it'll look great once the card is finished.
6. Finish the card by sticking the watercolor panel on the card stock base and stamping the sentiment on a strip of white cardstock.

Card #3

Putting my 3rd card together was very quick and easy. I first stamped the watermelon slice randomly on a piece of white cardstock using red chalk ink. Then, I stamped the slice on watercolor paper , watercolored it and cut it out. Finished the card by mounting it on the cardstock base and adding the sentiment.
I hope you enjoyed how I made these cards, I certainly enjoyed making these. Watercolor CAS cards are my all time favorite projects!  Thanks so much for stopping by today.

Supplies Used:


Friday, January 13, 2017

DIY Vintage Desk Calendar-cum-Photo Frame


Hello...... to all you beautiful people !!!

Here's wishing you a very happy 2017! 


Hope you are having a creative start to the new year. I am Suman, here today with my first post on the Itsy Bitsy blog - A Mixed Media, Do-it-Yourself Desk Calender-cum-Photo Frame. 


I am thrilled to be representing India's biggest and fastest growing Hobby, Arts and Crafts store with an impressive online and onsite presence with 18 Brick & Mortar stores and a very user-friendly e-commerce site as well. Thank you Rashmi Harish for this opportunity. 

Here are the pictures of my project, this has a desk calendar on one side and a photo frame on the other side......


DIY Vintage Desk Calendar-cum-Photo Frame
The Photo Frame..............

DIY Vintage Desk Calendar-cum-Photo Frame


DIY Vintage Desk Calendar-cum-Photo Frame
Some Close -ups.........
DIY Vintage Desk Calendar-cum-Photo Frame
Now lets see the step-by-step process of creating the DIY Vintage Desk Calendar-cum-Photo Frame.......

Basic construction for the Calendar: 
Base measures 8-3/4"x7-1/2",I have taken two pieces of Black Chipboard/heavy card stock for the base. cut two pieces of black card stock measuring 8-3/4"x 6-3/4" ( later I replaced this with another Golden Brown colored card stock of 8-1/2"x 6-3/4" with a punched border) 
DIY Vintage Desk Calendar-cum-Photo Frame
For the top Hinge : cut a piece of black card stock of 1-1/2"x 8-3/4", score at 3/4", Join both chipboards with this hinge on top. I have used Silicon Glue from Itsy Bitsy for this. 

For the Lower Hinge: cut a piece of black card stock of 6"x 8-3/4", score at 3/4", 1-1/2", 2-1/4",3", 3-3/4", 4-1/2",5-1/2" , Score and crease and fold with alternate mountain and valley folds(accordion fold). Attach to the lower portion of the chipboard with Silicon Glue. use binder clips to hold till the glue is dry.
DIY Vintage Desk Calendar-cum-Photo Frame
Cut two pieces of size 8-1/2"x 6" from thick water colour paper for the Calendar and photo frame. Here are some of my awesome supplies from Itsy Bitsy.........
DIY Vintage Desk Calendar-cum-Photo Frame

I have used Itsy Bitsy stencils and Mont Marte Modelling paste to add some texture with the Irregular Dots and Script stencils, some random swipes of white Gesso in some places.......and then the Colour Splash Inks........
DIY Vintage Desk Calendar-cum-Photo Frame
Spray some inks and mist with water, you can soak up extra color with a dry tissue, keep adding layers of colors till you like it.........remember to dry the layers in-between. 

DIY Vintage Desk Calendar-cum-Photo Frame
I added Colour Splash inks in Charcoal and Mocha to get a vintage effect. Have used Itsy Bitsy Pearlized Metallic paints in Gold and Copper to highlight textures..... my backgrounds looked like this at this stage......you can see the depth of colors as the layers of colors build up to create beautiful shades, shadows and complexity to the base. Never be afraid to experiment.....you will have much more fun if you let go and lose yourself in the process :) 
DIY Vintage Desk Calendar-cum-Photo Frame

Now to embellish using the wonderful range of  chipboards, flowers and other cute stuff from the store......
DIY Vintage Desk  Calendar-cum-Photo Frame
I created the photo frame using a die and card  stock and an acetate sheet.......


DIY Vintage Desk Calendar-cum-Photo Frame
The dimensional numbers are painted with gold,copper and Pearl metallic paints from Itsy Bitsy, chipboards painted with metallic paints and Colour Splash Inks..........
DIY Vintage Desk Calendar-cum-Photo Frame

DIY Vintage Desk Calendar-cum-Photo Frame
The Calendar is a free download, printed, cut , stacked and glued on top. It is matted on layers of black card and burlap........
DIY Vintage Desk Calendar-cum-Photo Frame
The gold micro beads are added with the help of Silicon Glue from the store.......
DIY Vintage Desk Calendar-cum-Photo Frame
Punched two holes on both sides of the calendar leaving equal distance, fixed gold eyelets and added rings.........matted the calendar on a matching piece of golden brown card with a punched border, you can use any die or border punch from the store.......
DIY Vintage Desk Calendar-cum-Photo Frame
embellished photo frame with flowers, chipboards, gold pollens , cute Jute birds embellishments from the store.........
DIY Vintage Desk Calendar-cum-Photo Frame

DIY Vintage Desk Calendar-cum-Photo Frame
some micro beads and metal charms added from my stash.............I have cut a whimsy frames chipboard in half and used on top and bottom of the photo frame.
DIY Vintage Desk Calendar-cum-Photo Frame

DIY Vintage Desk Calendar-cum-Photo Frame

DIY Vintage Desk Calendar-cum-Photo Frame

DIY Vintage Desk Calendar-cum-Photo Frame
Do leave some love and give it a try if you are inspired, Keep visiting the blog for more inspiration from my teamies. We would like to see all your fabulous creations. And do not forget to take part in this month's challenge at Itsybitsy blog ( to be announced very soon - stay tuned ),you can win some amazing goodies too.
Thank you so much for your visit today, I appreciate and look forward to your comments and feedback.If you like my work please do visit my blog  and FB page.

Supplies used from the store:

Monte Marte white gesso
monte Marte - modeling paste
silicon-liquid-glue
stencil-Irregular Dots
Stencil- Script 
chipboard Retro Flowers
Chipboard whimsy frames
color splash sprays -           Hot pink, Gold, Mocha, lemon zing, charcoal
Gold Pollens       
Flowers Vintage         
     Thanks for stopping by,Love....Suman