Showing posts with label floral. Show all posts

Friday, April 28, 2017

Watercolor cards with Say it Flowers stampset and Fairy Dust Glitter


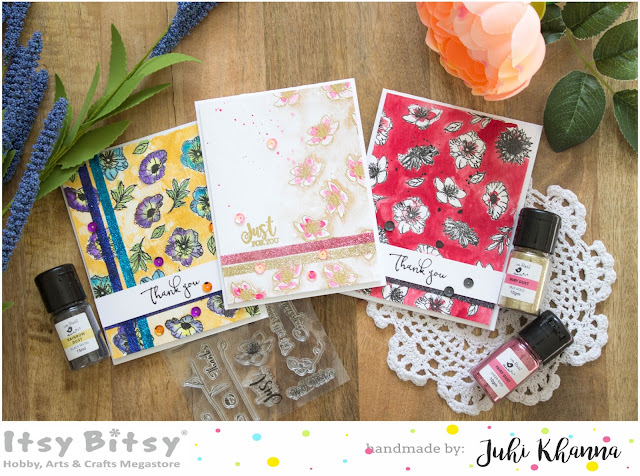
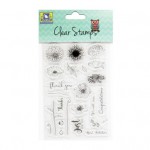
Hello everyone, it's Juhi with some watercolor cards. I have used the beautiful "Say it with Flowers" Stamp set for today's cards. I have also used Fairy Dust in various colors on my cards.
As I have mentioned in my earlier posts, watercoloring is my favorite technique.


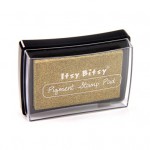
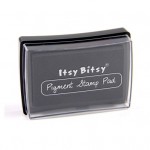
I started by stamping the flowers from the stampset on 3 watercolor panels cut to the size of my card fronts. I stamped randomly, taking care to change the orientation of the flowers and also stamp off the edges to create a random looking pattern. I stamped 2 panels with black pigment ink and 1 watercolor panel with gold pigment ink.


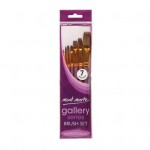
I then watercolored the area between the flowers on one of the watercolor panels with Crimson Mont Marte tube watercolors. I also added some red on the flowers.


For the second watercolor panel I watercolored the flowers in shades of blue, purple and yellow and added a mustard background.
For the 3rd panel I added some bright pink to the center of the flowers, I did not fill the flowers completely to create a messy watercolored look.
Now that I was happy with the watercoloring, it was time to add some glitter!!!
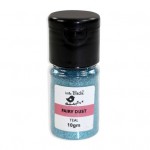
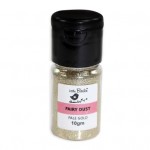
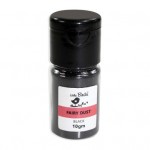
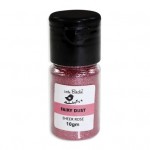
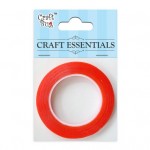
I used one of my favorite ways to add glitter to my projects, I used Itsy Bitsy's gorgeous fairy dust super fine glitter with double sided tacky tape. I will not go into the details of how I did it in this post as I was already shared the method in detail here and here.
Fairy Dust comes in a huge variety of colors so I could find just the right colors for my cards!!!
I finally stamped the sentiments and mounted the watercolor panels onto white cardstock with double sided foam tape! I just love how these cards turned out, I hope you will also give stamping and watercoloring a try, it's very easy and fun and the results are beautiful!!!
Thanks so much for stopping by today!


Supplies Used:


Friday, October 28, 2016

DIY Shadow Box by Angela Jose

Hello All, today we have an extremely talented blogger & crafter on our blog, Angela Jose!


Angela absolutely loves crafting & DIY. She inspires others to create pretty things, through detailed tutorials. Hope you enjoy reading :-) Over to Angela.

Hello All, I have been looking for a very long time to make a crafting den on my own but never ever have I seen a messier place than my crafting table! I have hence decided to add some shelves for extra storage space and some crafts to fill up blank work space. Well this tutorial is for DIY shadow box which I made for use as photo frames for my wall. They are simple and easy to make except for a little math that I have covered up for you :) So shall we start?
Materials required to make DIY shadow box:
  • Pattern papers of sixe 16"x16" : The patterns I have are from ItsyBitsy
  • Score and trim board (or alternately an empty pen, ruler and pair of scissors)
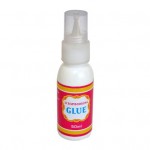
  • Glue

How to make these simple DIY shadow box :
As I told you, the math is a little confusing but otherwise, its a very simple craft. I advise you to blindly follow the measurements given here and try out a shadow box using any scrap paper that you have so that you can understand the exact math and create boxes of your own sizes.

For now, I have given the measurements for DIY shadow box of size 6"x 8" and inner frame size 5"x 7" and you can try these out. For variations in measurement of the boxes, keep reading and I tell you how to calculate.
Place your paper and score at positions : 0.5", 1",1.5",2" and at 10",10.5", 11", 11.5" . Turn your paper 90 degrees and score at measurements 0.5", 1",1.5",2" and at 8", 8.5", 9", 9.5" and 10". You need one more scoring of length one inch at measurements 2.5" and 9.5". Rotate your paper 180 degrees and score one inch at measurement 2.5" and 9.5"
Now that you are done with the scoring, lets start marking out the cutout. Follow the image and mark with a pencil for all four corners and then cut them out with your scissors. ( Doesn't look like its understandable as to where to mark! Scroll down to the bottom of this post for a link for pdf file from where measurement template can be downloaded). https://drive.google.com/open?id=0B42e08tqCj2CRXZGMFdTc01sdUE
Next fold along all of the score lines and lets get started with sticking them. I tried sticking with red tacky tape but I couldn't realign once pasted and that was a major drawback so I used glue which was easier.
Start with the side where the scored portion has straight cut. Apply glue to the edge of the folded panel as seen in the picture. Make sure you apply glue all over the strip especially towards the score/fold so that the frame stays well. Fold the sheet and hold it tight for 1 minute so that the glue sets right. Make sure your fold looks like a perfect square shape like in below photograph when seen from the side. If your alignment is wrong your frame will end up wobbly and unsymmetrical so while you are doing, take utmost care- after all its just a matter of few minutes!
Once you have completed these two side, you can start the other two sides the same way. The only difference this time will be that the shape will be a bit different to add a small triangular portion. While applying glue this time, you can apply a tiny dot at the triangular area as well so that the frame on all sides stays together.

While I made the box first, I did not apply glue at the triangle area so this was the result. I could see gaps at the corners because the shadow box frame of all sides weren't holding together.
I used tacky tape pieces at the triangle are to hold them together but alternately, while you are sticking the frame itself, you can apply glue at the triangle area. I have also used Itsy Bitsy's embellishments like bows, chipboard shapes, metallic paint.
So thats it. If you have the measurements in hand, making these DIY shadow box is a cakewalk. Lets get into the math behind these DIY shadow box then :-D
Measurements to make DIY shadow box
Paper size = 12"x12"
Maximum inner frame size of shadow box = 7"x7" which means your W& L shouldn't be more than 7 inches. If you have understood the math, you can extend it to any measurement of pattern paper and any frame size.
Say width of your proposed frame = W and length = L then your score lines will be at :
1/2", 1", 1 1/2", 2"  and (3+W)", (3+W) 1/2", (4+W)", (4+W)1/2", (5+W)" , (5+W)1/2
rotate paper 90 degree and score at
1/2", 1", 1 1/2", 2"  and (3+L)", (3+L) 1/2", (4+L)", (4+L)1/2", (5+L)", (5+L)1/2
Don't forget to score a one inch line at 2 1/2" and (2+L) 1/2"

If there is any extra paper beyond your last scored line, you should trim them out before starting to fold at the scored lines.If these are too confusing, don't worry I have a prepared a standard chart for all measurements of shadow boxes that you can create from a 12"x 12" paper. 

Hope you enjoyed watching the tutorial. I used these shadow boxes to hold few of my favorite photographs and also a few quotes. This pretty handwritten quote with handmade embellishment one was sent to me by my pen friend Piyu :) Do check out few more simple crafts on my blog and let me know if you want to see any specific craft.

Until next time
xoxo Angela


Saturday, October 8, 2016

Fabulous Cards by Hussena Calcuttawala

Hello All, today we have an extremely talented crafter, a crafter who probably needs no introduction, Hussena Calcuttawala!

She is passionate about card making & Quilling & her fabulous cards are creatively adorned with  stunning flowers & foliage! Over to Hussena:

Hello, everyone!
This is Hussena here. I have been a craft blogger for over 4 years now and I love to try out different types of craft and techniques related to it. My current crafty passion is card-making and I am head over heals in love with it. I usually love working with florals and all my work has some element of flowers in them.

When I was invited for this Guest Design spot for Itsy Bitsy, I was really thrilled as I love all the products that Itsy Bitsy carries, but especially the gorgeous range of flowers and foliage that Itsy Bitsy carries and that too in such pocket-friendly budget.

Today, I have three projects to share. One is a card and two are note-cards. So without further ado. let's get on with it.

Here's a look at my card first :


And a look at the two note-cards :


I have used some really beautiful pattern papers which were sent in my kit along with the gorgeous flowers from Itsy Bitsy's new release Margarita Carnation from the Little Birdie range. Itsy Bitsy have also launched some really amazing Stencil designs and Burlap embellishments which are all included in all three of my projects.

I also have a small tutorial to share on how I created the background for my card and the products used.

Step 1 - I have used a peach colored card base which was sent to me in the kit along with a piece of pattern paper which I have distressed using a pair of scissors & colored the edges using two different shades of Distress inks.

Step 2 - After distressing, I glued the pattern paper to the cardbase & then using a stencil from Itsy Bitsy (Floral) and some Mont Marte Modelling Paste, I did some stenciling using a Spatula to add some texture. I also added a bit of Distress ink to the Modelling Paste to give it a hint of colour.

Here is how it looks once the stenciling is done!
Step 3 - This is what I have used for embellishing my card. The Pattern papers that you see on the left were the ones i have worked with & the little flower embellishments were created using flowers from this set. I absolutely love the Glitter Paper from Itsy Bitsy & I have used it for die-cutting my leaf & foliage. Also used some dies for embellishing my card.

This border die by Spellbinders is absolutely regal & so intricate. I absolutely love using this.


And here's a final look at all the projects together.

The note-cards were die-cut from the Itsy Bitsy Nesting Dies & I die-cut it from the same pattern papers. The jute strings that you see on my card & note-cards are also from Itsy Bitsy. I have used a lot of embellishments and the background for my brown note-card was created using the Leaf Stencil. The green leaves that I have used on my blue note-card are also created using the stencil & then fussy-cut it into the leaf shape to create my embellishment. The purple pollens are also from the store. 

I hope you like what I have created. I would like to thank Rashmi & her team for inviting me over (and also for their patience). This post was scheduled for nearly a month back, but due to some personal reasons, it couldn't go live.

If you have any queries regarding any of the projects, or supplies used, please leave me a comment below & I will get back to you.

Thank you so much for your visit!
Have a good day ahead.