Showing posts with label watercolors. Show all posts

Friday, May 12, 2017

Shaker dome tutorial -for itsy bitsy(mothers day special )

Hello dear Crafters!!!

This gives me extreme delight to share with u all my experience, experiments, trials with the absolute amazing new launch! This is Little Birdie ‘Gold Alcohol Splash’ colour spray.

These little bottles of gold portion I must say are like must must have in your craft stash esp. if you are someone like me ,who loves mix media or someone who just loves gold (I mean which gal doesn’t :P)

Btw This is my first guest post on the blog and I’m super nervous. (So please excuse me for the mistakes).

Today I’m sharing an absolute favorite project of mine these days, i.e. 3D dome with the magic of alcohol sprays! And it’s a dedication to my pretty mom, a special gift for this MOTHER’S DAY.


So before digging in the details of how to make it let’s check out what we are going to make.


So let’s begin.
Step 1: Take the burlap panel –this is an absolute perfect base because it has so much texture to it and its sheen at the end is just amazing.

The stencils are  of amazing quality and  are super durable that’s what I love about these beauties.


Step 2: I have stenciled using the modeling paste from Mont marte and used 3 different stencils to create depth (don’t forget to cover the sides) and heat set it.


Step 3 : I used just 2 sprays and could achieve gradients and also 3 shades on the panel.


Few things to remember:
·They dry very quick
·They leave a golden sheen behind after each spray on the project which is gorgeous

·These are  fabulous to colour the flowers to match your projects. I did a few for this project

·        
·  These colors can be blended with Sponge Blenders and diluted with Alcohol Blending Solution. 
   
    Step 4 : So now it’s time to make the center focus.
I used the  water brush and water colours to colour the image (This is just a reference picture.


Step 5 : Then I stuck the picture to the canvas and before which I cut it to the exact size of the dome using the silicon glue.


Step 6 : Now stick the flower and add some shaker elements to the center of the picture (put loads, more the merrier) 
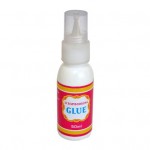
now using the silicon glue fix the dome over the picture and allow to dry completely …..Its takes a while but until then don’t move the panel.


Step 7 : Finish by adding peals and flowers around the dome as per your choice. Use silicon glue and  fix the dome over the picture and allow to dry completely …..Its takes a while but until then don’t move the panel.


Step 8 : To add the final touch add the foiled sentiment from the mother’s day collection
    

Just to help u understand how the shaker looks 


So yeah ! we are done.
hope you enjoyed the tutorial.


Thank u for the opportunity Itsy Bitsy .


love Rashmi.

 Trust me, you will regret if you do not try these amazing "Gold Alcohol Sprays"! So do get it and make some amazing projects and join for ongoing  blog challenge 'Anything goes with Gold Alcohol Splash'.


List of supplies used :


Friday, April 28, 2017

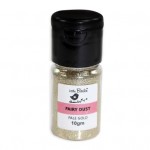
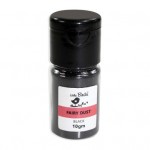
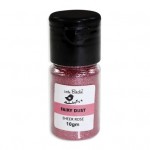
Watercolor cards with Say it Flowers stampset and Fairy Dust Glitter


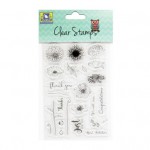
Hello everyone, it's Juhi with some watercolor cards. I have used the beautiful "Say it with Flowers" Stamp set for today's cards. I have also used Fairy Dust in various colors on my cards.
As I have mentioned in my earlier posts, watercoloring is my favorite technique.


I started by stamping the flowers from the stampset on 3 watercolor panels cut to the size of my card fronts. I stamped randomly, taking care to change the orientation of the flowers and also stamp off the edges to create a random looking pattern. I stamped 2 panels with black pigment ink and 1 watercolor panel with gold pigment ink.


I then watercolored the area between the flowers on one of the watercolor panels with Crimson Mont Marte tube watercolors. I also added some red on the flowers.


For the second watercolor panel I watercolored the flowers in shades of blue, purple and yellow and added a mustard background.
For the 3rd panel I added some bright pink to the center of the flowers, I did not fill the flowers completely to create a messy watercolored look.
Now that I was happy with the watercoloring, it was time to add some glitter!!!
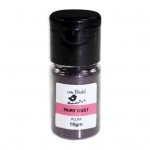
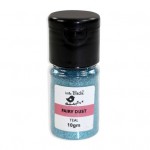
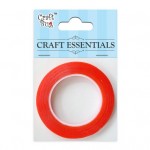
I used one of my favorite ways to add glitter to my projects, I used Itsy Bitsy's gorgeous fairy dust super fine glitter with double sided tacky tape. I will not go into the details of how I did it in this post as I was already shared the method in detail here and here.
Fairy Dust comes in a huge variety of colors so I could find just the right colors for my cards!!!
I finally stamped the sentiments and mounted the watercolor panels onto white cardstock with double sided foam tape! I just love how these cards turned out, I hope you will also give stamping and watercoloring a try, it's very easy and fun and the results are beautiful!!!
Thanks so much for stopping by today!


Supplies Used:


Thursday, March 30, 2017

Easy Watercolor Cards


Hello everyone, it's Juhi and today I'm sharing 3 watercolor cards. 
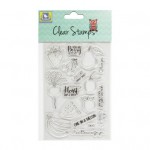
Watercoloring is one of my favorite techniques, you'd be surprised to know that it is not as hard as it looks, at least not the watercoloring I'm going to show you in today's post. What I really like about watercoloring on cards is that you don't need any fancy supplies to make beautiful cards. I'll be using the Berry Special Stamp set from Itsy Bitsy and Mont Marte Tube Watercolor paints for my cards.
 I love how the images and sentiments work together in the Berry Special stamp set.

Card #1:

Here are the steps of making this card.
1. Begin by stamping the beetroot from the stamp set on watercolor paper using black pigment ink. Take care to rotate the stamp and also stamp off the edge of the watercolor panel, this will create a random beetroot pattern.
2. Watercolor the beetroots, do not color all the way through, leave some white space in each beetroot. I mixed a bit of Violet  in Crimson from the Mont Marte Watercolor Tubes to create the beetroot color. Don't worry about coloring within the lines. Coloring a little outside the lines creates a beautiful watercolor effect.
3. Once the colors are dry, take a wet brush and spread the color over the white areas in the beetroots. Take care to keep the color lighter than the rest of the beet in these areas. This lighter area represents the part where light is falling on the beets.
4. Color the leaves. I used a mix of Sap Green and Yellow.
5. Spread out the color at the outlines of the beetroots with a wet brush and your watercolor background is ready.
6. For the front panel, stamp a single beetroot in the middle of the watercolor panel and color it in the same way as the background beets.
7. Stamp the sentiment, cut to size and adhere the background panel and front panel on white cardstock base with double sided foam tape.

Card #2

I tried no line watercoloring on this one, it was very easy to do and I am very happy with the results. Here's how I did it.
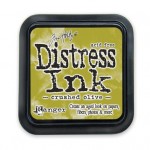
1. Stamp the olive from the stamp set with Crushed Olive Distress ink. As distress inks are not waterproof, watercoloring on it will remove the stamped outlines and we'll get no line watercoloring.
2. Leave some white space in each olive and color the rest in.
3. Once dry, spread the color with a wet brush.
4. Color in the leaves and add some paint splatters to finish the background.
5. I wanted a color coordinated cardstock base but did not have any, so I just painted the edges of my white cardstock base using the same color as the olives. I know it looks messy right now, but trust me it'll look great once the card is finished.
6. Finish the card by sticking the watercolor panel on the card stock base and stamping the sentiment on a strip of white cardstock.

Card #3

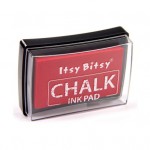
Putting my 3rd card together was very quick and easy. I first stamped the watermelon slice randomly on a piece of white cardstock using red chalk ink. Then, I stamped the slice on watercolor paper , watercolored it and cut it out. Finished the card by mounting it on the cardstock base and adding the sentiment.
I hope you enjoyed how I made these cards, I certainly enjoyed making these. Watercolor CAS cards are my all time favorite projects!  Thanks so much for stopping by today.

Supplies Used: