
Hello everyone, it's Juhi and today I'm sharing 3 watercolor cards.

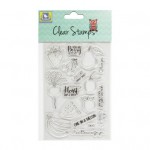
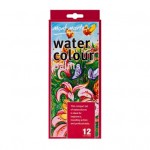
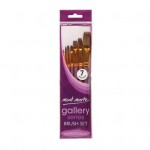
Watercoloring is one of my favorite techniques, you'd be surprised to know that it is not as hard as it looks, at least not the watercoloring I'm going to show you in today's post. What I really like about watercoloring on cards is that you don't need any fancy supplies to make beautiful cards. I'll be using the Berry Special Stamp set from Itsy Bitsy and Mont Marte Tube Watercolor paints for my cards.
I love how the images and sentiments work together in the Berry Special stamp set.
Card #1:

Here are the steps of making this card.

1. Begin by stamping the beetroot from the stamp set on watercolor paper using black pigment ink. Take care to rotate the stamp and also stamp off the edge of the watercolor panel, this will create a random beetroot pattern.
2. Watercolor the beetroots, do not color all the way through, leave some white space in each beetroot. I mixed a bit of Violet in Crimson from the Mont Marte Watercolor Tubes to create the beetroot color. Don't worry about coloring within the lines. Coloring a little outside the lines creates a beautiful watercolor effect.
3. Once the colors are dry, take a wet brush and spread the color over the white areas in the beetroots. Take care to keep the color lighter than the rest of the beet in these areas. This lighter area represents the part where light is falling on the beets.
4. Color the leaves. I used a mix of Sap Green and Yellow.
5. Spread out the color at the outlines of the beetroots with a wet brush and your watercolor background is ready.

6. For the front panel, stamp a single beetroot in the middle of the watercolor panel and color it in the same way as the background beets.
7. Stamp the sentiment, cut to size and adhere the background panel and front panel on white cardstock base with double sided foam tape.

Card #2

I tried no line watercoloring on this one, it was very easy to do and I am very happy with the results. Here's how I did it.

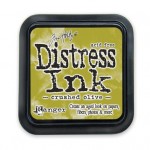
1. Stamp the olive from the stamp set with Crushed Olive Distress ink. As distress inks are not waterproof, watercoloring on it will remove the stamped outlines and we'll get no line watercoloring.
2. Leave some white space in each olive and color the rest in.
3. Once dry, spread the color with a wet brush.
4. Color in the leaves and add some paint splatters to finish the background.
5. I wanted a color coordinated cardstock base but did not have any, so I just painted the edges of my white cardstock base using the same color as the olives. I know it looks messy right now, but trust me it'll look great once the card is finished.

6. Finish the card by sticking the watercolor panel on the card stock base and stamping the sentiment on a strip of white cardstock.

Card #3

Putting my 3rd card together was very quick and easy. I first stamped the watermelon slice randomly on a piece of white cardstock using red chalk ink. Then, I stamped the slice on watercolor paper , watercolored it and cut it out. Finished the card by mounting it on the cardstock base and adding the sentiment.

I hope you enjoyed how I made these cards, I certainly enjoyed making these. Watercolor CAS cards are my all time favorite projects! Thanks so much for stopping by today.


love these pretty cards Juhi !! watercolors are interesting mediums , love the light and dark effect you achieved !!
ReplyDeleteLoved them Juhi !
ReplyDeleteThe cards look amazing, loved the Beets & the water melon cards!
ReplyDeleteThese are adorable, Juhi!
ReplyDelete