Showing posts with label Christmas. Show all posts

Wednesday, December 21, 2016

Christmas Easel Card

Hello Crafty Friends!
Its that time of the year  so festive & so fun! Sharing a Christmas Easel Card made using the adorable Christmas Pack.


Absolutely loving the coordination between the different patterns in this stack. The focal point in this card is the doily front embellished with the new Christmas chipboard embellishments & glitter stickers! The amazing Christmas range of embellishments, washis & papers made this card so much fun to make. 


Here are some more pictures


Remember you still have sometime to join the final challenge of the year, hop here for details.

Supplies used  

Saturday, November 19, 2016

Christmas Gifts


Hello & happy weekend to you all!
Christmas is round the corner & it's the most magical time of the year! Time to celebrate & enjoy! Festivities are never complete without gifts & today I have some quick & easy ways to wrap the gifts. 

Here's a sneak peek!


I am very proud to introduce the newest range of Itsy Bitsy products - a favourite with most paper lovers like me - Little Birdie's Pattern Papers!!! Let me warn you hoarders like me will find it hard to run the scissors!
Over the next few days we will share a lot more inspiration using different paper packs.

So here it is the Christmas Pack - 


Priced at Rs. 200 for a pack of 12 sheets each one with a different design. With a very good mix of checks, plaid, dot & stripes, these are truly value for money & they are SINGLE SIDED! I loved the rich & vibrant prints & colors, very very festive. These are printed on 160gsm acid free Linen Paper & are a delight to work with.


Besides this pack Itsy Bitsy has the widest range of Christmas embellishments & home decor products. Check the link here to view the festive collection.

Over to my post now........loads of ideas! 
First I have a quick & easy idea to transform a gift bag using the Itsy Bitsy stencil. My favourite paint to work while using a stencil is the Mont Marte dimensional paint.  Once the paint dried I popped up the pattern using a white gel pen. 


The gold shimmer is very festive in real!


Next I have a star shaped gift box & complete with glitter embellishments for a festive look.


Pillow boxes are so handy when gifting small items. With the WRMK pillow box punch making these is child's play!


This star I made using the Sizzix die looks so elegant. Aren't these papers fantastic!!!


A magnetic frame up next, also made using sizzix dies! 


A simple tag in which I used the backing of the embellishment pack.


And finally my favourite is this gift card holder, made is a jiffy!


Hope these ideas help you in making your gifts even more special!
Stay tuned for the next release in this range coming soon!

Hugs,

TANVI

Supplies from Itsy Bitsy - 


Friday, December 25, 2015

Bottle cap Snowman

Hello Folks!! Welcome to another step by step tutorial. Here's something to do for the coming Christmas holidays. Enjoy and have fun making this cute Bottle cap Snowman as part of “CRAFTY COUNTDOWN TO CHRISTMAS".

Materials Required:
Bottle cap
Silicon glue
Card stock
Satin ribbon (red & silver)
Button
Crystals
Scissor

Method:
Step 1 – Take a bottle cap & glue crystals as eyes with the help of Itsy Bitsy silicon glue

Step 2 – Cut a triangle out of orange card stock
Step 3 – Glue black crystals as lips
Step 4 – Take another bottle cap & glue 3 green crystals as shown
Step 5 – Take a silver ribbon & glue the bottle caps
Step 6 – Glue an empty bottle cap at the end of the ribbon
Step 7 – Tie a red ribbon as muffler & glue a green button on top
The super cute bottle cap snowman is ready. You can use it as a pendant or a tree hanging! This is a fun & easy tutorial during the holidays. Let us know what you thought of it.

Link to supplies –

Thursday, December 24, 2015

Chenille Stick Bug

Hello Folks!! Welcome to another step by step tutorial. Here's something to do for the coming Christmas holidays. Enjoy and have fun making this cute Chenille Stick Bug as part of “CRAFTY COUNTDOWN TO CHRISTMAS". 

Material Required:
Chenille stick – Green, red & brown
Itsy Bitsy Silicon glue
Google eyes
Pompom
Scissor

Method:
Step 1 – Take 2 different color of Chenille sticks (red & green) & twist as shown. Make 2 such strands
Step 2 – Bend one end of both the strands as shown
Step 3 – Wrap a brown color Chenille stick around the strand
Step 4 – Glue google eyes on the body with the help of Itsy Bitsy glue
Step 5 – Glue a small red pompom below the eyes
Step 6 – Cut a small piece of chenille stick and wrap it around the waist of the bug

The chenille stick bug is ready. Make these with your friends during any party and have a gala time. You can use multicolour Chenille sticks too. Happy crafting!! Let us know what you thought of it.
  
Link to Supplies:

Wednesday, December 23, 2015

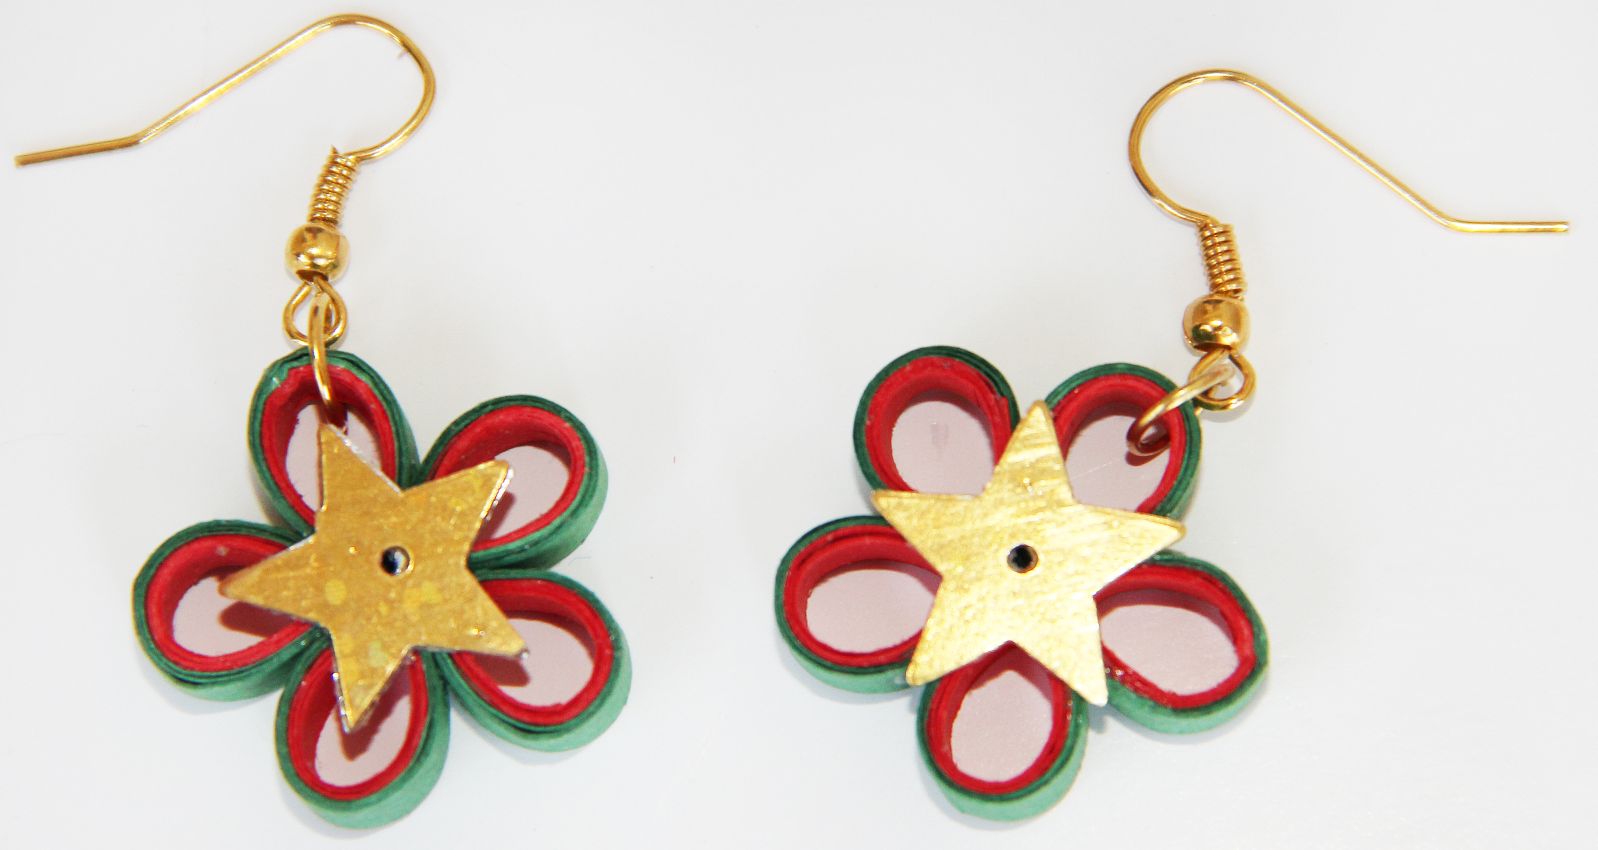
Quilled Jewellery

Hello Folks!! Welcome to another step by step tutorial. Here's something to do for the coming Christmas holidays. Enjoy and have fun making this simple quilled jewellery as part of "CRAFTY COUNTDOWN TO CHRISTMAS".

Material Required:
Quilling strips 3mm
Star embellishment
Craft glue
Findings ear wire hook
Finding clasp
Finding end piece
Cord
Border buddy
Jump ring
Flat nose plier

METHOD:
Step 1 – Take 2 quilling strips (red & green) and glue the ends
Step 2 – Apply Itsy Bitsy silicon glue throughout the strip and roll it around the border buddy to make a coil
Step 3 - Take out the coil and press the edges (in the shape of tear drop)
Step 4 – Make 5 similar coils
Step 5 – Glue the coils as shown
Step 6 – Glue a star embellishment
Step 7 – With the help of flat nose plier, put a jump ring around a coil
Step 8 – Attach an ear wire hook to the jump ring (as shown)
Step 9 – The earings are ready
Step 10 – Make a small red coil & glue it to one of the big coils

Step 11 – Take a cord, put it inside an end piece & press it inside with the help of a plier. The cord has to be tightly locked. (Repeat on both sides of the cord)

Step 12 – On one side, attach a clasp to the end piece (as shown). On the other side, attach a jump ring
 

The quilled neckpiece & earings are ready. This is simple & very easy to make. This can be a great addition to your accessories. You can make plenty of these and gift your friends too. Let us know what you thought of this tutorial. J

Link to supplies –