Showing posts with label Quilled jewellery. Show all posts

Thursday, September 1, 2016

Crafter In The Spotlight 13 - Itsy Bitsy

Hello friends!! Itsy Bitsy brings you "CRAFTER IN THE SPOTLIGHT" – a unique way of encouraging and appreciating the talented crafters. We recognize talented crafters week after week, turn the spotlight on them & feature them in our "CRAFTER IN THE SPOTLIGHT"! We love what you talented crafters create & are amazed at each of your unique creations every single day! We love the way you use Itsy Bitsy products & give life to those products.

I am delighted to announce this week's crafter in the spotlight - September, 2016 - "ARCHANA SHETTY"! Ever since we started this program, we have been featuring Paper Crafters, week after week & for the first time we are showcasing a crafter who specializes in something slightly different, stunning jewellery! Archana, who likes to call herself a "True Blue Bengalurean", is a post graduate in computer applications! Although Archana made her foray into the creative world through drawing, sketching & recycled craft, quilling is her forte & designing quilled jewellery is what she is very passionate about! This committed crafter makes it a point to craft at least 4 hours every single day!

Wow, that is admirable! What would Archana do if she had magical powers? To know more about Archana, what inspires her & her all time favorite quote, please read her interesting interview below. 

Here are excerpts of my interview with Archana:

Rashmi Closepet, MD, Itsy Bitsy  Tell us a bit about yourself?
Archana Vasant : I am Archana, 27 years old and true blue Bengalurian. I have done my Post Graduation in Computer Applications. I am a happy housewife for the last 5 years and live with my loving husband Vasant and adorable son Inith. I am crafting for the last 3 years and I am thoroughly enjoying it.

RC: How did you get into crafting?
AV: I entered the craft world through drawing. As a kid, I loved drawing. Over the years, the interest spilled over to crafting. Initially, I used to reuse plastic bottles and transform them into pen stands, flower vases etc. I used to makeover thermocol pieces, carton boxes into photo frames. I then moved onto making quilled jewelry. Constant encouragement of friends made me take it even more seriously.

RCWhat is your favourite type of craft?
AVDesigning quilled ear rings, Jhumkas and necklaces are my favourite types of crafts.

RCWhat are your favourite products at Itsy Bitsy?
AVThe colorful collection of quilling strips catches my eyes every time I enter the store.
I like the feathers, beads, and organza ribbon available at Itsy Bitsy too.

RCWhat products from Itsy Bitsy do you think are must haves for a crafter?
AVEvery crafter should try the decoupage sheets and varieties of glue available at Itsy bitsy. Decoupage sheets and Decoupage glue are a must if one wants to design clean and neat looking craft.

RCWhat product would you like to see at Itsy Bitsy?
AVI would like to see more of Craft punch and Terracotta beads at ItsyBitsy.

RCYou draw inspiration from?
AVMy family is my inspiration. In my childhood, my parents encouraged my interest in drawing by getting me all that I asked for. And now, my husband is a pillar of support. Without his support, I surely wouldn’t have pursued this hobby this far. My husband is the biggest critique of my designs too. His feedback always helps me in improving my work.

RCWhat are your other interests?
AVApart from crafting, my few other interests are collecting stamps and invitation cards.
I try to utilize the designs of the invitation cards to design Photo frames.

RCIf you had magic power how would you contribute to the crafting world?
AVIf I had magic power, I would instill a sense of crafting in the tender minds of all the children of the world. I strongly believe that crafting is creativity and creativity helps in making humans more empathetic.

RCYour prized possession in craft stash?
AVLike a mother who loves all her kids equally, I treat every single craft item in my stash as a prized possession.

RCHow would you describe your style of crafting?
AVMy craft work has three important traits. 1> Clean finish. 2> Enticing looks and 3> A sense of belongingness.  No wonder, I constantly get repeat orders from my patrons.

RCHow do you organize your time for crafting?
AVI spend 4 hours for crafting every single day. In spite of being a busy housewife, my passion for crafting has helped me pull time for crafting. Crafting helps me unwind and where there is a will, there is always a way. Generating time is closely linked to one’s passion and commitment in my view.

RCTips for people who want to craft?
AVJust one tip. Don’t wait. Start and Start now. 

RCYour all-time favorite quote?
AVIt’s a George Bernard Shaw quote that is my favorite. “Imagination is the beginning of creation. You imagine what you desire, you will what you imagine, and at last, you create what you will”

Here are a couple of Archana's awesome creations :


Many congrats Archana for being the CRAFTER IN THE SPOTLIGHT – ITSY BITSY :-) :-)

You will receive Rs 500/- Itsy Bitsy gift voucher :-) :-) & a Crafter in the Spotlight badge, which can be proudly displayed on the side bar of your blog and other platforms.
Also, visit our Youtube channel to view & to know more about this crafter – https://www.youtube.com/watch?v=KTASWgS6as4 

Looking forward to many more creations, Happy Crafting!

Wednesday, December 23, 2015

Quilled Jewellery

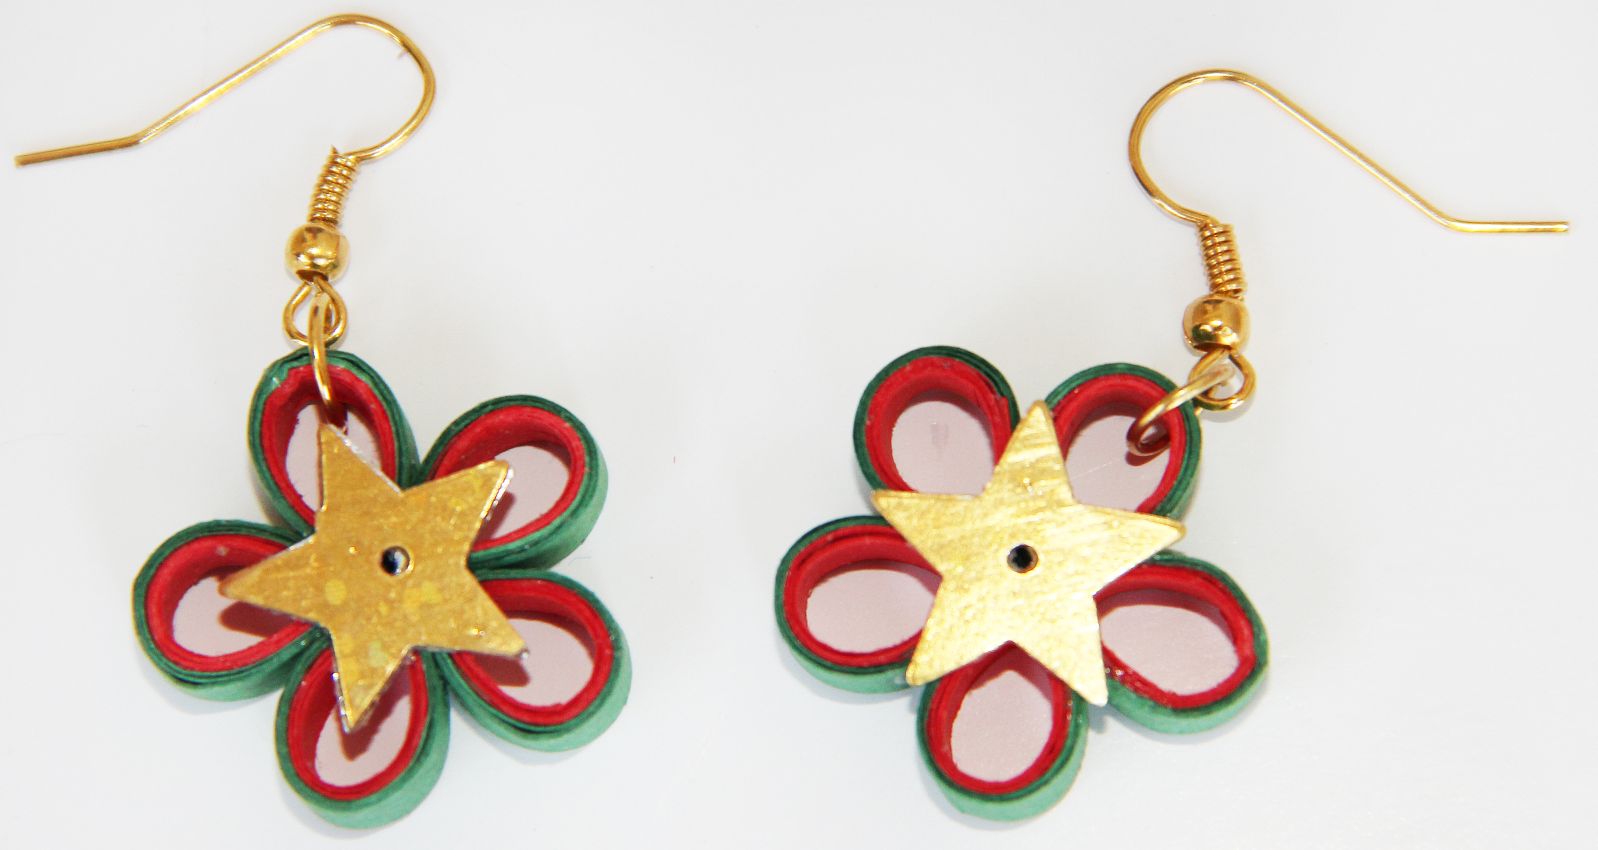
Hello Folks!! Welcome to another step by step tutorial. Here's something to do for the coming Christmas holidays. Enjoy and have fun making this simple quilled jewellery as part of "CRAFTY COUNTDOWN TO CHRISTMAS".

Material Required:
Quilling strips 3mm
Star embellishment
Craft glue
Findings ear wire hook
Finding clasp
Finding end piece
Cord
Border buddy
Jump ring
Flat nose plier

METHOD:
Step 1 – Take 2 quilling strips (red & green) and glue the ends
Step 2 – Apply Itsy Bitsy silicon glue throughout the strip and roll it around the border buddy to make a coil
Step 3 - Take out the coil and press the edges (in the shape of tear drop)
Step 4 – Make 5 similar coils
Step 5 – Glue the coils as shown
Step 6 – Glue a star embellishment
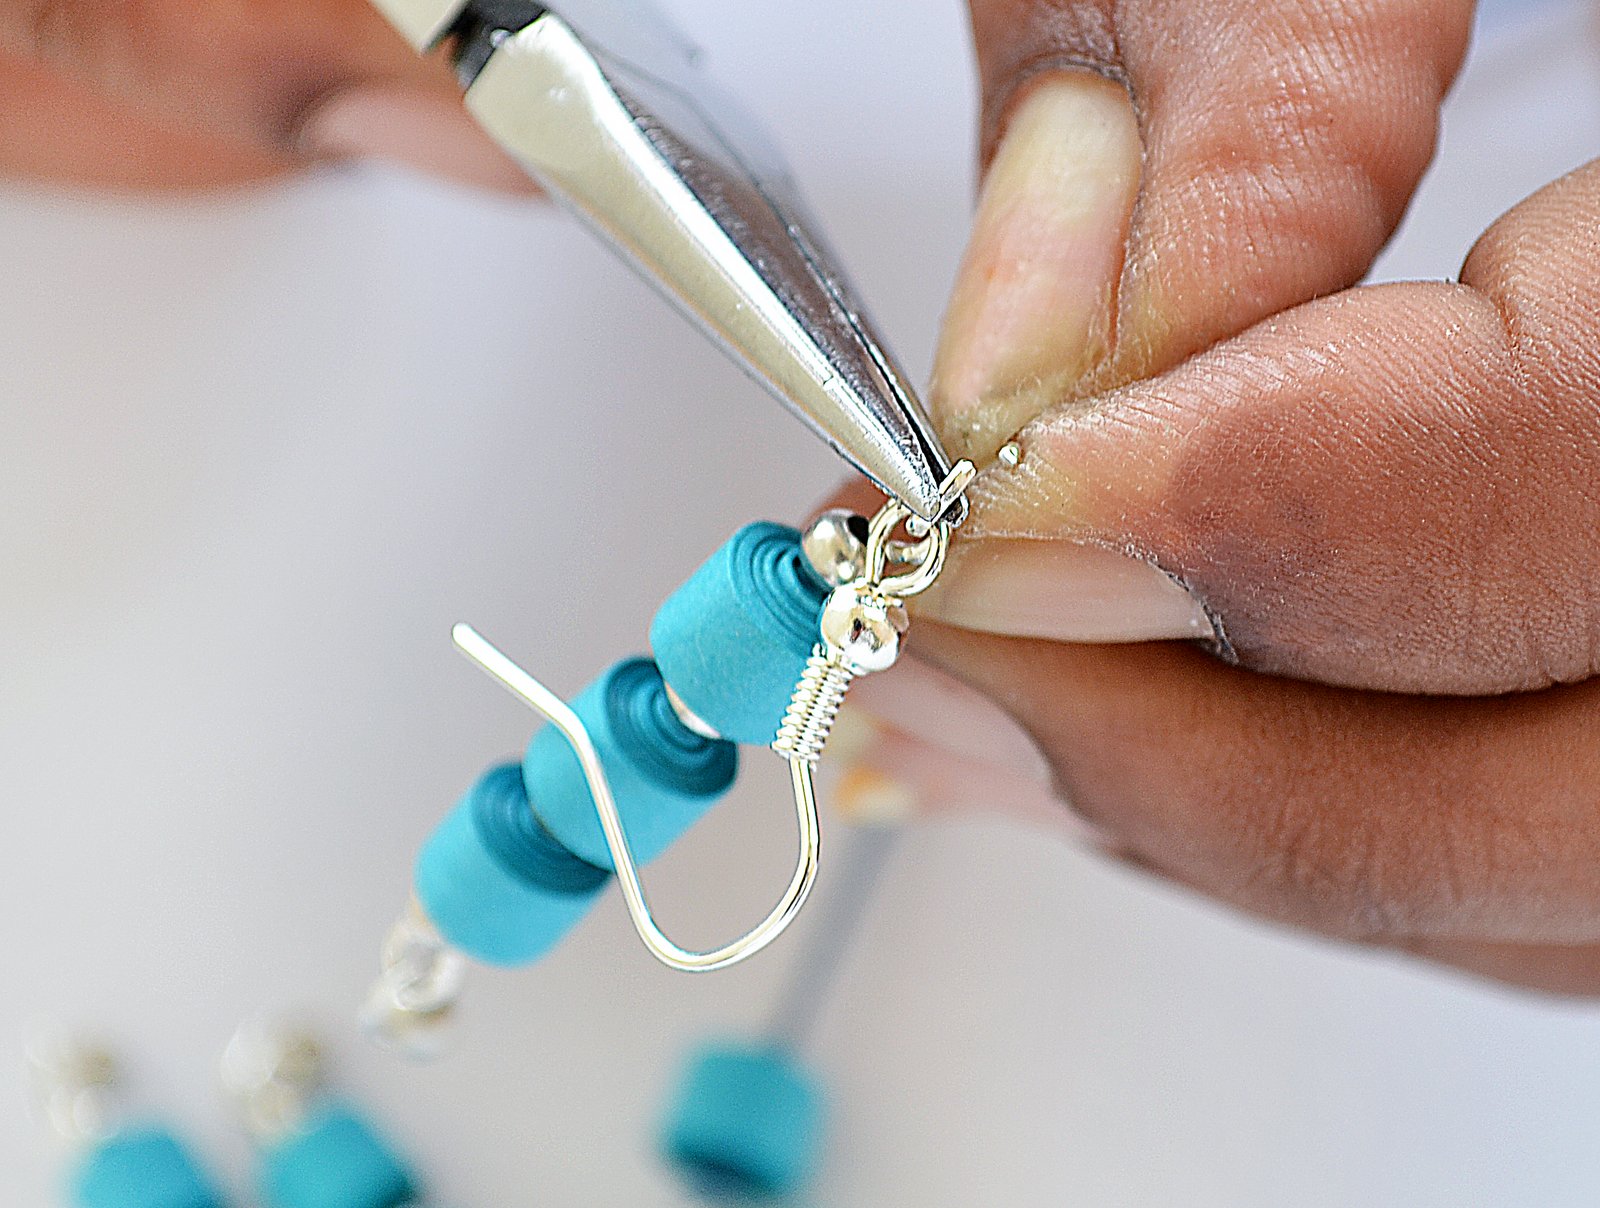
Step 7 – With the help of flat nose plier, put a jump ring around a coil
Step 8 – Attach an ear wire hook to the jump ring (as shown)
Step 9 – The earings are ready
Step 10 – Make a small red coil & glue it to one of the big coils

Step 11 – Take a cord, put it inside an end piece & press it inside with the help of a plier. The cord has to be tightly locked. (Repeat on both sides of the cord)

Step 12 – On one side, attach a clasp to the end piece (as shown). On the other side, attach a jump ring
 

The quilled neckpiece & earings are ready. This is simple & very easy to make. This can be a great addition to your accessories. You can make plenty of these and gift your friends too. Let us know what you thought of this tutorial. J

Link to supplies –

Tuesday, October 20, 2015

Cascading Quilled Necklace


Hi Folks! It’s Tuesday and we are back with a fabulous quilled necklace tutorial!
Quilling is a very popular craft right now and quilled jewellery is quite sought after. It can look traditional or trendy depending on what you want. You can customize jewellery pcs to your liking or to match your dresses and at a very low cost. To make basic quilled jewellery, you do not need much practice, like the necklace below.


Of course, for a great final result, you do need good quality quilling strips. Itsy Bitsy carries a very wide range of quilling supplies and quilling strips. You can find 10mm, 5mm, 3mm, 2mm and even 1mm strips! These strips are made with superior quality paper with consistent Colour and GSM.

 Today we are going to make a necklace which is perfect for beginners and fun for pros. 
So let’s get started. Here is a list of supplies required:


·         Quilling Strips 5mm – 21 strips in your choice of colour or colours
·         Spacer beads 4-5mm – approx- 55 pcs
·         Cotton cord -In your choice of colour
·         Eye pins -11 pcs
·         Jump rings -22 pcs
·         End pieces -1 pair
·         Lobster Clasps – 1 pc
·         Ear wire – 1 pair
·         Itsy Bitsy Craft glue
·         Itsy Bitsy Decoupage glue

Tools required:


·         Quilling tool,
·         Jewellery cutter
·         Round nose plier
·         Flat nose plier
·         Scissors

METHOD:
So let’s start making the coils! Each coil needs to be made using half of a strip. So cut every strip in half before you start making coils.


Use the quilling tool to make the coils, since the resultant hole at the centre of the coil is important to thread the coils. Secure the end of the coil with a dot of craft glue. Make 41 such coils.


 At this point you can apply a top coat with the decoupage glue to give a glossy finish to the coils. Decoupage glue also protects the quilled coils from wear and tear.
Once they dry, we will use these coils as beads

.

Let’s assemble the necklace.  To make the necklace we will need 25 coils.
Thread a spacer bead onto the eye pin followed by a coil, a spacer, another coil, spacer and so on to make the Hangings.


To finish the hanging, trim the eye pin with jewellery cutter, leaving about ¼” to make a loop. With the help of round nose pliers make a loop. We now have a loop at the top as well as the bottom of the hanging.


Thread a jump ring through a spacer bead and attach it to one end of the hanging. Attach another jump ring (without the spacer) to the other end of the hanging.


Make the hangings as shown in the image below:
5 coils – 1pc
4coils – 2 pcs
3 coils – 4pcs (2 for necklace and 2 for earrings)
2 coils – 2pcs
1 coil – 2pcs


Thread the cotton cord though coils and hangings alternating them to form the design as shown below.


Measure the cord as per the desired length of necklace and trim. Attach the end piece to both ends of the cotton cord by fold the end piece as shown with the help of flat nose pliers.


Attach a jump rings to both the end pc and the lobster clasp to one of the jump rings.  Your fabulous necklace is done!


To make the earrings, attach the jump ring of the hanging to the loop in the ear wire. Repeat for the other earring.


Your beautiful Cascading necklace is ready!


 Its fun to experiment with this design and you can come up with your own ideas and make jewellery to match your dresses! You can also try different variations with different colour/size of the strips, using different spacer beads or by changing formation of the hangings.


Do let us know what you think of this tutorial in the comments below. Happy Crafting!

Monday, March 9, 2015

International Women’s Day Workshop at Itsy Bitsy


Hi people! A very good morning to all of you!

Last Saturday, Itsy Bitsy conducted 2 craft workshops to celebrate the occasion of International Women’s day. The workshops were conducted in 11 of our stores in Bangalore, Delhi and Hubli. We had lot of fun and wanted to share it with you all!

The morning workshop was a beaded key chain. We learned how to make bead charms and how to work them into a design. This is one of the basic steps in bead and wire jewellery making. Once you know how to do that you can make all sorts of customized one-of-a-kind bead jewellery and accessories! Some snapshots of the key chain workshop:

Beaded Keychain

Beaded Key chain Workshop

Beaded Key chain Workshop

Beaded Key chain Workshop


In the evening workshop, we made a pair of quilled earrings. Quilling is one of the most popular crafts all over the world right now. You can do wonders with this art, be it jewellery making, card making, embellishments, wall art or signages. This workshop showed the basics of quilling and participants made a pair of pretty earrings.
Here are some glimpses of the quilling workshop. J


Quilled Earring Workshop

Quilled Earring Workshop


Thanks to all the participants! Happy Crafting!