Showing posts with label Foam. Show all posts

Tuesday, September 29, 2015

The Busy Hive Magnet

Hi Folks, Welcome to another Itsy Bitsy Craft Tutorial. Today we are going to make this super cute beehive magnet with little busy bees! A great weekend activity or a perfect gift J


Supplies:
  1. Yellow Cardstock (A4 or 12”x12”) – 1 sheet
  2. Orange Craft Foam
  3. Yellow Pompoms (8-12mm) – 3 pcs
  4. Black Chenille sticks – 2 pcs
  5. White Pollen/Stamen- 6 pcs
  6. Tempera Paint – Black
  7. Silicone Glue or Craft Glue
  8. Google Eyes - 1Pair
  9. Magnet


Here’s How:
Cut a piece of cardstock – 13.5cm X 10.5cm. Refer to the diagram below. Score on the dotted lines and then cut on the solid lines. You will have 9 paper strips – each measuring 1.5cmX10.5cm, scored at every 1.5cm. (Scoring is important to fold the hexagons later.)
 

Make hexagons from the strips by gluing the ends as shown. Make more hexagons if you want a bigger hive.

Glue the hexagons together and make the hive. You can make some cells open or make it completely symmetric.

Apply glue to the edges and stick it to the felt piece.


Trim the excess felt. You hive is ready


To make the bees, cut a 2- 3” piece of chenille stem and coil it. Stick the pompom on one side of the 
coil.

Paint the pollen black, trim them to size and glue them to make the antennae. Stick the google eyes, and a small piece of cord for the mouth.

Make as many bees as you like and house them in your hive J. Just apply a little glue so they do not fall off. 

Stick the magnet at the back and proudly display your awesome creation!!
Do let us know what you think of the tutorial in comments below. Happy Crafting :)

Wednesday, April 30, 2014

DIY Clock for kids - guest post by ArtsyCraftsyMom


The summer holidays are here and its every mom's worry how to keep the kids occupied and entertained. In fact my biggest worry is also that with no homework for 2 months, Lil P will forget all her school concepts. The last year, I realized that Lil p had got really interested in reading the time. So we decided to make a cute Clock for her to practice her time telling skills.


As usual, I searched my craft stack and we picked up a few things that interested us. Pipe cleaners in red & yellow for the minute & hour hand. She wanted a bird house kind of clock, so we picked up a yellow corrugated sheet and cut into a flower shape. Added a black glitter sheet in the center.


Then the foam sheet was cut into a house shape . 


 Then into a pentagon shape

 Then we added all our embellishments.  Green craft sticks for the roof. Cream ones for the base and handle.  We made a hole in the center of our yellow flower and added the pipe cleaners in the center. Stuck the 1-12 numbers around the clock.  Next we added some stickers & pearl dots . Some pigeons, flowers & clouds and all stuck securely with a glue gun. and our DIY clock for kids was ready. 

Now isn't that a simple project? You can use cardboard instead of foam to make it more stiff. You can also change the look  or theme using different stickers . since the minute & hour hands move easily, Lil P is having fun moving the clock according to the time she wants to set the clock to.

There are more such fun ideas on my blog and pinterest. Do drop by and show us your love by leaving lots of comments.


 Shruti Bhat is a Software Quality Analyst by profession who mostly exercises her left brain during the day at work and her right brain takes over at home. She loves crafting with her 7 year old daughter and blogs at ArtsyCraftsyMom.com. She can be reached at @ArtsyCraftsyMom on Twitter, Facebook & Pinterest

Friday, January 31, 2014

Peacock Craft - guest post by ArtsyCraftsyMom


For January's guest post I wanted to do something symbolic of India .. and my thoughts were drawn to the gorgeous peacock - The National Bird of India. I had made a peacock earlier with my craft class , This time though I wanted it to be more magnificent and regal ..  I searched my supplies and found a good stash of craft goodies.. 


Googly Eyes, Sparkly pipe-cleaners, Feathers  big & small , Glitter sheets, shiny sequins, Foam sheet & craft sticks.


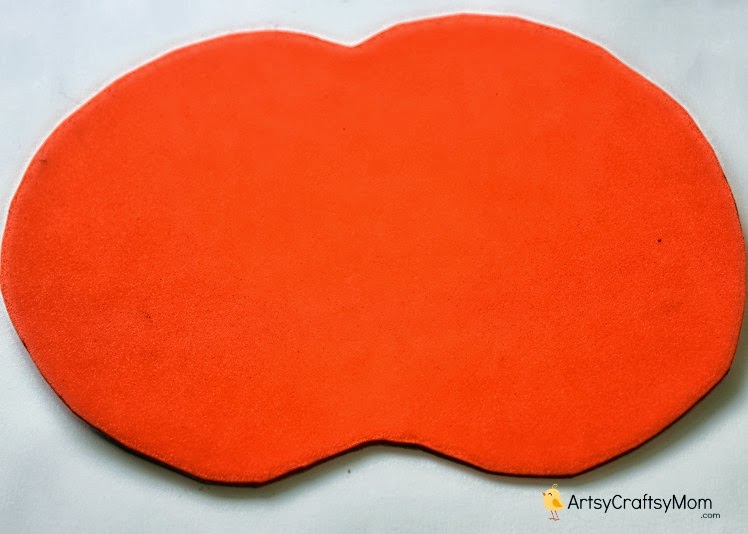
I drew out a large 8 shaped cutout from the blue glitter sheet. It almost looks like a Bowling Pin.


Then I cut 2 metallic pipe cleaners - one Blue & one Green in half & twisted them to form feather shapes.. I made 4, you can make a few more to add depth & shine. 


Now , I took 4 large blue feathers & 2 large green feathers and stuck them onto a craft stick using a Hot glue gun. Once they set, I stuck the pipe cleaner feathers on top .. I arranged the pipe cleaners  such that they could be seen from behind the peacocks body. Keep the 8 shaped cutout on top of this and adjust accordingly. 


Now it was time to create the Peacocks body. I cut a beak shape from the foam & a piece for its head.. Stuck 2 googly eyes. I used the cuter variety. The coloured googly eyes. These have pretty eyelashes. I also had blue sequins from the ItsyBitsy Diwali sale and stuck them randomly using a glue stick. 
We also stuck 2 yellow craft sticks ( the matchstick sized ones ) as legs. The picture doesn't show it. 

I then stuck the Body on top of the feathers and our peacock was ready.. My daughter loves it and is making up her own stories with her peacock puppet. 

If  this interests you, you can also hop on over to my post on Republic Day Crafts to make with your kids. What do you think of this craft? Love it ? Hate it? Tell me what you did on the Republic Day? Did you make any India centric craft? I would love to hear from you. 


Shruti Bhat is a Software Quality Analyst by profession who mostly exercises her left brain during the day at work and her right brain takes over at home. She loves crafting with her 7 year old daughter and blogs at ArtsyCraftsyMom.com. She can be reached at @ArtsyCraftsyMom on Twitter, Facebook & Pinterest


Tuesday, September 24, 2013

Scarecrow -Pumpkin Photo Frame - Guest post


With Halloween approaching soon & Fall crafts being the most discussed craft over the blog-o-sphere these days, I decided to follow the bandwagon and make something that is both functional and that fit the theme.

To make this friendly scarecrow in a pumpkin patch,


You'll need -
  1. Foam sheets - Orange & brown
  2. Felt sheet - Green, White, Pink & Red
  3. Icecream stick
  4. A pair of googly eyes
  5. Blue Pipe cleaners 
  6. Corrugated flowers
  7. Black Sketch pen
  8. Straw 
  9. Glue Gun & 
  10. Scissors

To make -
First cut out a pumpkin shape from the orange foam sheet. 

Cut out the center to foam a space that's 4.1" x 6.1" [ this will accommodate a 4"x6" size picture] 


To make the scarecrow, Cut a circle from the white felt, cut out a hat shape from the brown foam, cut the straw into 6 inch long strips. tie them together and bend them in half. Stick them to the bottom of the hat. Stick the hat onto the felt face using glue gun. Stick on googly eyes & a triangle foam piece for the nose. Stick on some flowers for the hat.

Cut a rectangle felt piece for the shirt & a red felt piece for the neck scarf. Twist a blue pipecleaner around some straw to make the hands. Glue them all together as shown.

Stick the scarecrow onto the pumpkin foam. Add a stump, felt leaves, draw a mouth for the scarecrow using black sketch pen and finally add a ice-cream stick at the bottom of the photo frame for the scarecrow stick.  Now take a picture of your child in their Halloween costume and paste it behind the orange foam cutout.


You have your very own scarecrow in a pumpkin patch photo frame ready.

Shruti Bhat is a Software Quality Analyst by profession who mostly exercises her left brain during the day at work and her right brain takes over at home. She loves crafting with her 7 year old daughter and blogs at ArtsyCraftsyMom.com. She can be reached at @ArtsyCraftsyMom on Twitter, Facebook & Pinterest

Supplies Used

Monday, June 24, 2013

Pom Pom Caterpillars


What do you do when your kids announce on a lazy Sunday afternoon that they are bored and can't go out because its raining? I sure have struggled with an answer on most days. The easiest way to keep my daughter ( and very often her friends) occupied is with a simple craft activity. That's why I love it when ItsyBitsy sends me a bag full of goodies every once in a while. To make these cute creepy crawly caterpillars, you'll need

  1. Foam sheets in assorted colours
  2. Pom poms - In 2 sizes - Large & small. 
  3. Pipe cleaners 
  4. Foam circle cutouts in various colours
  5. Craft stickers 
  6. Straws
  7. Strong Glue - like fevicol / glue gun. 
  8. Googly Eyes
  9. Single hole punch
  10. Scissors

To make, 

First Make sure you have all materials on hand. To make one caterpillar we need 1 foam sheet, 1 large pom pom, 3 small pom poms ( one for nose & two for the antennae) , 2 googly eyes, 1 pipe-cleaner for the antenna, One straw for the body. 

Using scissors, roughly cut the foam sheet into long strips about 2 inches wide. We cut along the long edge of an A4 foam sheet. 

Then we did an accordion fold along the velvety edge and pressed really hard to form a zig zag shape. Then we used a single punch to make holes through each fold to string the straw in.  

At home we strung a pipecleaner through the holes as it was tough for the kids to string in a straw. But you can try whichever is easier for your kid.

We first stuck the big pom pom as the face. Added a nose & googly eyes. Then we twisted a pipe cleaner as an antenna. Stuck two pom poms atop the antenna and then stickers on the back. You can modify as you wish. Use pom poms instead of stickers. 

Hope you enjoyed this simple craft and will try out more options. Do check out the blog for more such ideas. Also, don't forget to leave a comment here with suggestions. I would love to get your feedback.

Friday, April 19, 2013

An Exploding Box with Explosive Flowers!


I love Exploding Boxes! They're so innovative and clever - a wonderful way of giving a card... nothing beats it. I've done one before for this blog which you can view here. This is my second attempt albeit 8 months later. However this time I wanted to make a really EXPLOSIVE exploding box. One where the contents literally explode out of the box. So here's my creation. 


My exploding box is a testament to Spring Flowers. Not that we really have the season here in India but  it seems like a wonderful time of year overseas where flowers start blooming all over the place. So my papers are all from the DCVW Fresh Floral Stack and the lid of my box has been embellished with some gorgeous Antique Fusion Blooms from Itsy Bitsy. Here's a closer look at the box when it's closed along with a closeup of the flowers on the lid. 


Now onto the explosion! So when the box opens, it opens to a flat card base and right in the centre I carried forward the flower theme with a pot of gorgeous blooms from Itsy Bitsy. As you can see, there are some flowers which hug the pot and others that just burst out, hence the explosion. In fact they burst out and continue bouncing about a bit so it's really a treat for the eyes! 


Here's a closeup of the central flower pot to give you a view of the suspended flowers as well. I used some adorable sunflowers from Itsy Bitsy for the bouncing ones and connected them via a thin strip of OHP or transparency sheet to create that bursting out effect. Isn't that fun!


As far as I was concerned my box ends with this centrepiece but of course I had to add some details to the panels surrounding the flower pot so grudgingly I did.. ha ha... And then I had fun with that as well. Here are  some pictures of the inner panels. 


Finally here's a picture which I also really love. It's shows how the box looks when you take off the lid. It's so pretty as all you can see is this bunch of flowers that is literally bursting to come out.


For this project, I have made a video tutorial demonstrating how I created certain aspects of the box.  I have shown how the Itsy Bitsy Heart Border punch works for embellishing the sides of the box and lid. I have also displayed how I used the Itsy Bitsy Scoring Board to make the box which works wonderfully for such projects and is a really economical scoring option for crafters on a budget. Finally I've also shown how I created the flower pot with the flowers bursting out. I will be uploading the video very soon so watch this space for updates!

Update 22nd April 2013: The video is ready and you can view it here

Thanks so much for dropping by and I would love to hear your thoughts about my explosive exploding box. 

Supplies Used: Please click on the image to visit the product page on our website

Wednesday, March 13, 2013

Crafting with the DCVW Card and Envelope Sets

Die Cuts with a View is an American scrapbooking and card making brand and they come up with the most gorgeous pattern papers to add beauty and style to all our projects. But did you know they also have card and envelope sets to make gorgeous projects with a readymade base? I recently got my hands on 2 such sets - one from the DCVW Linen pack and the other from the Mariposa Pack. Here's a look at the cards I made, before and after. 


This card is from the Mariposa pack and it's all about butterflies. So to embellish the card, I decided to use my foam punch with a black glitter foam sheet to make some miniature butterflies. I added 2 tiny crystals in the center for a touch of glam and a rich dark ribbon knot at the top. I embellished the envelope as well with the same butterflies and voila my card was done!


Next I got to work on the card from the Linen stack. It had a very neutral design so I figured a splash of pink would do some good.  I got out my eyelet punch and punched a row of eyelets at the bottom. I lined up 2 rows of crystals above the eyelet row and finished off with a bright pink bow at the top. I used this adorable pink elephant sticker as a final touch and my card was ready. For the envelope I punched 3 eyelets on the envelope flap to continue the theme and on the reverse side I placed the crystals.  Here's another look at the card and all its elements.


I have filmed the making of both these cards so that you can see first hand how the foam punch works, how to punch eyelets, how to use the glue gun and how to use glue dots. You can watch it here:


Supplies Used: Click on the caption beneath each thumbnail photo for the product page at our online store website.

Pink Grosgrain Ribbon
Grosgrain Ribbon 
Aluminium Eyelets
Eyelet Punch
Glue Dots
Glue Gun

Yellow Crystal
Butterfly Foam Punch
Pink Crystal
Elephant Mini Embellishment
Linen Card & Envelope
Mariposa Card & Envelope