Tuesday, October 15, 2013

The Anything Goes with ItsyBitsy Challenge

Folks, it's the 15th of the month and time for a brand new challenge here at ItsyBitsy. As you know ItsyBitsy is India's number one Hobby and Craft Supplies Megastore and we have literally over 15000 products to choose from. So your challenge this month is to create anything you like as long as it includes a product from ItsyBitsy. The challenge name is 'Anything Goes with ItsyBitsy because with ItsyBitsy, you can make almost anything!!! As always there will be two categories - Jewellery Making and Paper Crafting. 

And to get you started, here is some inspiration! For Paper Crafting, I created a gift set. I have to say I was extremely inspired by the submissions of last month's challenge. Mansi made a beautiful set which inspired me to make one. And Sathya created this fabulous mosaic design card which again inspired my project. Nothing gets me more excited than great new ideas and you ladies got me crafting like crazy!!


My set begins with a card inspired by the Mosaic design I mentioned earlier. I used a sheet from the DCWV Luxury Stack and cut it into little 1" by 1" squares. Then I used 2 Intricutz dies - one a flourish and one a rose to create that pretty white ornate design on top. I finished with some ItsyBitsy vintage roses, ribbon and beads. This card set the tone for my set. 


The next project was a coordinating gift box. I used the same mosaic design to start and added the same die cuts albeit at different locations creating a different layout. The flowers and beads continued here and the DCWV Luxury stack paper continued the colour scheme. 


Finally it was time for the gift bag with a matching tag. Here the beads became the bag handle so both the bag and the tag and devoid of beads. For some relief from the Mosaic style, I made the tag with a simple overlay of pattern paper from the same stack while the die cuts and the flowers continued the theme. 


Now on to the Jewellery Making Inspiration. Our team at ItsyBitsy really went all out to showcase our fabulous product range with this one. 


All the beads are terracotta and they have been painted using our artist acrylic colours. Isn't it just stunning!! Now that's sure to get you crafting!

Rules of the challenge:
  1. For the Paper/ General crafting project, your submission can be a card, box, tag, scrapbook layout, dress, embroidery, crochet work etc - anything as long as it is handmade and
  2. contains at least one ItsyBitsy product
  3. For the jewellery making project, your submission must be some form of jewellery and once again must contain at least one ItsyBitsy product
  4. Quilled jewellery or jewellery made out of paper beads will fall under the Jewellery making category.
  5. Entries can be submitted until 10th November 2013.
  6. Entries will be open to audience vote from 11th to 14th November 2013
  7. Following this, the winners will be selected after combining both audience feedback and judges feedback.
  8. In order to submit your entry, click on the inlinkz button provided at the end of this post, add your image and link to your blog post containing the submission. There is a separate button for each category.
  9. If you do not have a blog, please create an album on any online photo gallery, ensure the settings are public and link it up as detailed in point 5. 
  10. Each participant can submit a maximum of 3 entries within each category.
  11. Submitting old projects is not permitted. All submissions have to be created after 15th October 2013
  12. In your blog post, create a link back to this page - The Anything Goes with ItsyBitsy Challenge.
  13. Entries are welcome from all over the world however if you are the winner, we can only ship your prize to an Indian address.
  14. 2 winners will be selected, one for jewellery making and one for paper/general crafting who will each receive a voucher of Rs. 1000 each, redeemable online at 
  15. In addition 3 to 6 finalists in each category will be selected all of whom will receive a badge to display on their blog.
Submissions for Paper Crafting


Submissions for Jewellery Making


Supplies Used

Sunday, October 13, 2013

The Latest ItsyBitsy Store in Lajpat Nagar, New Delhi

If you're in New Delhi you will be happy to know that ItsyBitsy opened its latest store in Lajpat Nagar last weekend. It was an exciting day for the ItsyBitsy family as we extended out chain to six stores in India. Crafters, well-wishers, friends and shoppers all dropped by to explore our aisles of craft, to say hello and to enjoy fabulous discounts!!


As with all our stores the Lajpat Nagar store has a fabulous bead bar with a fabulous range of beads enough to delight any jewellery maker. The best part about the bead bar is that you can buy as many or as little as you like of each design, you pay by the gram. You can touch, feel, examine and explore on your own terms as you browse through the unending trays of beads!!!


As with most of our stores, the Lajpat Nagar branch has a fabulous little demo station intended to show how die cutting machines work, foam cutters slice and other nifty tools work. Sunita Tandon, well known crafter was kind enough to run the demos which were a massive hit with the visitors!


And how about our range of papers and card stock. Each displayed in our massive racks allowing crafters to scan through all the options and choose the ones they need.


The Lajpat Nagar store will continue to be on sale for one more week so if you're in New Delhi you really should stop by to stock up on your favourite craft supplies at your favourite craft store - ItsyBitsy!!!

Thursday, October 10, 2013

Baby Shower Party Decorations with Itsy Bitsy


Those of you who have been following my last few posts know that I have been immersed in planning my dear friend Sowmya's birthday party. I made the party invitations in the shape of a diaper which you can view here, the take-away gifts in the shape of a baby bootie which you can view here and now it's time to share the decorations for the party. Once again ItsyBitsy proved to have everything I needed making the entire event quite thematic and pretty. 


My first order of business was a wall bunting made of pattern paper. I found a simple baby vest template online and then cut each paper following this template. I made about ten of them in varying designs all from the DCWV French Country Stack. I laced them together with some blue satin ribbon from Itsy Bitsy and tied a bold pretty bow in the centre of each vest. Isn't it adorable! Then using some blue tack I adhered it to the wall. The great thing about blue tac is that it doesn't leave any residue. You can just peel it off when you're done. 


Next I got to work on the table pieces. I wanted to make a flower pot with baby themed flowers. The pot itself was easy enough to do, it was just a box with a scallop edge, that I created using my rotary trimmer. For the flowers, I used varying sizes of scallop circle and plain circle die cuts, all from Itsy Bitsy. I alternated blue corrugated paper with pink card stock to make each flower. Itsy Bitsy has the most adorable baby embellishments so the centre for each circle had a different baby sticker. Some are even catered to pregnant women. A craft stick kept it in place and natural hay filled the pot. As a final touch, I added a ribbon with a floral centre for the base. I made about 5 of these and placed them on my dining table and side tables along with a rectangular doily to add to the theme. 


As a final decoration, I made some pompoms using kite paper from ItsyBitsy. I made about 15 of them and dangled them in little clusters of 3 all over the room. I have to say that my photos didn't do justice to the room, it really looked much prettier than this. 

All the guests oohed and aahhed over the decorations, marvelling at my creativity and patience, but they don't know what you, my fellow crafters know - crafting is our greatest pleasure right! Of course my husband brought me back to earth. He walked in after the party with all the decorations in place, literally dangling above his head and didn't notice anything - not a word did he say!

What are your thoughts on my baby shower decorations - I'm itching to know! Leave a comment and tell me! Till then Happy Crafting!!

Supplies Used

Saturday, October 5, 2013

There's Still Time to Play in our Pretty P Challenge - Get Inspired with Baby Shower Party Favours


We're running a fun challenge this month called 'The Pretty P Challenge'. You can create anything you like as long as it has at least 2 of the four Ps - Pink, Pearls, Pattern Paper and Posy. A friend and I were hosting our dear friend Sowmya's baby shower today and I decided to create party favours keeping the Pretty P Challenge in mind. So what did I create? A party favour box, shaped like a baby shoe and filled with yummy home made chocolates!!!


Here's a look at the shoe by itself. I used some lovely designs from the French Country Stack which is full of pinks and blues, perfect for a baby project. I cut out the template by hand and then it was pretty easy to put together the shoe. Once everything was glued in place, I did not care for the join that appeared on the side, so using my magnetic twist trimmer, I glued a little strip to conceal the join. I replicated this on the other side, so that it was symmetric. I laced the shoe with ribbon with a bow at the end and finished with a rim of pearls. To comply with the 'posy' requirement, I added a pretty rose in the centre. 


I wanted to add some home made chocolates inside and was delighted to find that Itsy Bitsy had everything I needed. They had moulds to make the chocolate, paper to wrap it and convenient twists to keep the wrapping in place. They had all this in a variety of colours and of course I chose pink and blue to comply with my colour scheme. I stuffed them inside my little paper shoe with some net fabric which gave the appearance of socks peeking out of the shoe. Here's a look at the chocolates inside the shoe.


Would you like to make the shoe yourself? Here's the template I used. Cut on the lines and fold on the dotted lines, it's quite straightforward.


Still confused? No worries, I've put together a video tutorial on how I created this shoe, so watch this space for a step by step instruction set. I'm in the process of editing it and will publish it very soon. It not only shows how I made the shoe but also demonstrates how to use the Magnetic Twist Trimmer from We R Memory Keepers.
How do you like my little party favours? Would love to hear your thoughts!! Looking forward to it!

Supplies Used:

Tuesday, October 1, 2013

A Holiday Album Project

I had the good fortune to go on a Mediterranean Cruise in August with my husband, 2 children and parents. It was a wonderful experience, we visited 5 different countries and enjoyed fabulous food, wonderful sights and unforgettable experiences. I must have taken over 200 photographs so of course the first think I wanted to do when I got back was preserve at least some of them in a holiday album. I took some time trying to figure out the concept, but once I knew what I wanted to do, I wasted no time doing it. 


First of all, I wanted it to be large enough to accommodate pictures/ tokens and keepsakes I had preserved. So I decided to go with the standard 12" by 12" scrapbook size. Second, I wanted the papers I used to be somewhat nautical and imagine my delight when Itsy Bitsy introduced the DCWV Tradewinds Stack. It was like designed for my trip! Full of maritime themes and maps, it was just perfect for this project. The picture above is the cover of the album for which I used chipboard as the base and a fabulous ocean map pattern paper from the Tradewinds stack as the overlay. The text has been put together with chipboard alphas from Itsy Bitsy, all of which have been heat embossed using the WOW embossing powders. Here are some closeups of the heat embossing.


I was quite happy with the quality of the WOW embossing powders at Itsy Bitsy. There are so so many colours and finishes, it's so easy to find the colours that suit your project. To see them in action, check out my video tutorial below:

The next feature I wanted to incorporate in my album was a binding approach that didn't involve rings or spirals. I also wanted to avoid too many pages. Since we visited five countries, I wanted the album to have just five pages and all the pictures from each country to be viewed together. So I included a flap for every second page ensuring that each double page had in fact 5 sides for photographs. The pictures below will give you an idea of what I mean.

Here's a look at the double page when the flap is closed:


Here's a look at the double page when the flap is lifted resulting in 5 sides all of which can be viewed together. 


To see how I created this flap idea and the alternate binding approach, check out my video tutorial which provides step by step instructions.


Finally I wanted to share one particular embellishment I was thrilled to incorporate in my project. The Embossed Tags from Itsy Bitsy have always been a favourite of mine. There are so many different themes and designs, you will most likely find something that suits your project - just as I did. I found a 'Europe' tag, perfectly complimenting my Mediterranean holiday! How cool is that!! Perfect for my album and fortunately it was the right colour too!!


How do you like my project? Would love to hear your views! Leave a comment and let me know!

Supplies Used

Saturday, September 28, 2013

Baby Shower Invitations


My dear friend Sowmya is having her second baby in a month and a couple of us got together to organise her baby shower. Of course for me organising a baby shower isn't about the food, the party games or the decorations. It's only about the invitations! I love any occasion to craft so I really had a blast doing the invitations for her shower. 


I shaped the invitation as a little diaper. It was easy enough to find the template online so I found one that suited me and cut it to this shape. Once I put it together with the ribbon and everything, it turned out to be a little too bulky for a regular envelope and hence the box envelope by the side. I chose the DCWV French Country Stack for this project as it had a great combination of pastel pinks, greens and blues. We don't know the sex of the baby yet so I needed something neutral. 


The card as I said is shaped like a diaper or nappy. It's got side flaps which close together with a ribbon. Then to open the card, one has to just open the ribbon and read the message inside. I didn't use card stock at all in this project. I used two papers from the French Country Stack, stuck back to back so that the outside was one design and the inside was another complimentary one. So glad with the result. 


For the boxes I used a fun template I found online where the closing flaps are kept together using some twisted twine. You can use buttons or brads for the twine but I decided to use some fabulous flowers with pollen from Itsy Bitsy. For the twine, I used my stash of Sew Easy pink floss. It was the perfect shade of pink and the right thickness to keep the box closed while at the same time not putting pressure on the rose. 

I've still got a few more to do as we finalise the guest list but I wanted to share it right away as I'm ticked pink with the project. What do you think of my creation? Would love to hear your views. Leave a comment and let me know.

Till then, Happy Crafting!!!

Supplies Used

Baby Boy Layouts with the Spellbinders Cherry Picking Die

Spellbinders Dies are one of the best investments one can make in their crafty endeavours. Most Spellbinders dies come with 3 to four cutting options and have the capability for embossing and stencilling. I never quite understood how it all worked until I picked up the Spellbinders Cherry Picking Die. I had been eying it for quite a while and last week I finally took the plunge and bought it! Woo hoo! My first order of business - using it for a Baby Boy Scrapbook. Here are 2 pages I created using this fantastic and versatile die. 


The picture above is the opening page of the scrapbook where the baby is introduced to the readers. I wanted to provide space for the mother to add photographs of the little one and the Spellbinders Cherry Picking Die offered an excellent approach. The die allowed me to cut  a frame, the embossing feature enabled me to emboss the cherries and the stencil feature enabled me to heat emboss only the cherries!  Voila! A beautiful personalised one of a kind frame. Here's a closeup! 


To see how I created this fantastic effect, please watch the following tutorial which offers step by step instructions on how to make full use of this die.


The Spellbinders Cherry Picking Die also has 2 more dies included in the pack providing more results. I used them for the Family Tree page on the reverse side. The larger blue die cut is cut from the central portion of my original frame and the inner white frame with the tiny circles is cut using the additional dies available in the set. There is also a cherry and leaf die too. I used the cherry die to embellish the text 'Introducing Siddharth'. Love it to bits!! Here's a look at the page with a closeup below. 


The Spellbinders dies retail anything from Rs. 1099 to 1399 at Itsy Bitsy and if this is a little too steep for you, you have to check out the Couture Creations Intricutz dies. These are fantastic! Each is priced very reasonably - Rs. 499 to Rs. 799 and they cut cleanly and neatly. I used the Picket Fence Die and Heirloom Die to create the bottom trim on the Introduction Page. So thrilled with the turn out!


Here's a demo video showing the Intricutz dies in action. You can see how I created this extra broad fence and how I applied the flower vine. 


How do you like my Baby Boy Scrapbook Layout? Would love to hear your views - leave me a comment and I'll be sure to get back.

Supplies Used:

Tuesday, September 24, 2013

Scarecrow -Pumpkin Photo Frame - Guest post


With Halloween approaching soon & Fall crafts being the most discussed craft over the blog-o-sphere these days, I decided to follow the bandwagon and make something that is both functional and that fit the theme.

To make this friendly scarecrow in a pumpkin patch,


You'll need -
  1. Foam sheets - Orange & brown
  2. Felt sheet - Green, White, Pink & Red
  3. Icecream stick
  4. A pair of googly eyes
  5. Blue Pipe cleaners 
  6. Corrugated flowers
  7. Black Sketch pen
  8. Straw 
  9. Glue Gun & 
  10. Scissors

To make -
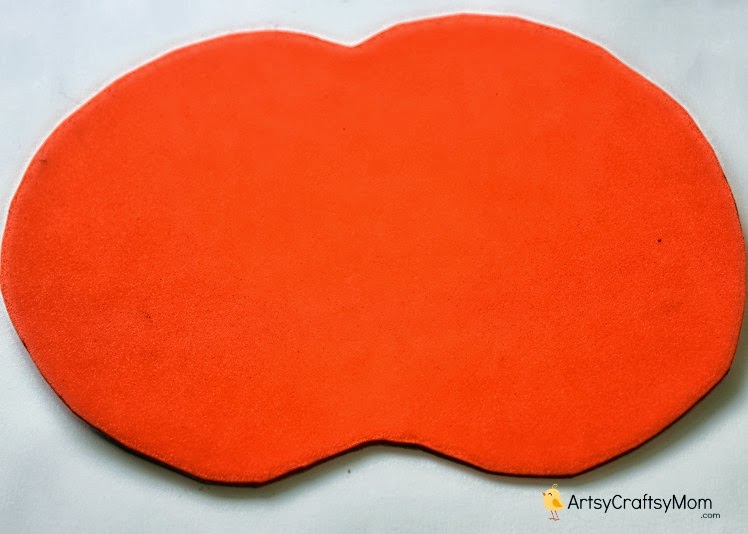
First cut out a pumpkin shape from the orange foam sheet. 

Cut out the center to foam a space that's 4.1" x 6.1" [ this will accommodate a 4"x6" size picture] 


To make the scarecrow, Cut a circle from the white felt, cut out a hat shape from the brown foam, cut the straw into 6 inch long strips. tie them together and bend them in half. Stick them to the bottom of the hat. Stick the hat onto the felt face using glue gun. Stick on googly eyes & a triangle foam piece for the nose. Stick on some flowers for the hat.

Cut a rectangle felt piece for the shirt & a red felt piece for the neck scarf. Twist a blue pipecleaner around some straw to make the hands. Glue them all together as shown.

Stick the scarecrow onto the pumpkin foam. Add a stump, felt leaves, draw a mouth for the scarecrow using black sketch pen and finally add a ice-cream stick at the bottom of the photo frame for the scarecrow stick.  Now take a picture of your child in their Halloween costume and paste it behind the orange foam cutout.


You have your very own scarecrow in a pumpkin patch photo frame ready.

Shruti Bhat is a Software Quality Analyst by profession who mostly exercises her left brain during the day at work and her right brain takes over at home. She loves crafting with her 7 year old daughter and blogs at ArtsyCraftsyMom.com. She can be reached at @ArtsyCraftsyMom on Twitter, Facebook & Pinterest

Supplies Used

Saturday, September 21, 2013

Cards with Crochet

My love affair with craft began when I was seven or eight years old when my mother introduced me to cross stitch. She taught me the basics and then gave me a pattern book as back then there weren't any stitch kits. I spent hours embroidering little birds and flowers, fruits and designs. Then my mother taught me how to knit, that again became a passion. Later my interests evolved to artwork and painting and now it is paper craft. Through it all, crochet was the only thing I hadn't tried. I was always interested but never attempted it. So when I saw the new range of crochet yarns at Itsy Bitsy, I knew the time for crochet had come. 


I picked up 2 balls of yarn from Itsy Bitsy -  a shaded pink and an olive green. I also picked up some hooks - Itsy Bitsy has a range of crochet hooks with different sizes, I picked the thinnest one as I figured with yarn so thin, the needle had to be thin too. Then I headed over to YouTube. I cannot tell you how many tutorials there are online for different types of crochet projects. There are tutorials on the basics, on patterns, on shawls, scarves, jackets, shrugs, flowers, leaves - my goodness, the list is endless. After watching and practicing, I started getting the hang of crochet. Then I started making the flowers, following that the leaves and in 3 days, my set of crochet flowers were done. Now it was time to put them to use. And being the paper crafting I am, of course it had to be cards. 


Here's a look at the cards I made using my hand made crochet flowers and leaves. I had also just picked up the DCWV French Country Stack which went perfectly with this colour scheme. Since I had made 3 flowers, I decided to make 3 cards and for the first time, I found I was able to put them together fairly quickly. I guess the crochet flowers had inspired me!


For my first card, I used white card stock as the base layer and placed a sheet from the French Country stack on top. I added a final layer of white card stock which I had embossed with a lovely Itsy Bitsy embossing folder. I distressed both these layers using the We R Memory Keepers Sweetheart distressing tool. My crochet flowers and leaves went on one corner and a lovely bow on the opposite one. I finished the card with an adorable Blue Moon scissor charm on my ribbon. Love it to bits!!

My next card had more layers of pattern paper from the French Country Stack. The crocheted rose with accompanying leaves formed the center piece, I gotta say, this flower is my favourite one. I embossed the top layer of white card stock with the Sweet Flowers Embossing folder and added some pretty pink and white roses on the two corners for a really pretty finish. Some randomly placed pearls added to the floral feel and voila, my card was done. 


For my next card, I tried a completely different layout. I used the pattern paper as the base, gluing two pieces back to back. This made it heavy enough to serve as a card base. I filed one of the new rectangular doilies at Itsy Bitsy in half to create a lacy top layer and added a border of pearls on it. My crochet flower went on the centre and the rest of the empty space was filled with die cuts from the Couture Creations Intricutz Die. This card started out looking quite sad but finished up looking the best I think. 


Here are some closeups of the first two cards, to give you a look at the embossing and the detailing in the crochet flowers. I really got quite addicted to the crocheting aspect, found myself at it till 4 am every night. Now that my project is ready I hope I still continue to crochet. 

How do you like my first attempt at crochet? Do you like how I used them in cards? Have you tried crochet yourself? Leave a comment and let me know! Would love to hear all about it. 

Supplies Used