Showing posts with label Flower. Show all posts

Thursday, April 14, 2016

Twine Wrapped Bottle

Hello All!! Welcome to another tutorial by Itsy Bitsy. Today, we shall turn an old bottle into a trendy new bottle! It is an easy DIY project and takes very little time and effort. Use your favourite colour of twine to decorate this bottle and make it prettier!!

Materials Required - 
Jute Twine – Any 2 colours
Silicone glue
Flower embelishment
Bottle

Method – 

Step 1 : Take a bottle and apply silicon glue around the base
Step 2 : Glue orange jute twine around the bottle
Step 3 : Secure the end with silicon glue. Note - it is not necessary to glue the entire bottle.
Step 4 : Glue pink jute twine as shown
Step 5 : Continue wrapping the bottle with twine until the entire bottle is covered.
Step 6 : You can leave the bottle as is or embellish it with a cute flower 


The elegant twine wrapped bottle is ready. Use it for home décor, school projects or for a fun activity during the summer holidays. Let us know what you think of it. Happy Crafting :-) :-)

Link to supplies – 


Tuesday, March 22, 2016

CAS Holi Card

The festival of colour is here and we are all ready to welcome the colours with our super cute and simple CAS cards, using stencils. :-) :-)

Materials required:
·        Stencils
·        Tempera colour
·        Card stock- 2 (we have ready 5”x7” card with envelope)
White and yellow
·        Double sided glue dot
·        Sponge

Method:
Step 1: Place the stencil on a white card stock. (You can stick the edges of the stencil to the card stock using cellophane tape for convenience) 
Step 2: Hold the stencil firmly. Using a sponge, dab the colours on to the card
Step 3 : Use bits of sponge to add different colours. Use colours of your choice to shade
Step 4: Remove the stencil, turn the card and stick double sided tapes to the edges of the card. 
Step 5 : Place this card on another card stock. This gives a 3D border for the stencil painting


Once dry, your card is ready & all set to be gifted. Gift it to your loved ones by adding sentiments and wishes. Enjoy a colourful and eco-friendly Holi. 

Link to supplies :
Card stock- 2 (we have ready 5”x7” card): http://www.itsybitsy.in/store/card-making/coloured-cards


Tuesday, February 9, 2016

Antique Decoupage Box

Hello All, Welcome to another tutorial. Today, we are going to make an exquisite antique decoupage box for the Valentine's Day. This decoupaged box makes a perfect gift box for your loved ones.  It is easy to do with limited supplies. Decoupage involves applying paper cut-outs to the surface of any item and then applying coats of mod podge/decoupage glue to get the perfect look.


Materials Required: 
Decoupage Paper – Vintage Theme
Handmade Flowers - Color of your choice
Wooden Blank
Modelling Paste
Mod Podge Satin Glue
Pigment Ink Pad
Plastic Half Pearl- 8mm
Scissor
Paint brush
Any stencil


Method:

Step 1: Take an wooden blank and note the measurements of all sides. Take a decoupage paper and cut it as per the measurements 

Step 2: Cut the decoupage paper as shown to match the measurement of the box.

Step 3: Apply Modge Podge all over the wooden blank.

Step 4: Place the cut decoupage paper on the wooden blank and cover it 

neatly
Step 5: Using Pigment ink, shade the box edges to add an

antique finish.
Step 5: Paint the entire box with Modge Podge. This gives shine and 

strength to the decoupage paper.

Step 6: Take any stencil and modelling paste to paint over the box


Step 7: Place the stencil on the box and apply modelling paste liberally on 

it with the help of a paint brush

Step 8: The finished work will look like this
Step 9: Embellish the box with half pearls and flowers

Make this Valentine's Day extra special by making and gifting these boxes filled with goodies to your loved ones. They are sure to entice your loved ones <3 <3 Let us know what you thought if this blog. Happy Crafting.


Link to Supplies:

Decoupage Paper – Vintage Theme IBPP27188 - http://www.itsybitsy.in/store/decoupage/decoupage-paper/decoupage-paper-vintage-flower-w-leaves-a4-1sheet-ib   

Flowers -  http://www.itsybitsy.in/store/index.php?main_page=advanced_search_result&search_in_description=0&keyword=mulberry+rose

Wooden Blank - http://www.itsybitsy.in/store/decoupage-blank/mdf

Modelling Paste - MMAR23790  http://www.itsybitsy.in/store/index.php?main_page=advanced_search_result&search_in_description=0&keyword=23790 
Modge Podge Satin Glue - http://www.itsybitsy.in/store/index.php?main_page=advanced_search_result&search_in_description=0&keyword=Modge+Podge

Pigment Ink Pad - IBSP20564 http://www.itsybitsy.in/store/index.php?main_page=advanced_search_result&search_in_description=0&keyword=20564

Plastic Half Pearl- 8mm- IBSC62732 http://www.itsybitsy.in/store/index.php?main_page=advanced_search_result&search_in_description=0&keyword=62732


Tuesday, January 12, 2016

Bright and Beautiful Sunflower

Hello All! Hope you all are having a great week! Itsy Bitsy is back with another fun tutorial. Today we are going to make Sunflower which is big and bright, to upgrade the beauty of your room.
Supplies required:

To make Flower:
1.      Cork sheet- cut to round shape, diameter 7 inch
2.      Chip board- cut to round shape, diameter 7 inch
3.      Handmade Paper-Yellow-cut to sunflower petal shape (length 7 inch)
4.      Handmade Paper- Green- cut to round shape, of diameter 6 inch
5.      Flower making Stem- 5mm

To make the Leaves & Stem
1.      Handmade Paper- Green- cut the shape of leaf
2.      Floral Tape
3.      Flower making stem 1mm (to make the leaves)
4. Pipe (Any)

Method:
Step 1- Glue the cork sheet to the chip board
Step 2 - Glue the petal end and press it to the chipboard. Keep adding the petals closely throughout
Step 3 - Glue the stem to the completed flower and cover the back using green handmade paper
(To make the Leaves and Stem)
Step 4 - Glue the leaf at the edges and place the floral stem on the leaf. Place another leaf on top and press. Using the hand embossing tool, make venation pattern on leaf
Step 5 - Use the floral tape to wind a pipe (use any), which will be the stem of the flower. Keep adding the leaves one below another and continue winding the tape to the entire length of the pipe
Step 6 - On completion of the stem, bend the leaves
Step 7 - Place the sunflower on a stem, as shown
Place the completed sunflower in a pot and brighten up your room corner. Place your sunflower in a vase or a decorated pot of your choice and make the boring corner bright. You can try making different flowers by changing the pattern of the petals.  Do let us know what you think of this tutorial.
Happy Crafting :)

Link for Supplies:
1.       Handmade Paper- Green - IBSC11823
2.       Floral Tape -       IBCR28805
3.       Flower making stem for leaves - IBCR30652
4.       Flower making stem  - IBCR30654
5.       Cork sheet - IBCR12106
6.       Chip board - IBPP12090
7.       Handmade Paper- yellow - IBPP19043
8.       Scissors - IBHA70589

Wednesday, January 6, 2016

Quilled Flower Sprig

Hello friends! Wish you all a Happy New year!!
Welcome to yet another tutorial from Itsy Bitsy.
Create this beautiful flower sprig using quilling strips. The flowers and the fringed pollens are made from quilling strips. You can make different kind of flowers using quilling strips.
Get inspired and create your own work of art.

Things required

  • Quilling strips: Pink- 3mm
  • Yellow- 3mm, Black-3mm
  • Floral stem
  • Vellum paper- white
  • Glue
  • Round plier
  • Quilling tool
  • Handmade Paper–Green

Method
Step 1 - Each petal needs two strips. Using the quilling tool, make round coils from the quilling strips and glue them at the end. Pinch at one end to make the petal shape. Gently press the coil to give depth to the petal
Step 2 - Make fringes using scissor on yellow quilling strips. Using the quilling tool make round coils
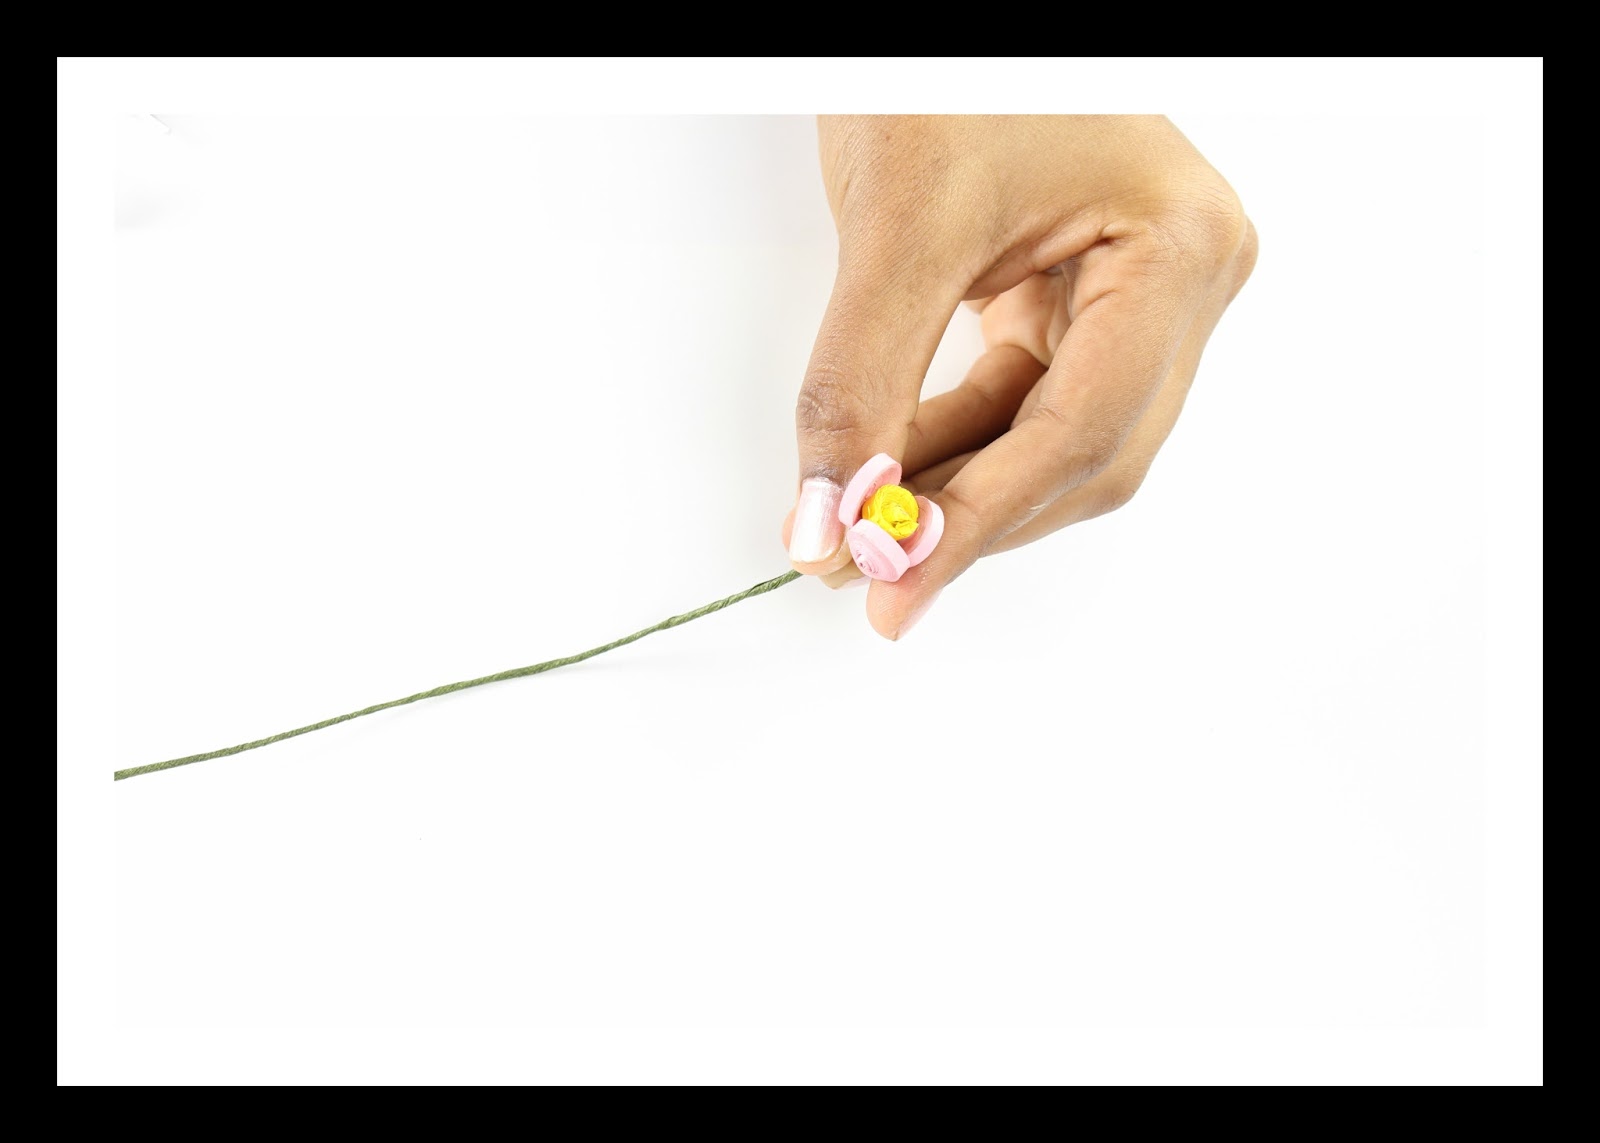
Step 3 - Using the round plier, bend the floral stem to make a small loop. Insert the fringed coil to the stem from below and glue
Step 4 - Glue the petals to the fringed coil. Make buds by gluing the petals directly to the flower stem
Step 5 - The completed flowers
Step 6 - Use Green handmade paper and cut the patterns as shown. Glue it to the base of the completed flowers to make the sepal
Step 7 - Use the green handmade paper and cut the shapes of leaves, attach them to the floral stem using floral tape. Wind the flowers and the leaves together to make the flower sprig
Step 8 - Wind the Sprig with green floral tape, paint it with decoupage for glossy finish
Step 9 - Make round coils using 3mm quilling strips (2- black coil, 3- yellow coil)
Step 10 - Make the wings of the bee by using the vellum paper. Glue the 3 yellow coil and 2 black coil one after the other, glue the wings on top and attach the feelers that are made from the quilling strip
Place the flower sprig on a painted chipboard or box .Glue the bee near the flowers, as shown
Our Pretty Sprig is ready. Use it as a wall hanging or as flower arrangement.

Link for supplies:
Quilling strips:
 Floral stem   
 Vellum paper- white
http://www.itsybitsy.in/store/craft/alpha/glitter/paper-glitter-alpha-6inc-b-pastel-blue-1pc-ib
Glue
 Round plier        
 Quilling tool
Handmade Paper–Green
 Floral tape